
Online booking
Online Booking – CRM Module
The Online Booking section allows patients to independently schedule appointments through a simple, mobile-friendly web interface directly connected to your clinic’s management system. This reduces administrative load, enables 24/7 booking, and ensures synchronized availability between staff calendars and the online platform.
Accessing the Online Booking Interface
Patients can access the booking form using a dedicated web link structured as:yourmanagementsystemdomain/make-appointment
This page operates independently and is connected in real-time to the main system, reflecting available services, doctor schedules, and booking slots.
Online Booking Process Overview
The booking process is designed for clarity and ease of use. It consists of five intuitive steps:
Note: At every step of the booking process, a summary panel displays the current appointment selection (doctor, service, and date/time), allowing the patient to verify and modify their input before confirmation.
1. Select a Doctor
The patient begins by choosing the preferred doctor.
Search Bar: Quickly find a specific physician by name.
Doctor List: Browse all available doctors with visible names and specialties.
Upon selection, the system automatically loads available services and time slots for the chosen doctor.

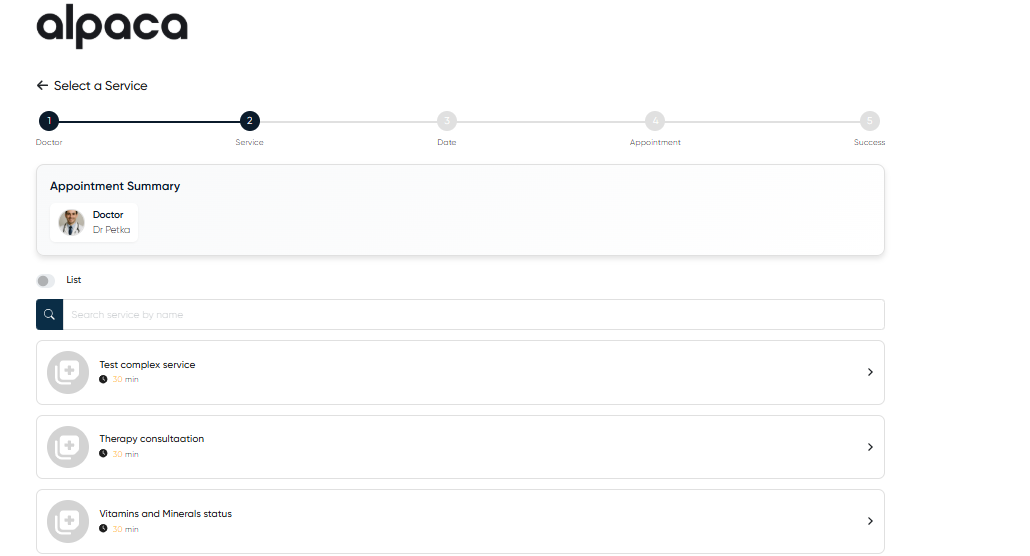
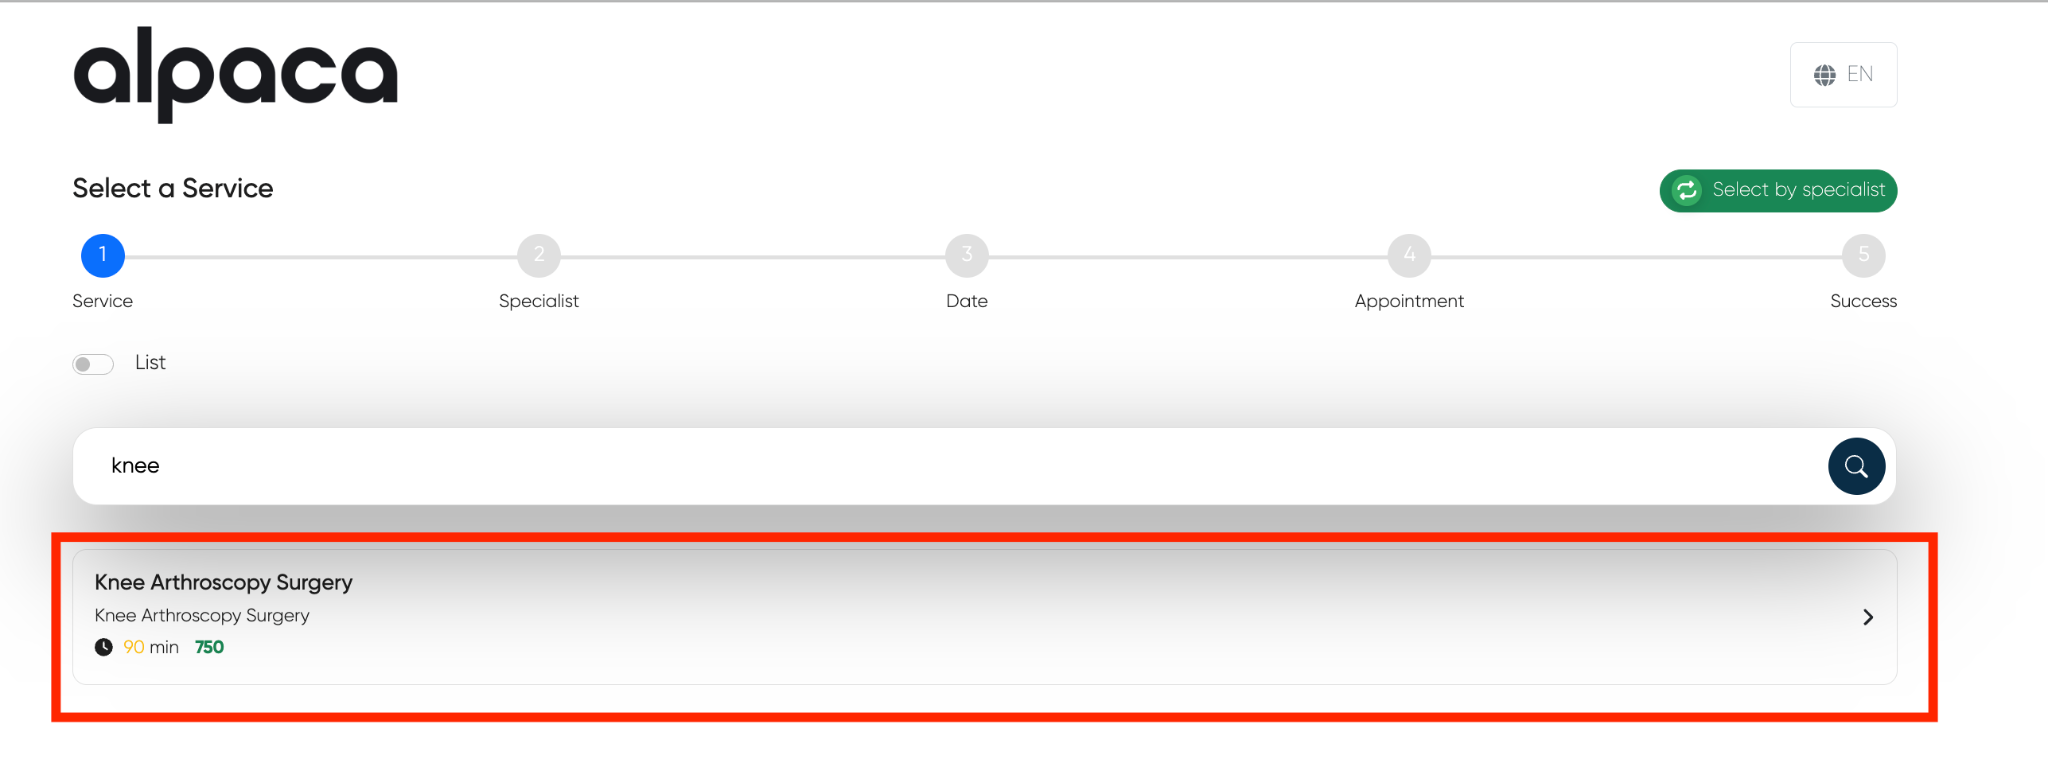
2. Select a Service
After selecting a doctor, the patient chooses the medical service they wish to receive.
Search Bar: Locate a specific service.
Service List: Displays all services provided by the selected doctor.
Selecting a service filters available time slots accordingly based on duration and scheduling rules.
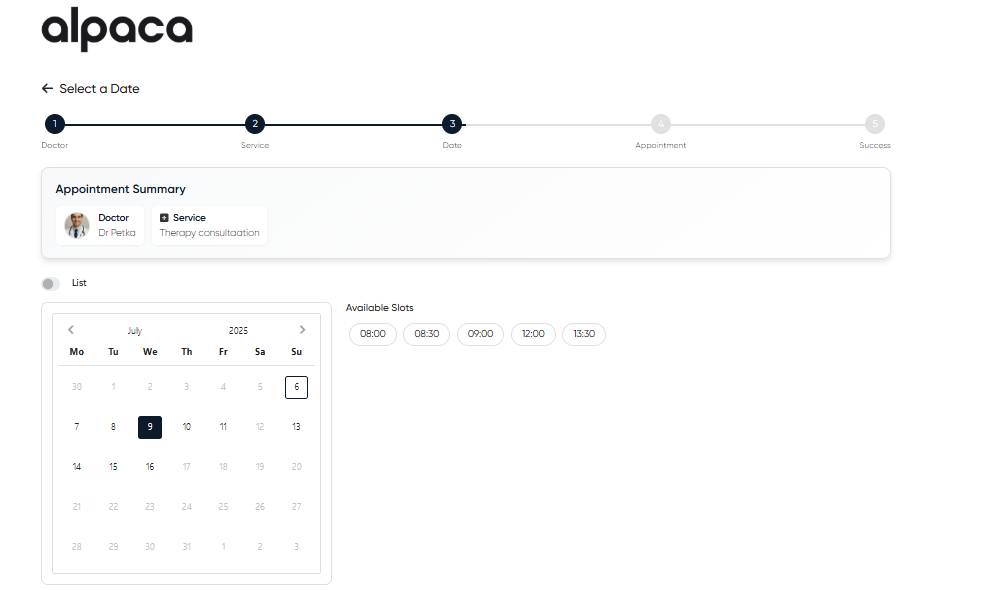
3. Select Date and Time
Patients are shown a calendar view with selectable dates and available time slots.
Date Selection: Clickable calendar days based on the doctor's real-time availability.
Time Slot Selection: Shows only free time slots for the selected doctor and service.
The system prevents double bookings and adjusts in real time as appointments are confirmed.
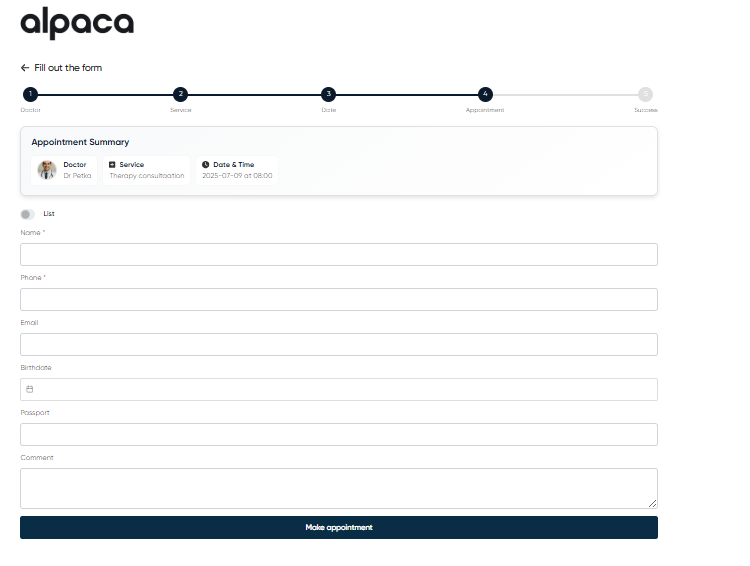
4. Enter Patient Information
Once the date and time are chosen, the patient is asked to fill out a short appointment form.
Fields:
Name (mandatory)
Phone (mandatory)
E-mail (optional)
Birthdate (optional)
Passport (optional)
Comment (optional) – Any additional notes or context
After completing the form, the patient clicks the Make an Appointment button to confirm.
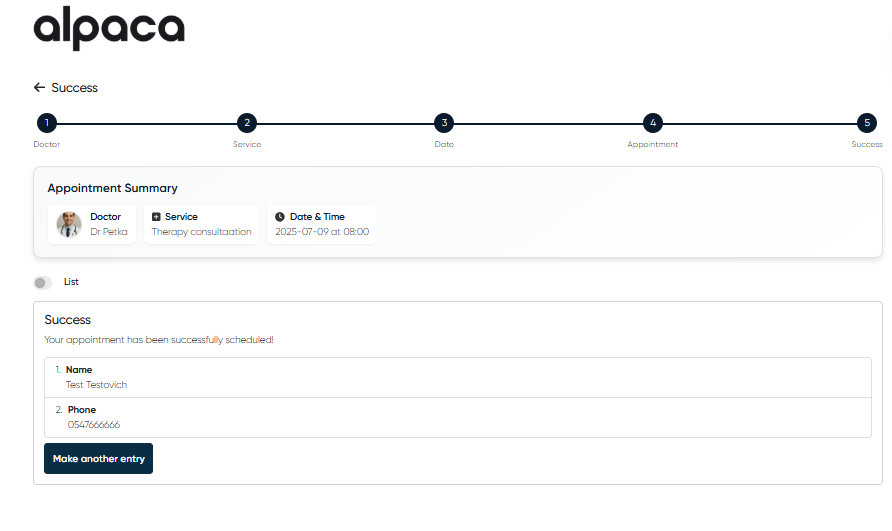
5. Success Screen & Confirmation
Upon successful booking, the patient is redirected to a confirmation page summarizing:
Doctor name
Selected service
Appointment date and time
Patient’s submitted details
From here, the patient can either exit the page or click Make another entry to book a second appointment.
Enable/disable doctor on the online-booking page
Administrators can control which doctors are displayed on the online booking page.
When a doctor is enabled, their name and available appointments will be visible to patients.
When disabled, the doctor will not appear in the online booking interface.
Navigation:Directories > Employees > Choose the doctor > Actions > Edit
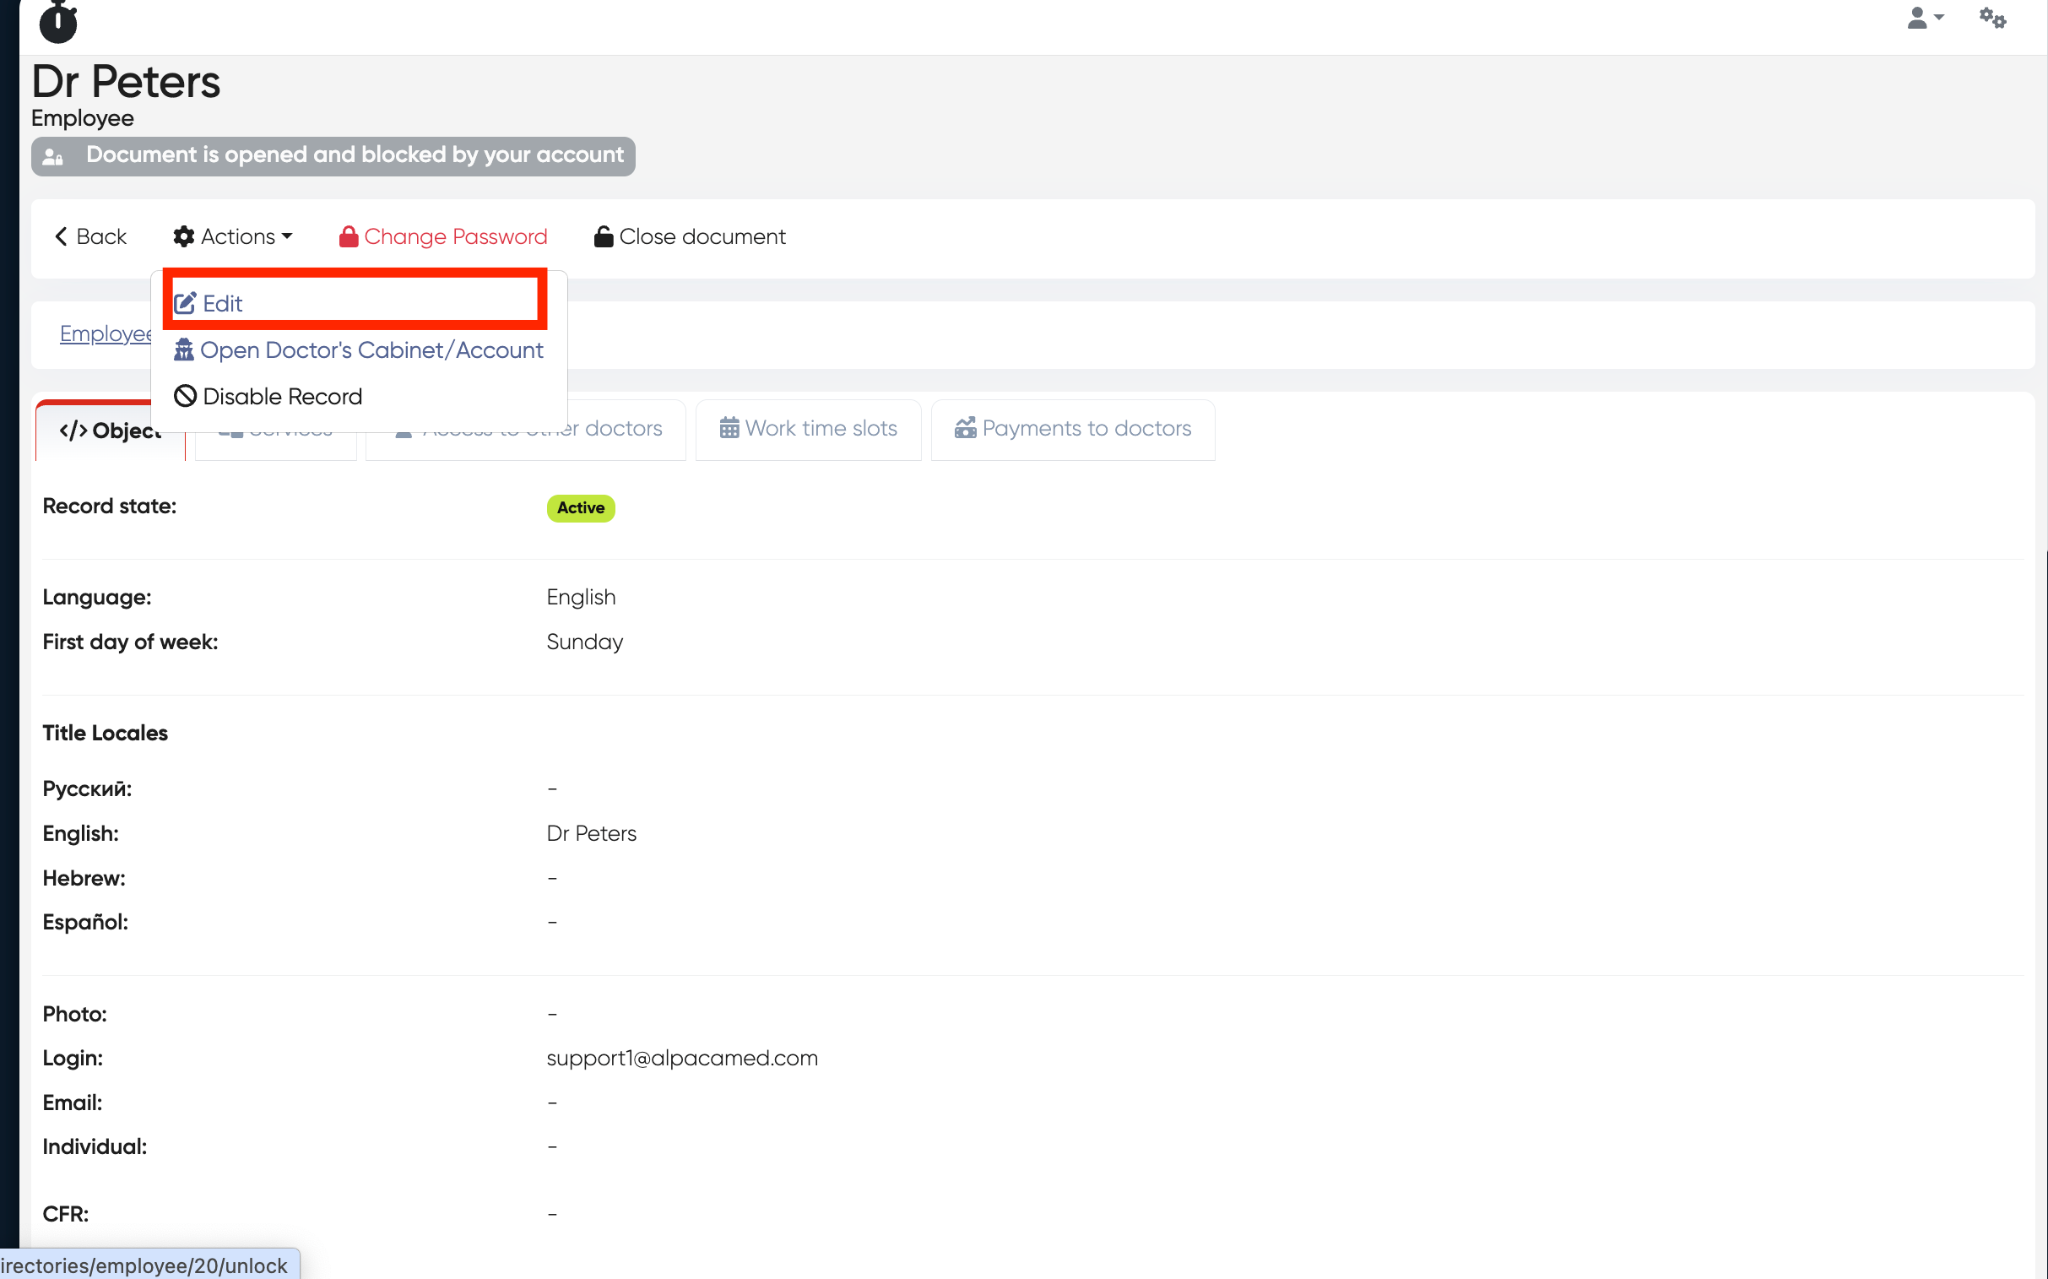
Steps:
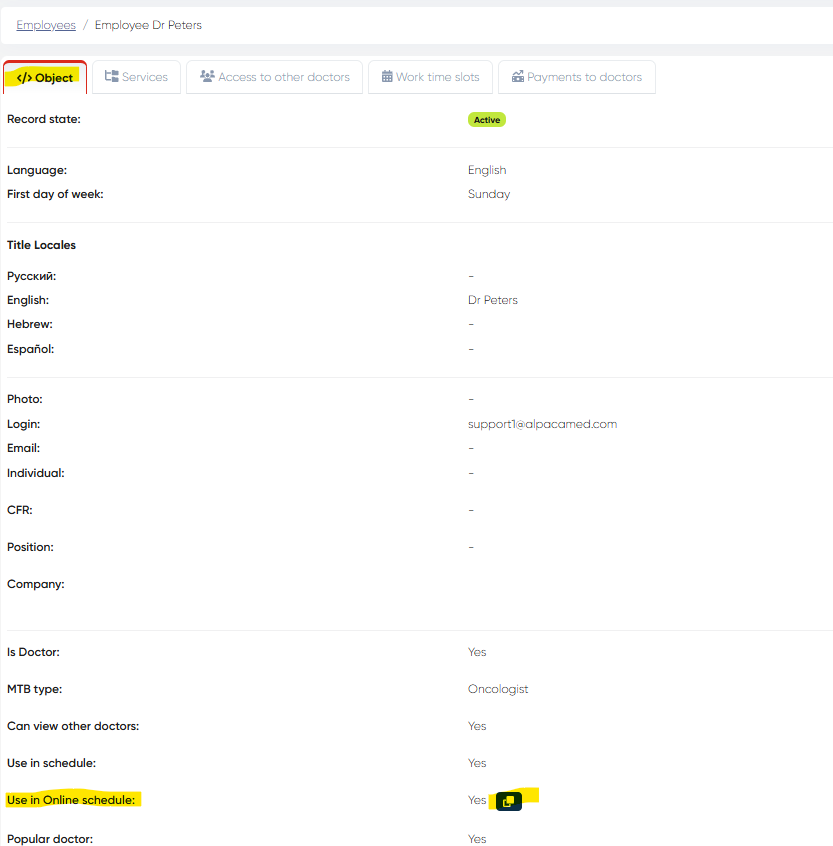
Open the doctor’s profile and click Actions → Edit.
Make sure the field “Is Doctor” is set to Yes.
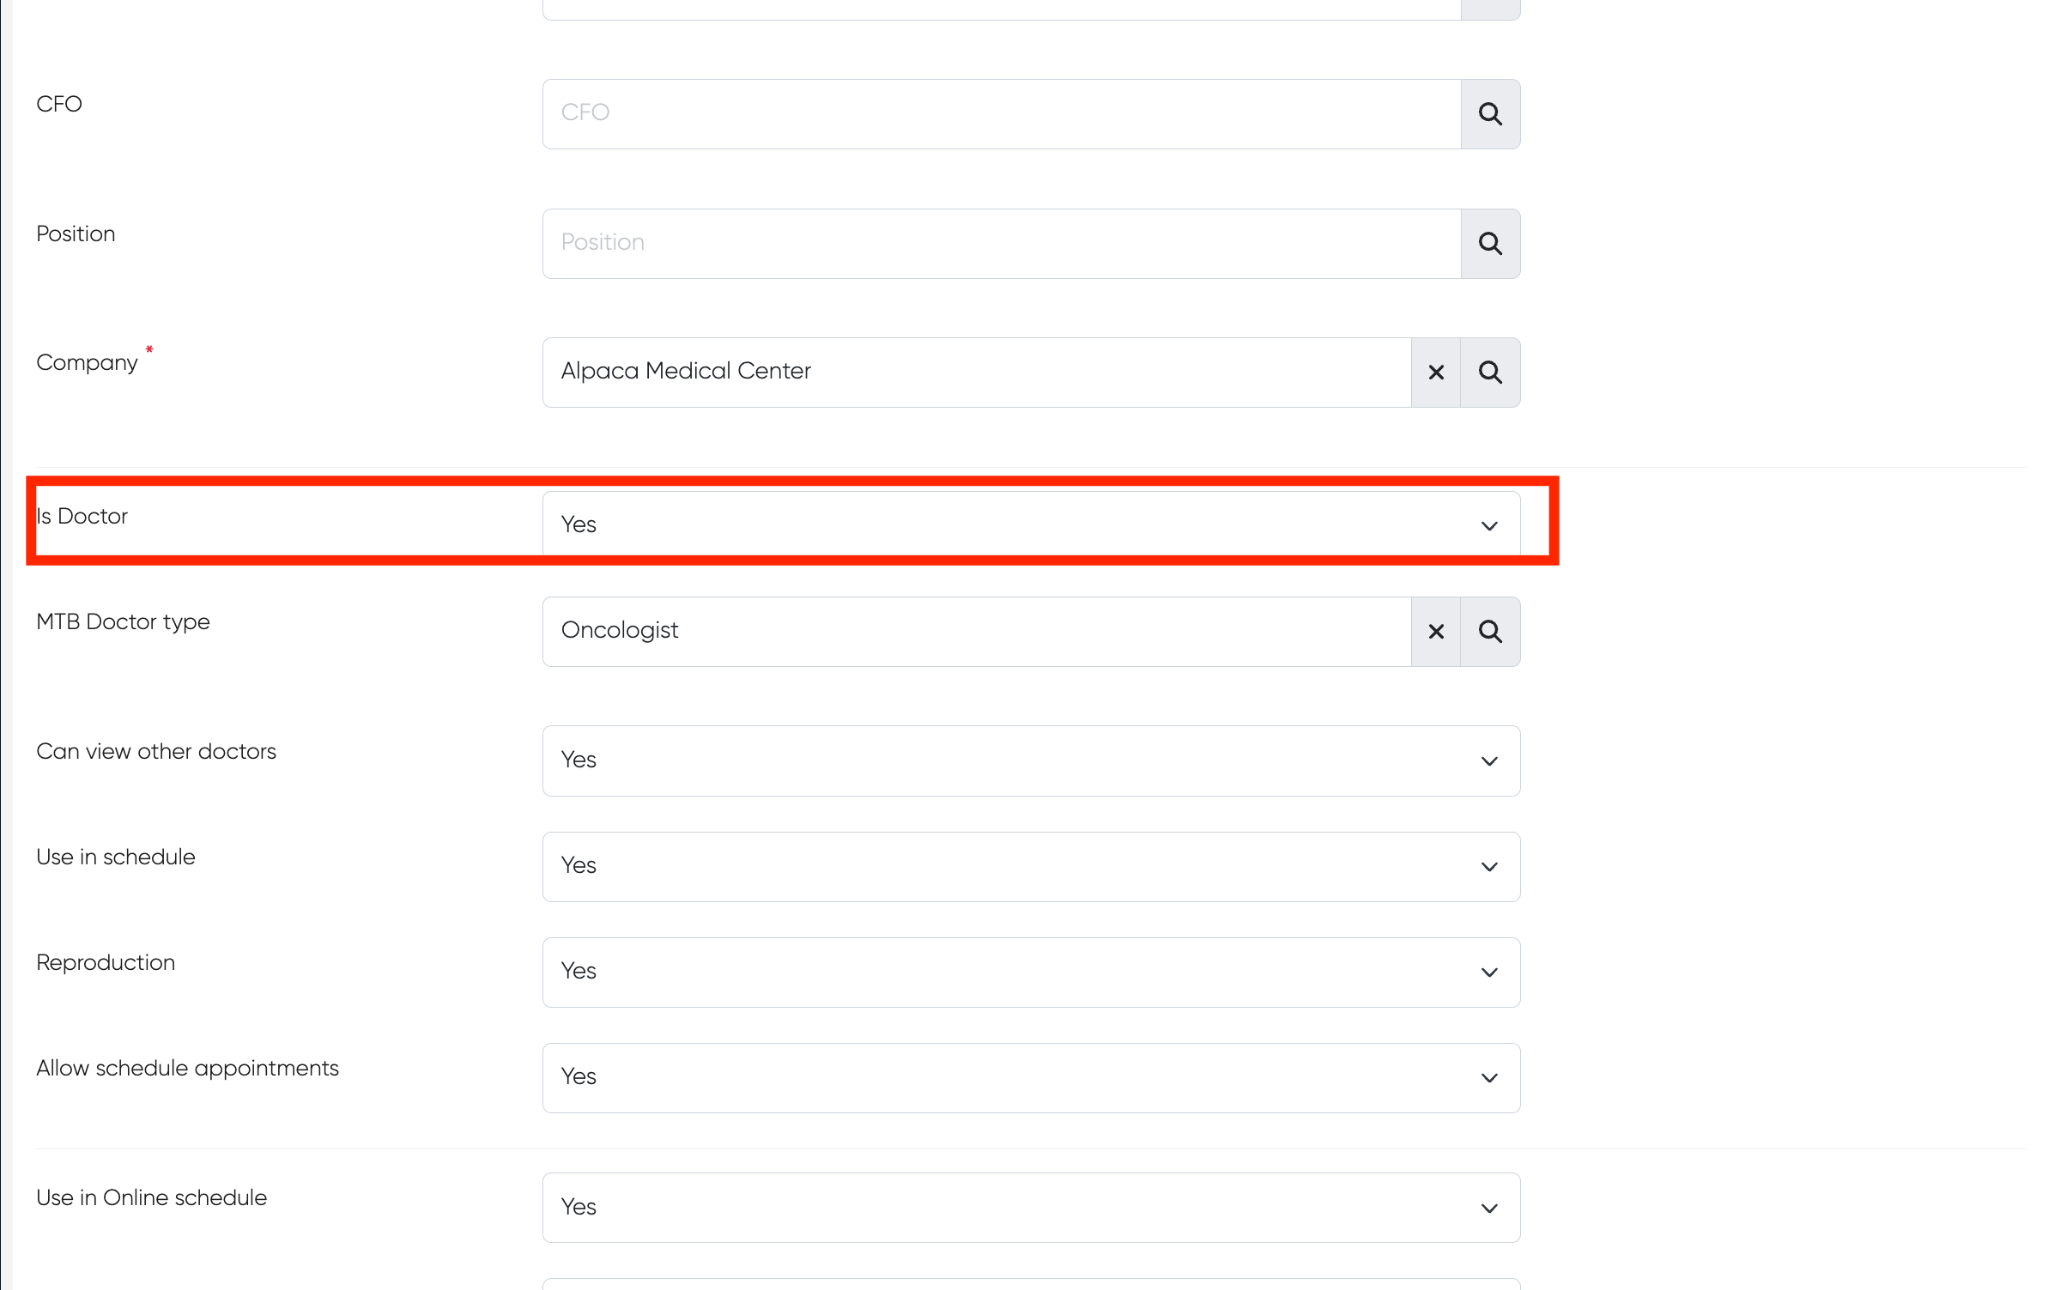
Set “Use in Online schedule” to Yes to make the doctor visible on the online booking page.
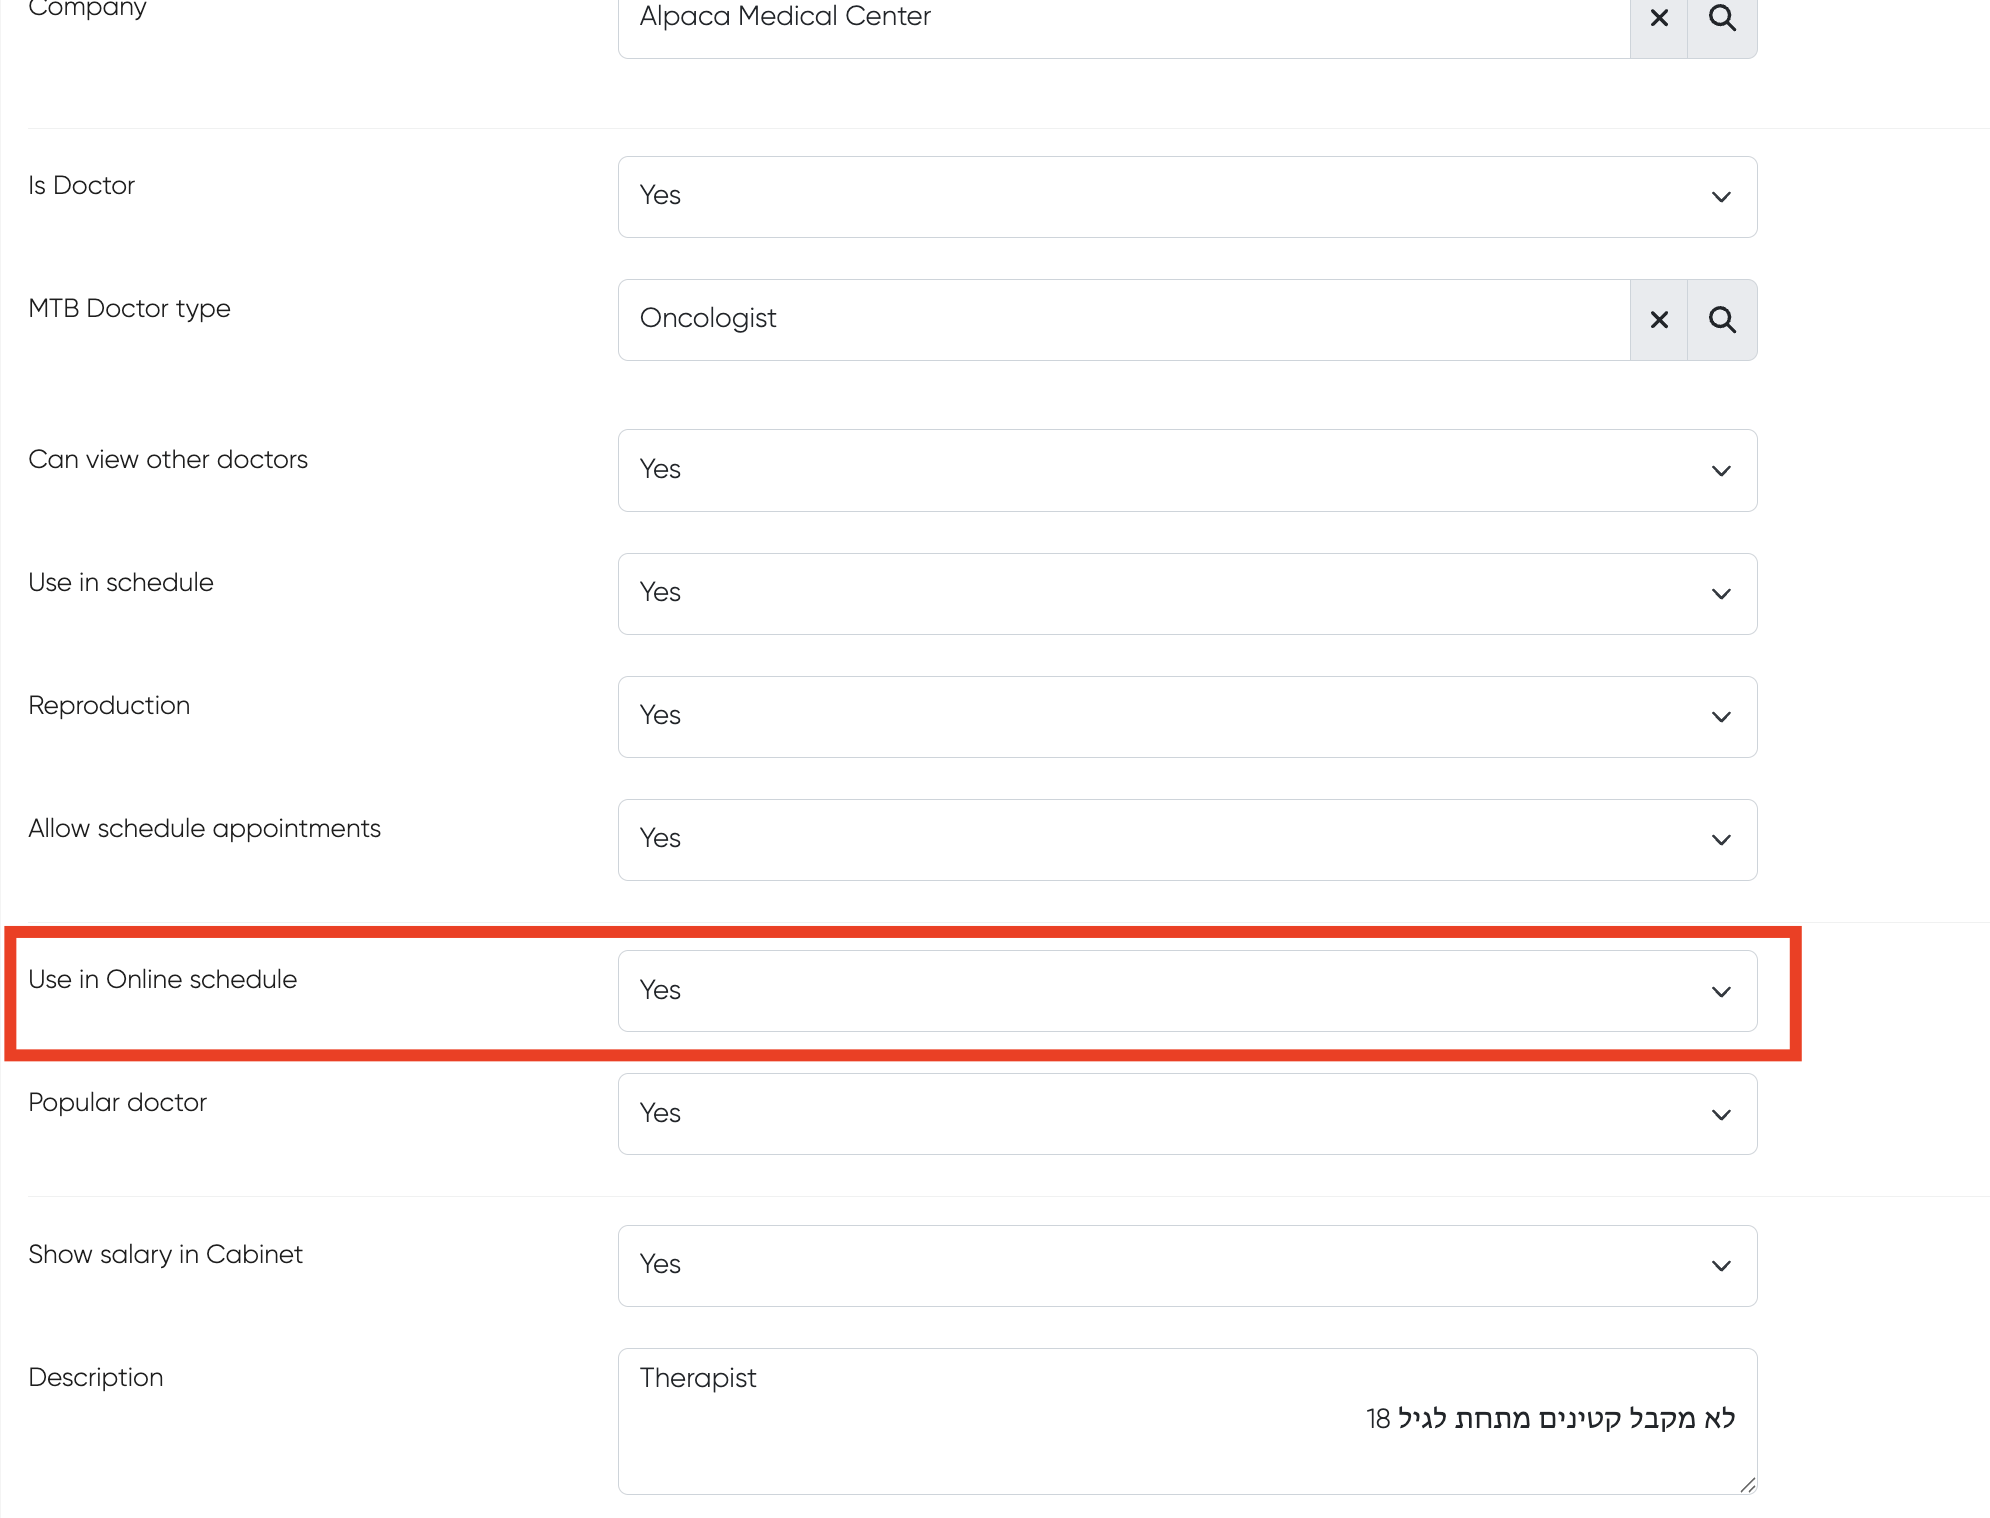
To hide the doctor, switch this field to No.
Optional:
If you want the doctor to always appear first in the online schedule list, set “Popular doctor” to Yes.
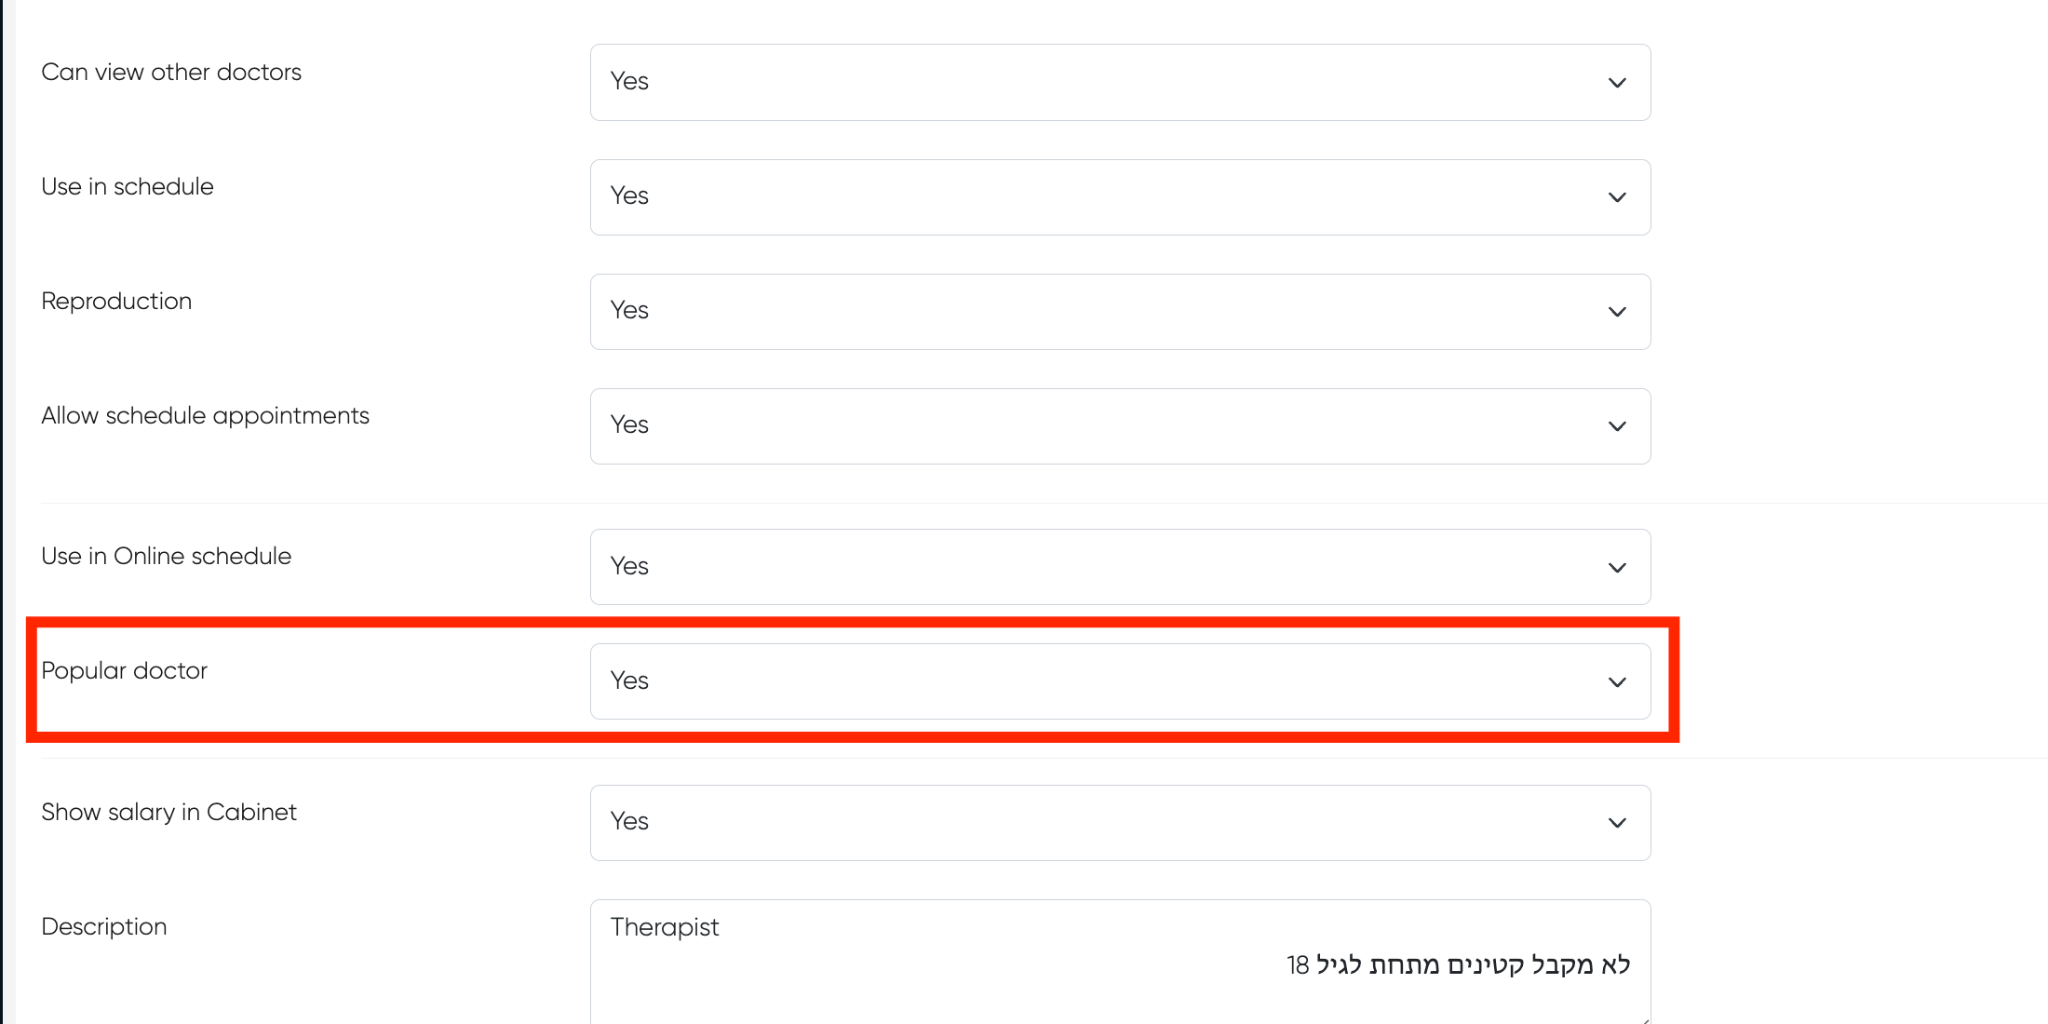
⚠️ If the doctor has a description in their profile, it will automatically appear on the online-booking page under their name.

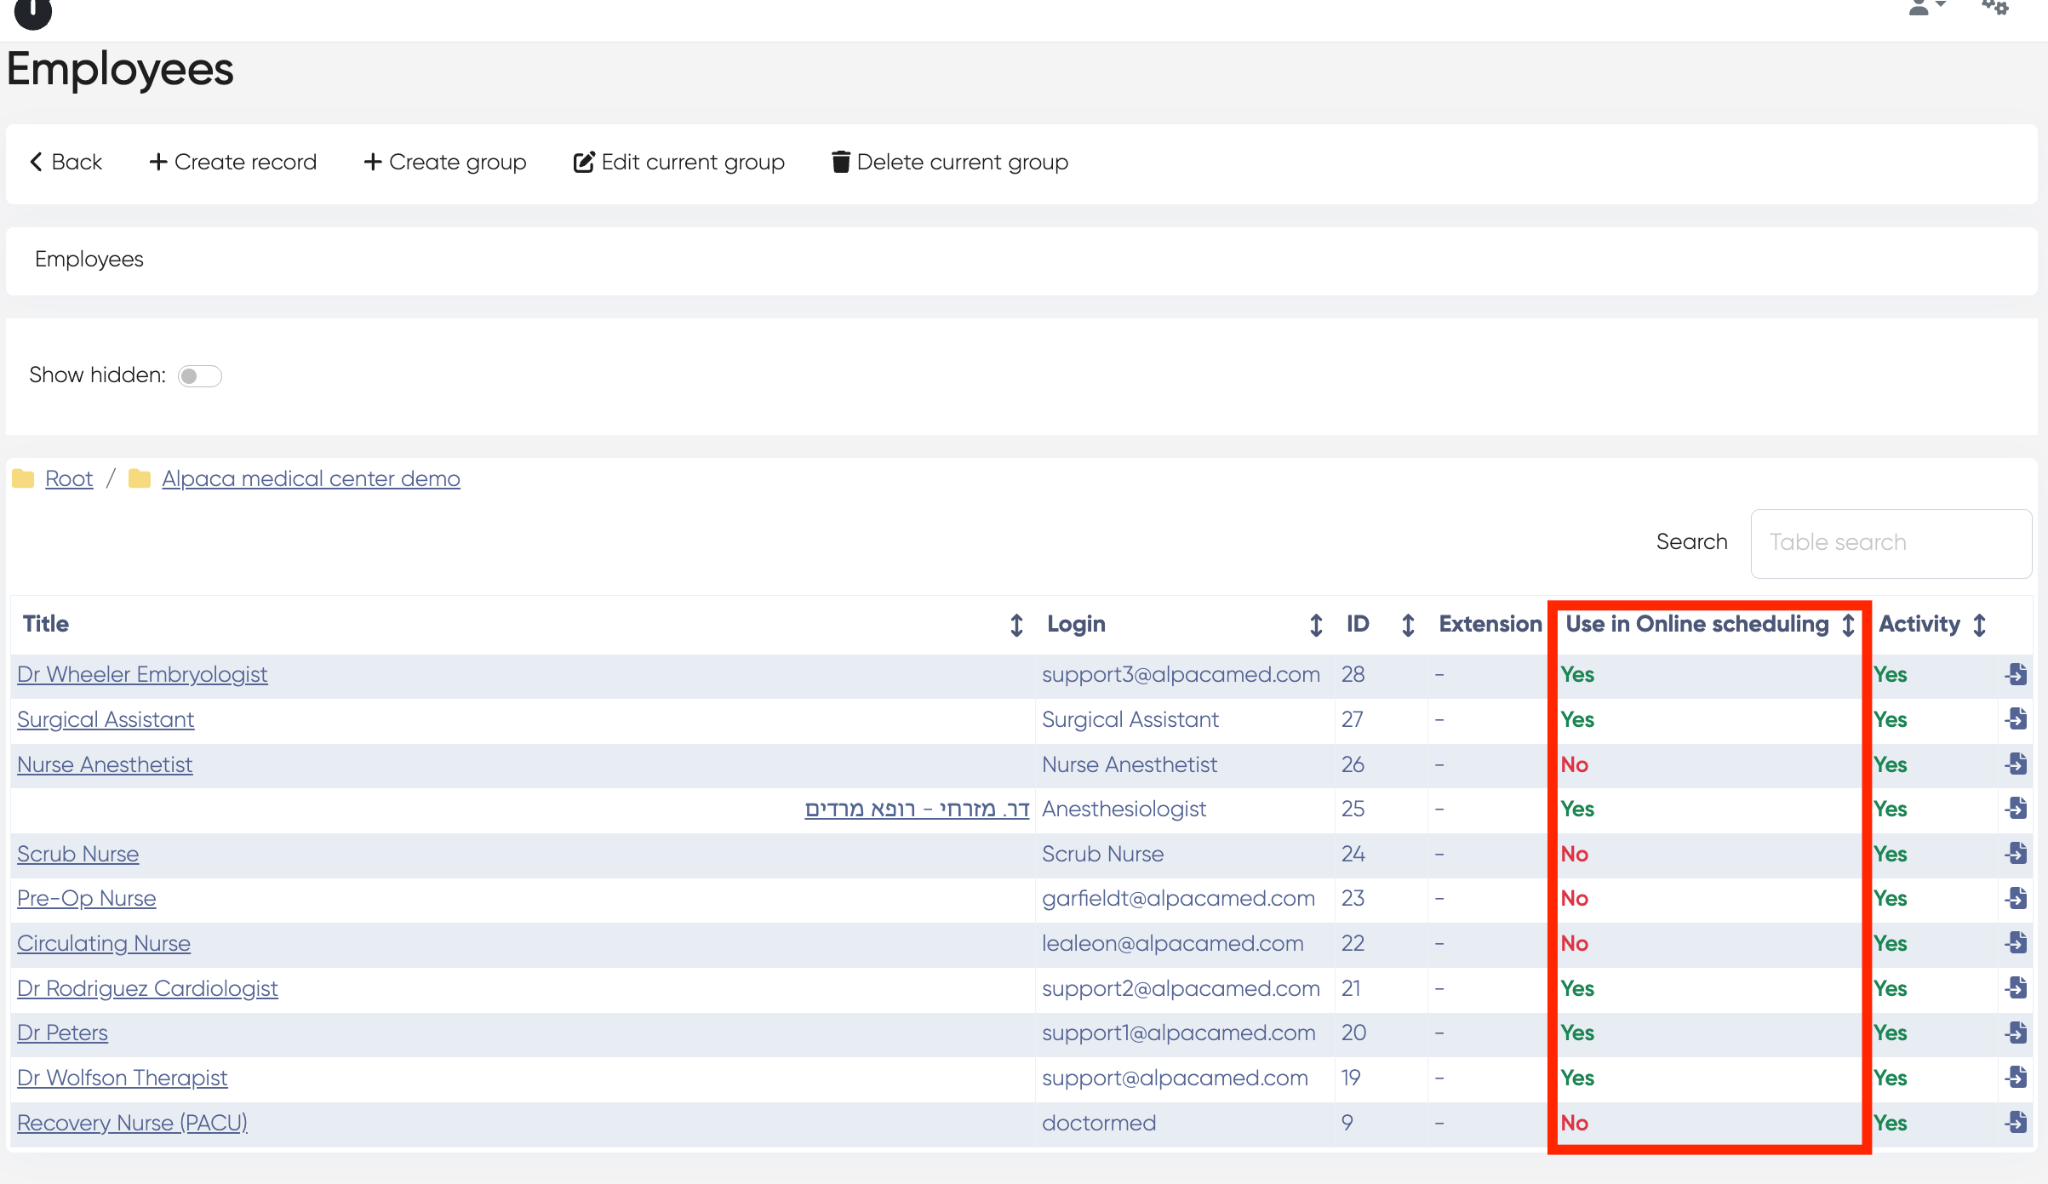
In the Employees list, you can view an overview of all doctors and check who is currently visible in the online booking page — see the “Use in Online scheduling” column.
Enable/disable service on the online-booking page
You can control which services are displayed on the online booking page for each doctor.
A service will appear in the online booking interface only if both the doctor (➡️ How to enable doctor for online-booking) and the service are enabled for online scheduling.
⚠️ If multiple doctors provide the same service, you need to enable or disable it individually for each doctor.
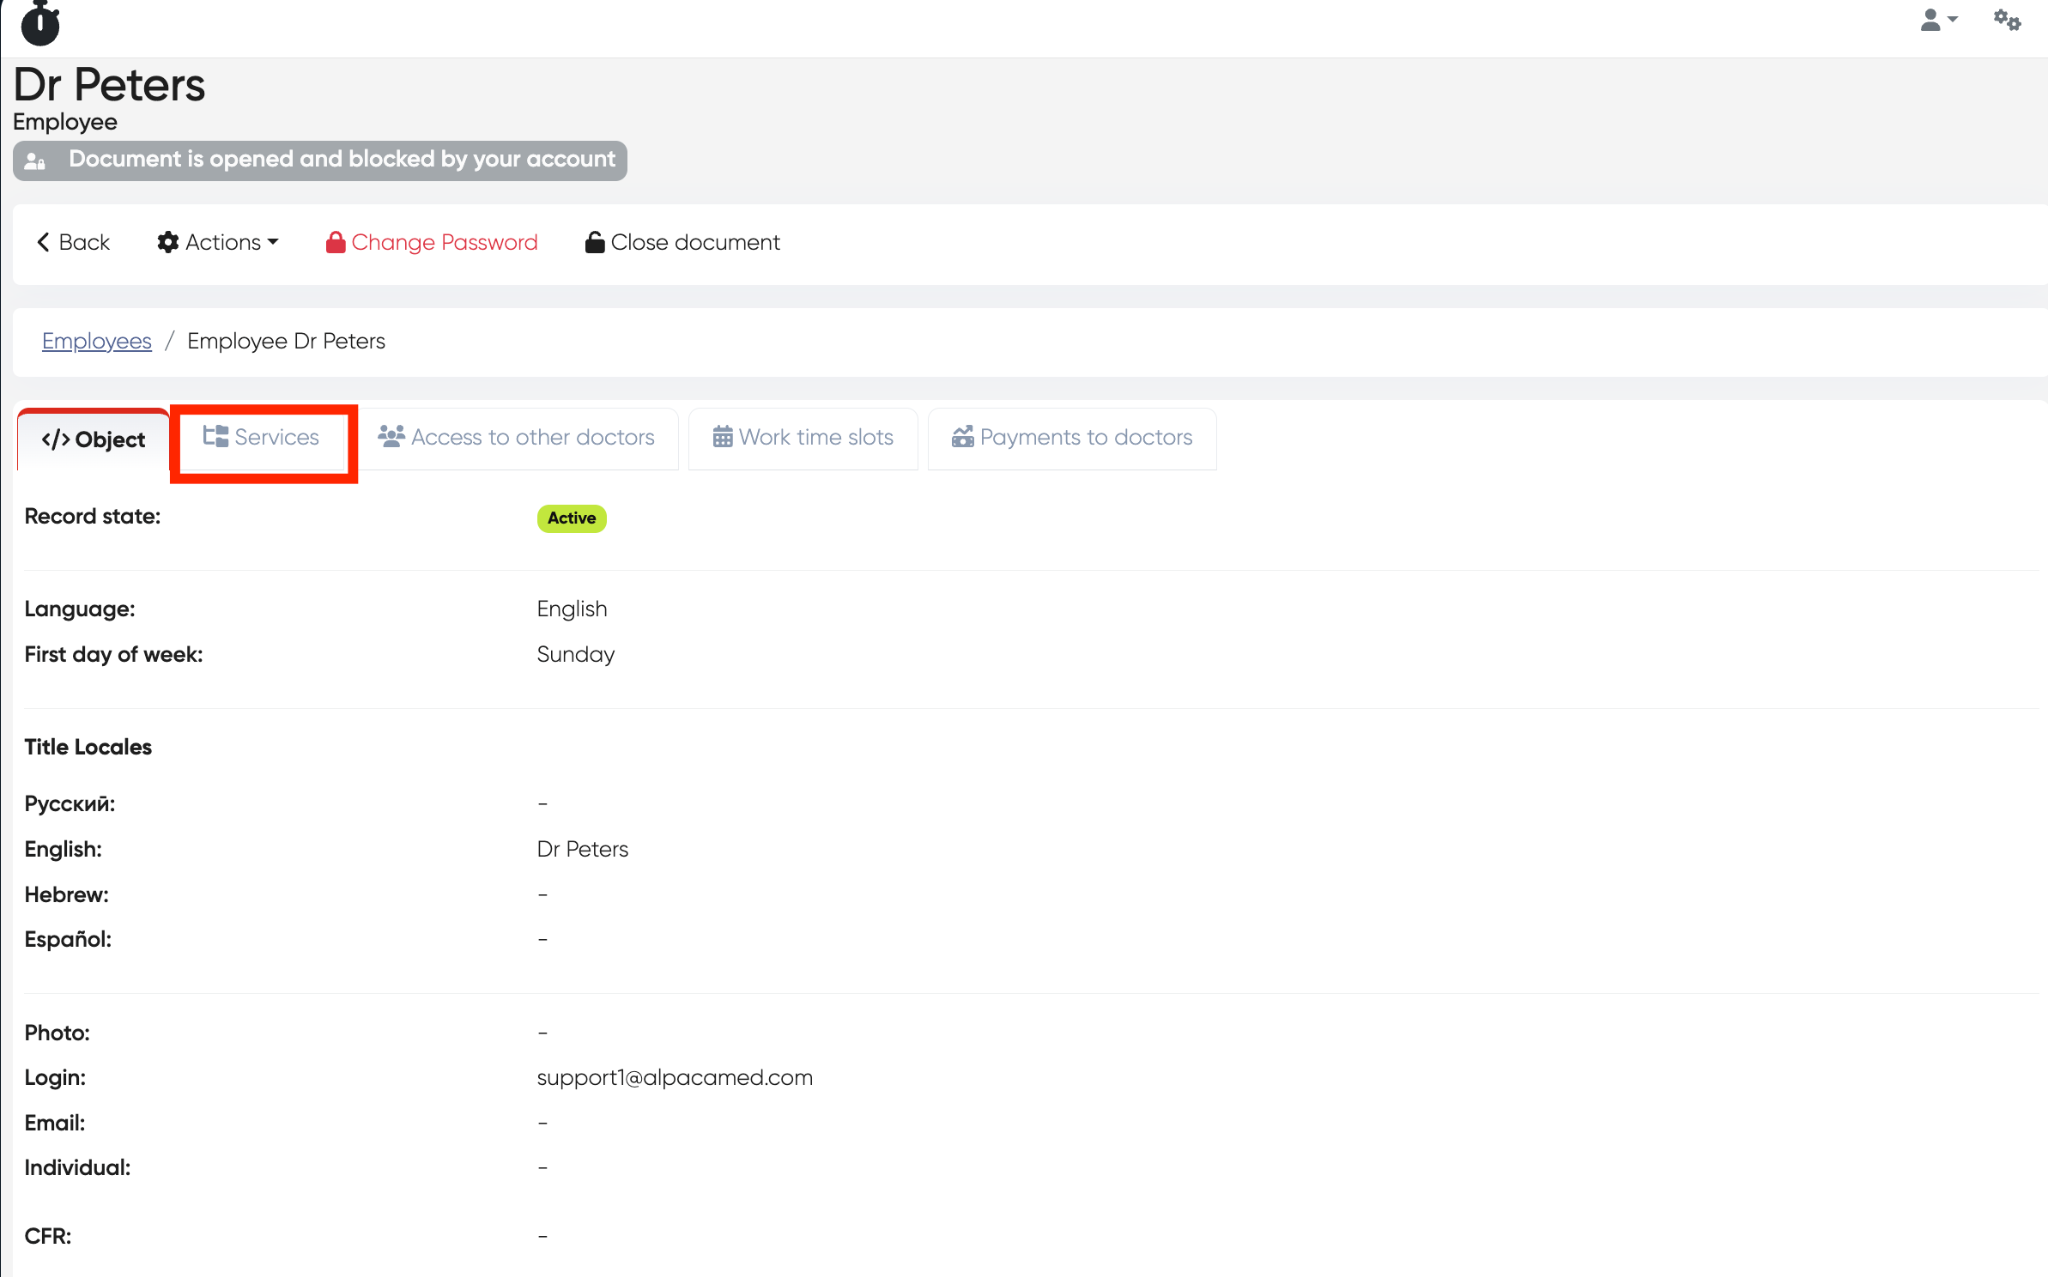
Navigation:Directories > Employees > Choose the doctor > Services tab
Steps:
Open the doctor’s profile and go to the Services tab.

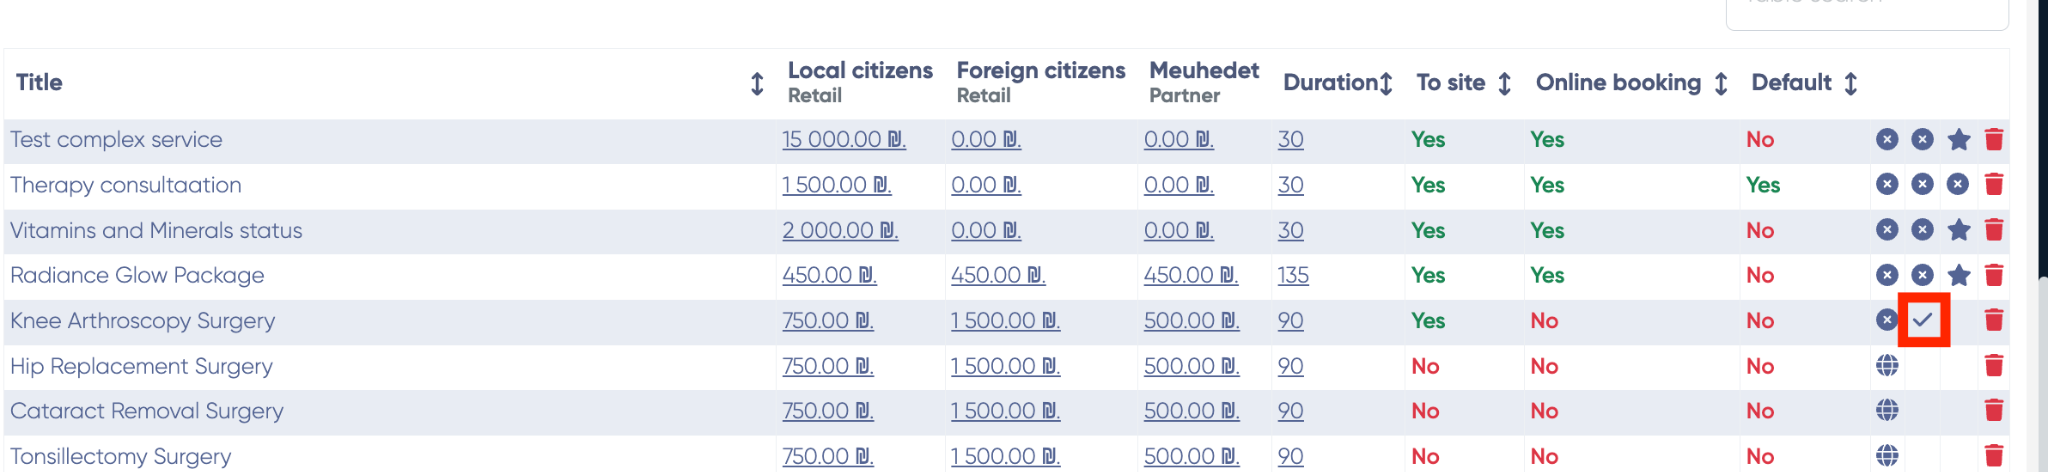
In the table, find the service you want to edit.
Check the columns “To site” and “Online booking.”
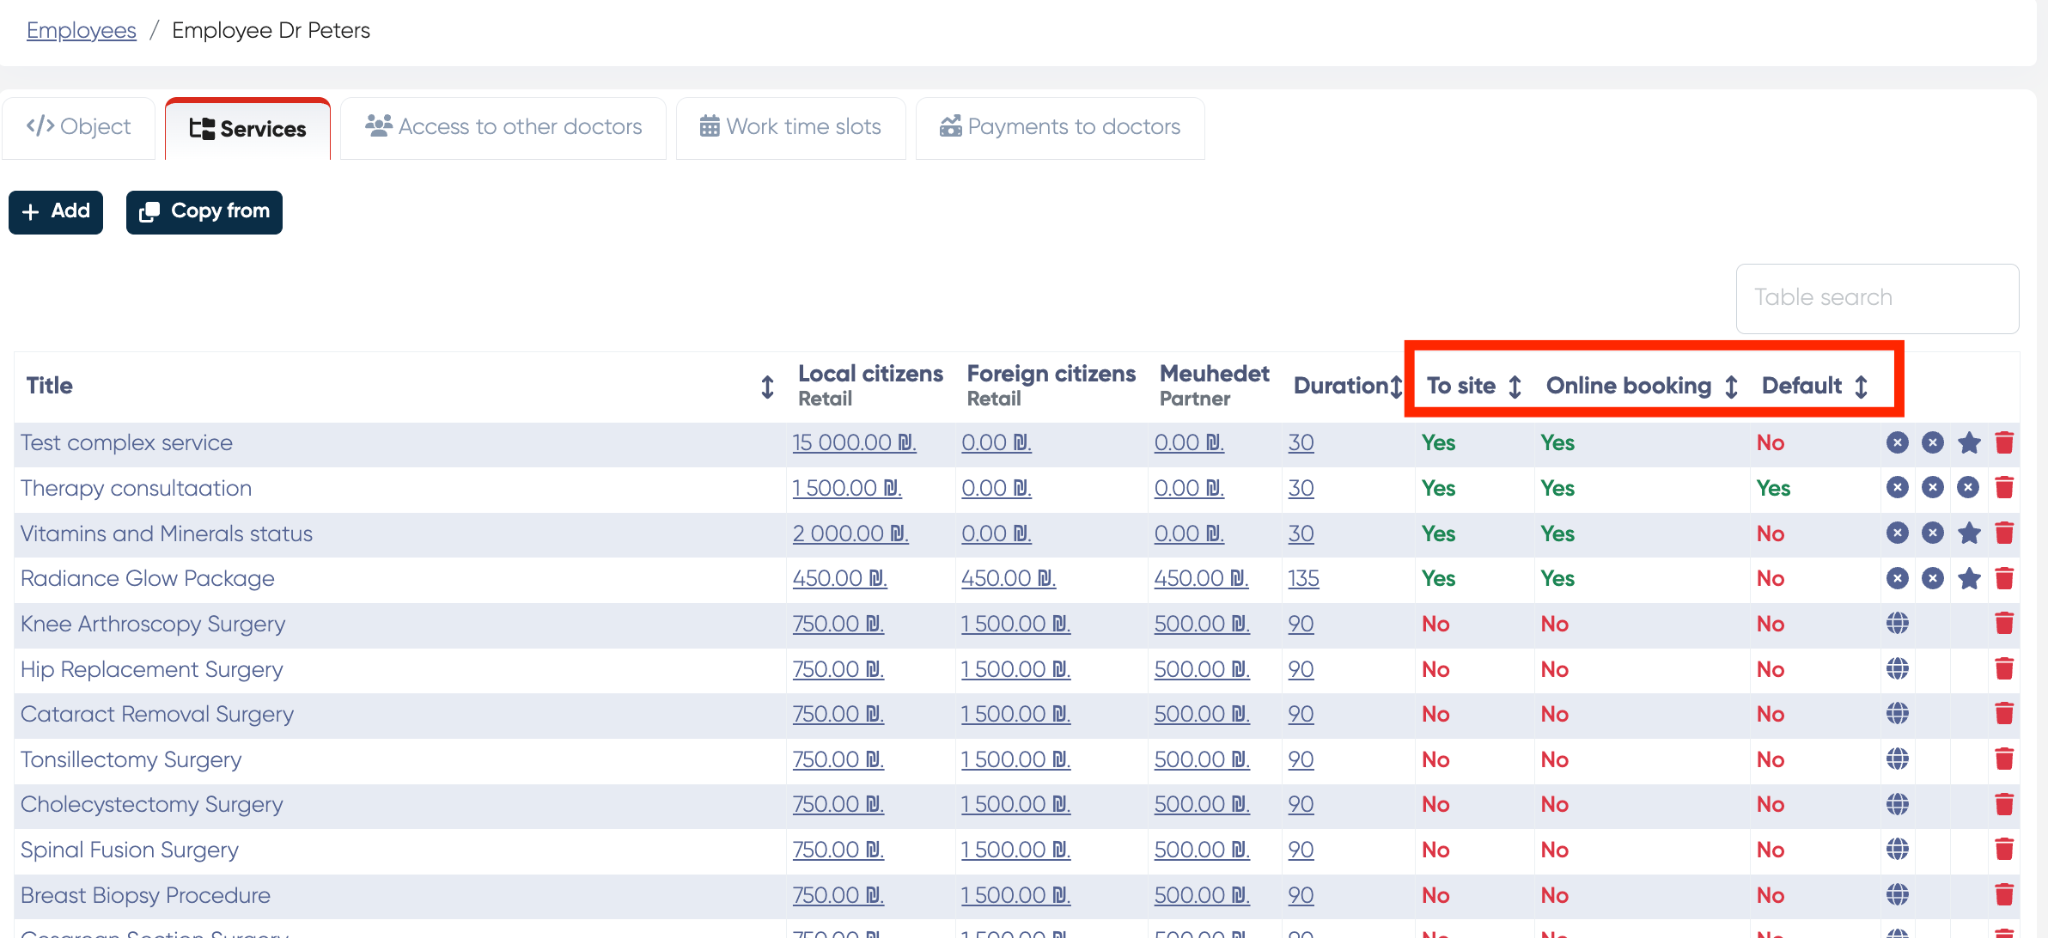
If both fields are set to Yes → the service is visible on the online booking page.
If they are No → the service is hidden from online booking.
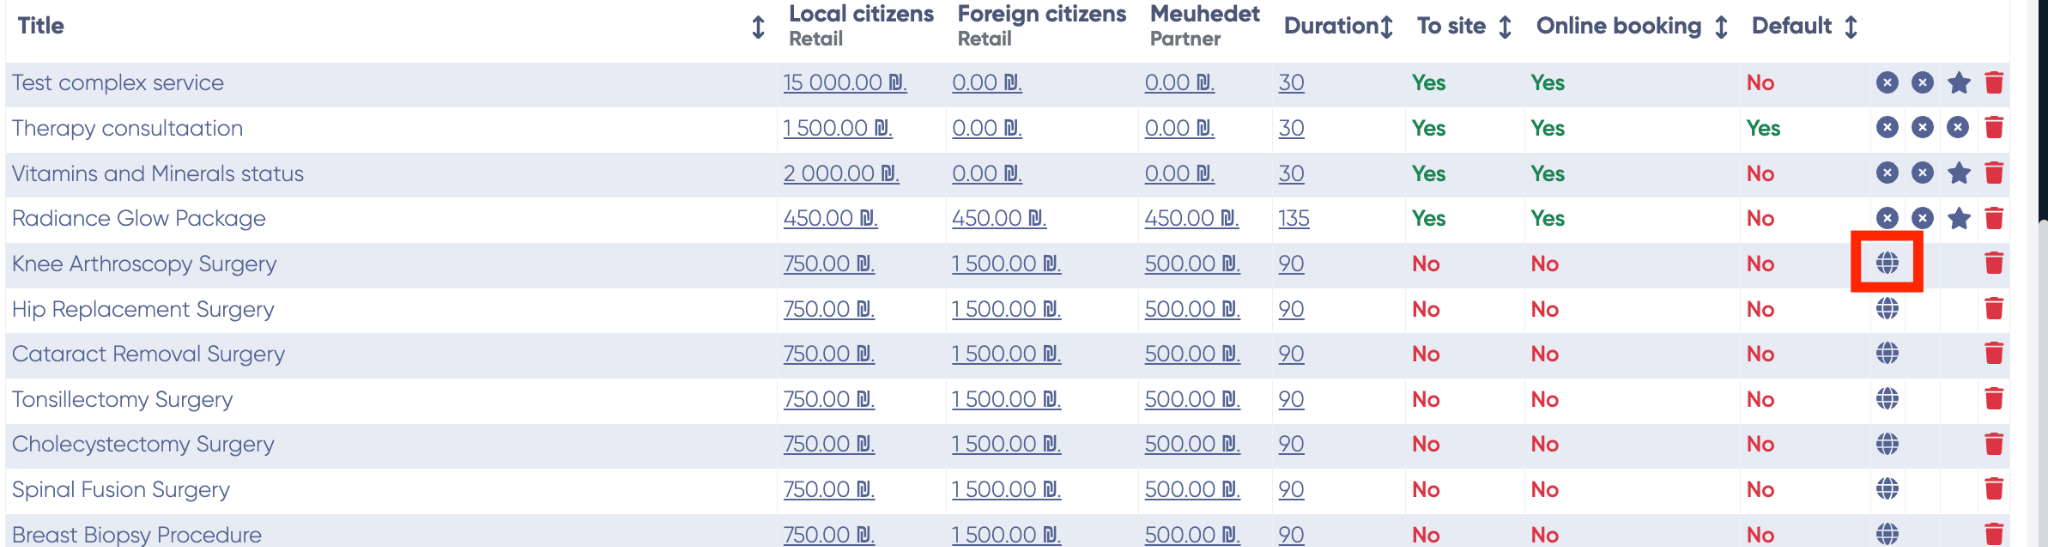
How to Enable a Service:
Click the 🌐 icon to toggle the “To site” flag → confirm by selecting Yes.
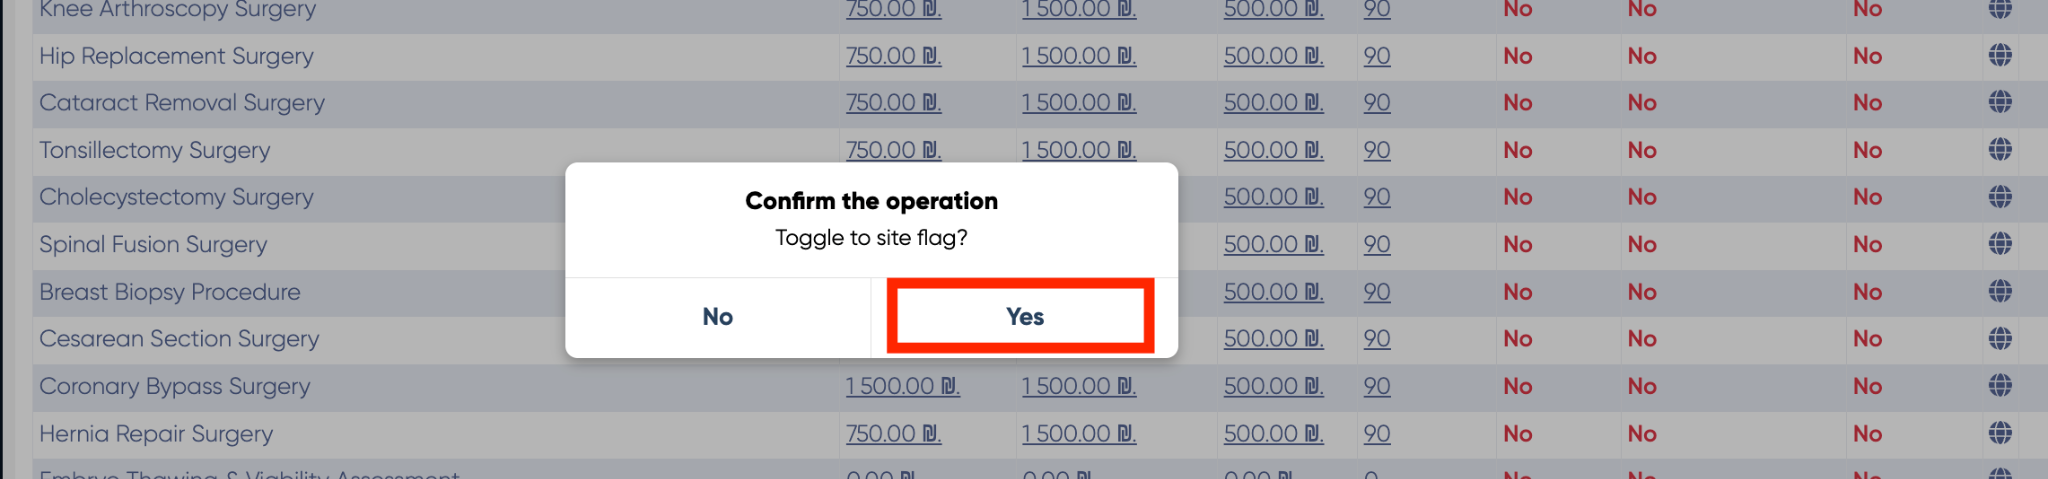
Click the ✓ icon to toggle the “Online booking” flag → confirm by selecting Yes.
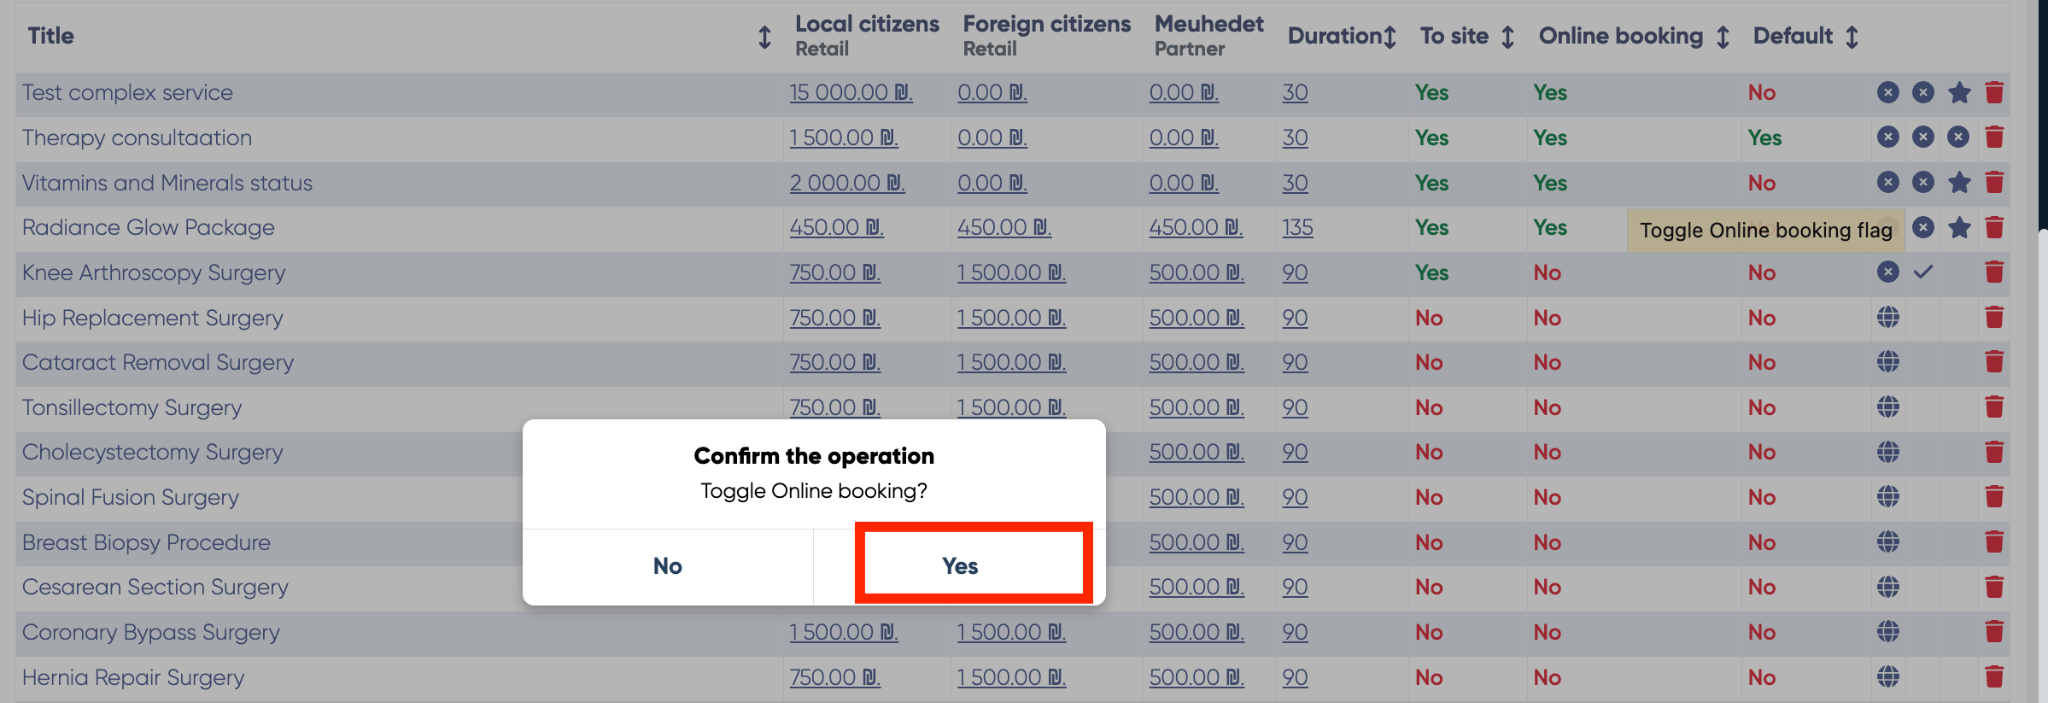
Once both are enabled, the service will immediately appear on the online booking page.
How to Disable a Service:
Go to the same Services tab.
Find the service you want to hide.
Click the ❌❌ icons and confirm both with Yes.

The service will no longer appear on the online booking page.
Additional Features
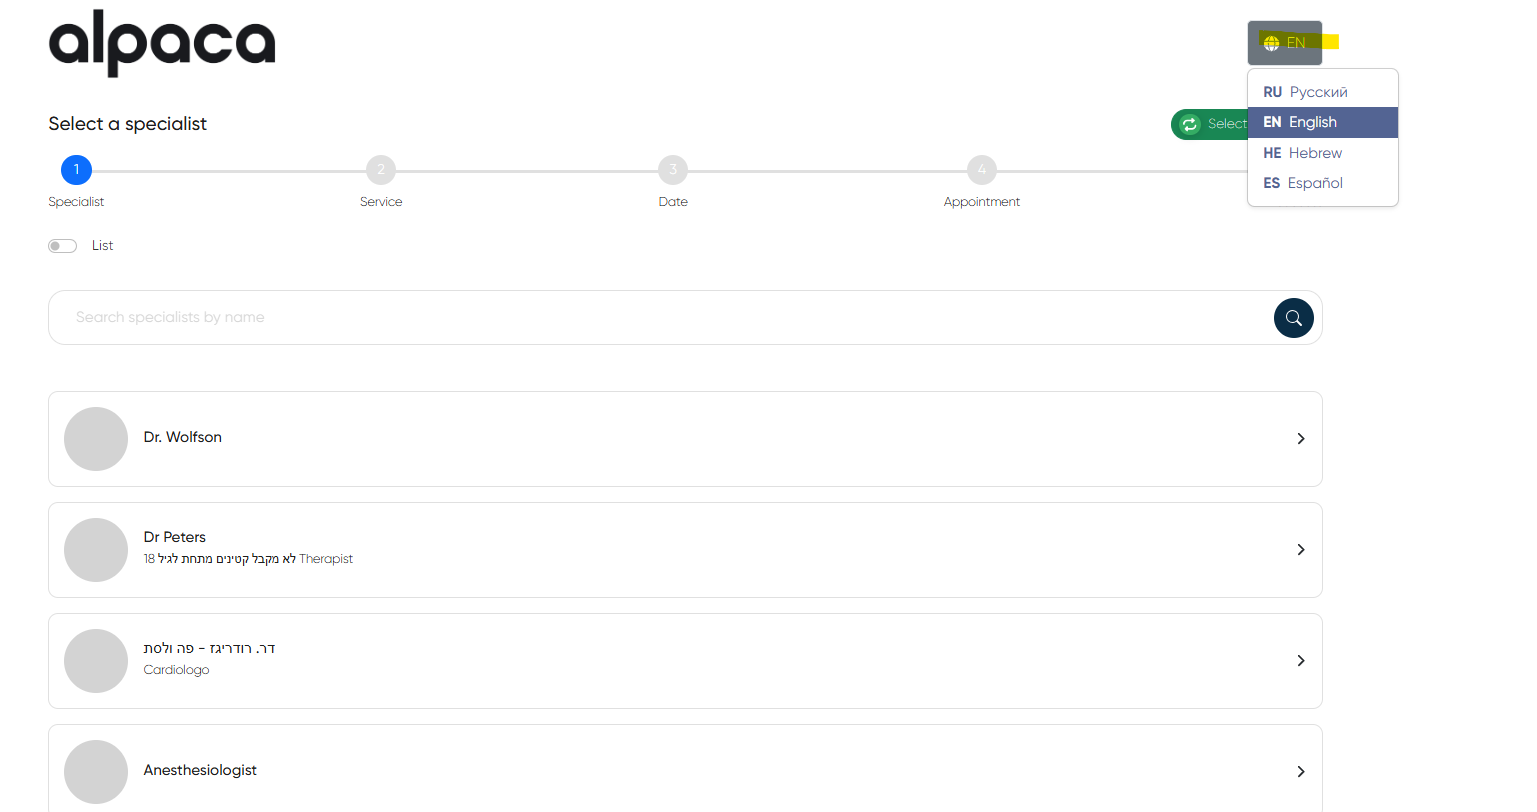
Multilanguage Button
The online booking page now supports multiple languages. Patients can click the language selector button to instantly switch the interface into their preferred language, ensuring accessibility for multilingual patient bases.
Doctor-Specific Online Booking Links
Each doctor who has online scheduling enabled can be assigned a unique booking link.
Navigation:Directories > Employees > Choose the employee > Object tab > Use in Online schedule
If the employee has online scheduling activated, the system generates a personal booking link for that doctor. This link can be:
Embedded into the clinic’s website under the doctor’s profile
Shared directly with patients (e.g., via e-mail, WhatsApp, or SMS)
This enables patients to immediately schedule with the specific doctor without browsing the entire clinic catalog.
Features and Benefits
Real-time synchronization with clinic schedule
Responsive design for mobile and desktop
Eliminates double bookings
No manual input is required by the clinic staff
Supports multi-service, multi-doctor clinics
Multilanguage support for global audiences
Doctor-specific booking links for personalized scheduling
This interface streamlines patient access and ensures booking data is immediately reflected in the clinic's internal CRM and scheduling tools.