
TWAIN
The TWAIN section in the Reception module enables the clinic to integrate and use document scanners directly within the system. This allows reception staff to scan patient documents, lab forms, consent papers, or any physical paperwork seamlessly into the clinic’s digital records.
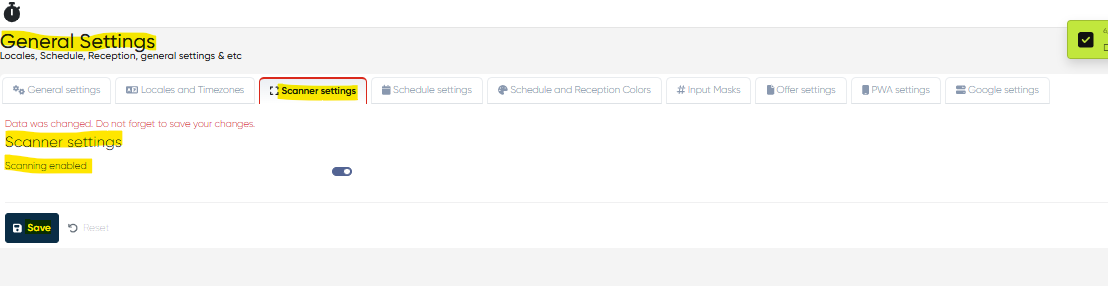
1. Making the TWAIN Service Available in System Settings
Before scanning can be performed, the TWAIN scanning service must be enabled in the system settings:
Navigate to Settings > General Settings > Scanner Settings.
Locate the Scanning Enabled option.
Enable the service by toggling the switch to On.
Save changes to activate the TWAIN scanning capability.
Once enabled, the service will be available for use within the Reception module.
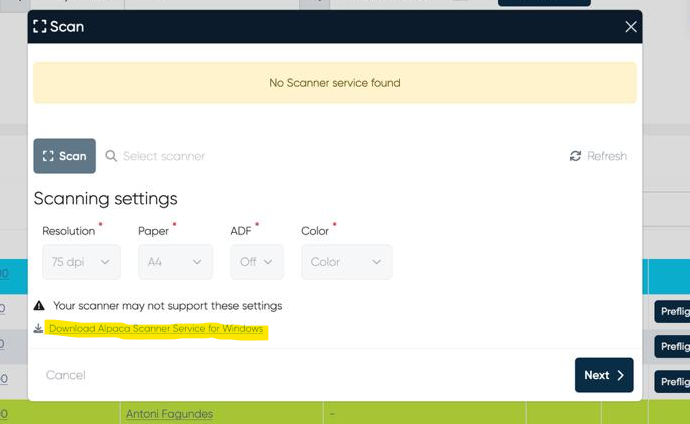
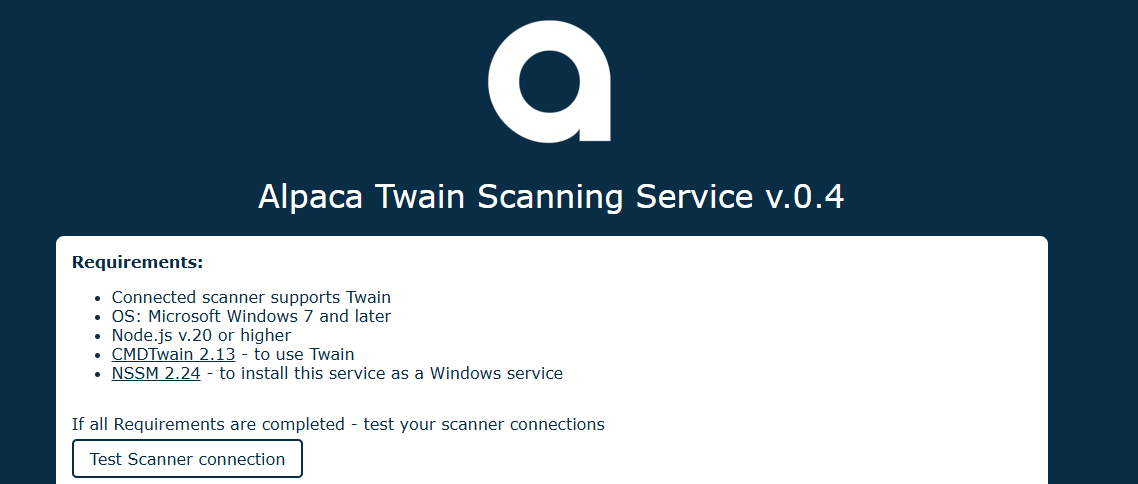
2. Installing and Enabling the Scanner Service
To use the TWAIN scanner integration, you need to install and configure the clinic’s scanner service component:
Download the Alpaca Scanner Service provided by Alpaca.
Run the installer on the local workstation connected to the scanner hardware.
Follow the on-screen instructions to complete the installation.
After installation, ensure the scanner service is running and configured to start automatically.
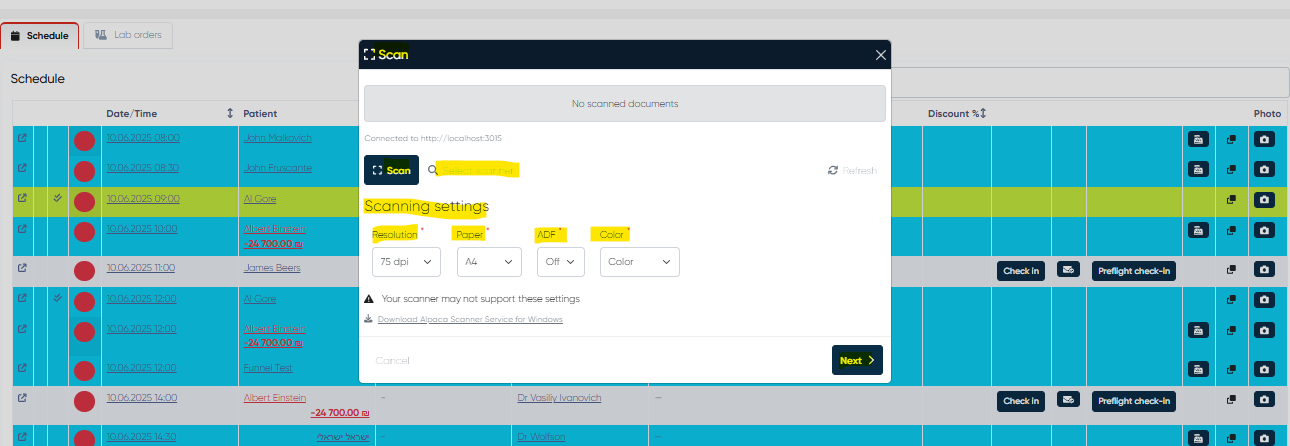
3. Using the Scan Option via the Reception Main Screen
Once the TWAIN scanner service is enabled and configured, scanning documents is simple:
Open the Reception module and navigate to the Schedule or Lab Orders tab.
Locate the appointment or lab order for the patient whose documents need to be scanned.
Click the Check-in button associated with the appointment or order. After you enter all necessary patient details, the Scan window will appear
Adjust the scanning settings if needed (Resolution, Paper size, Color settings, etc.)
Place the physical document in the scanner and initiate the scan.
Preview the scanned document; if satisfied, save it directly into the patient’s electronic record linked to the appointment or order.
Multiple pages can be scanned in sequence, with options to rotate, crop, or enhance images before saving.
Completed scanned files will be accessible later within the patient’s profile for reference or printing.
Summary
The TWAIN integration within the Reception module streamlines digitizing patient documents by connecting your physical scanners directly to the system. Proper setup through system settings and local scanner service installation ensures smooth, fast, and reliable scanning workflows for your clinic.