
Reception
Description
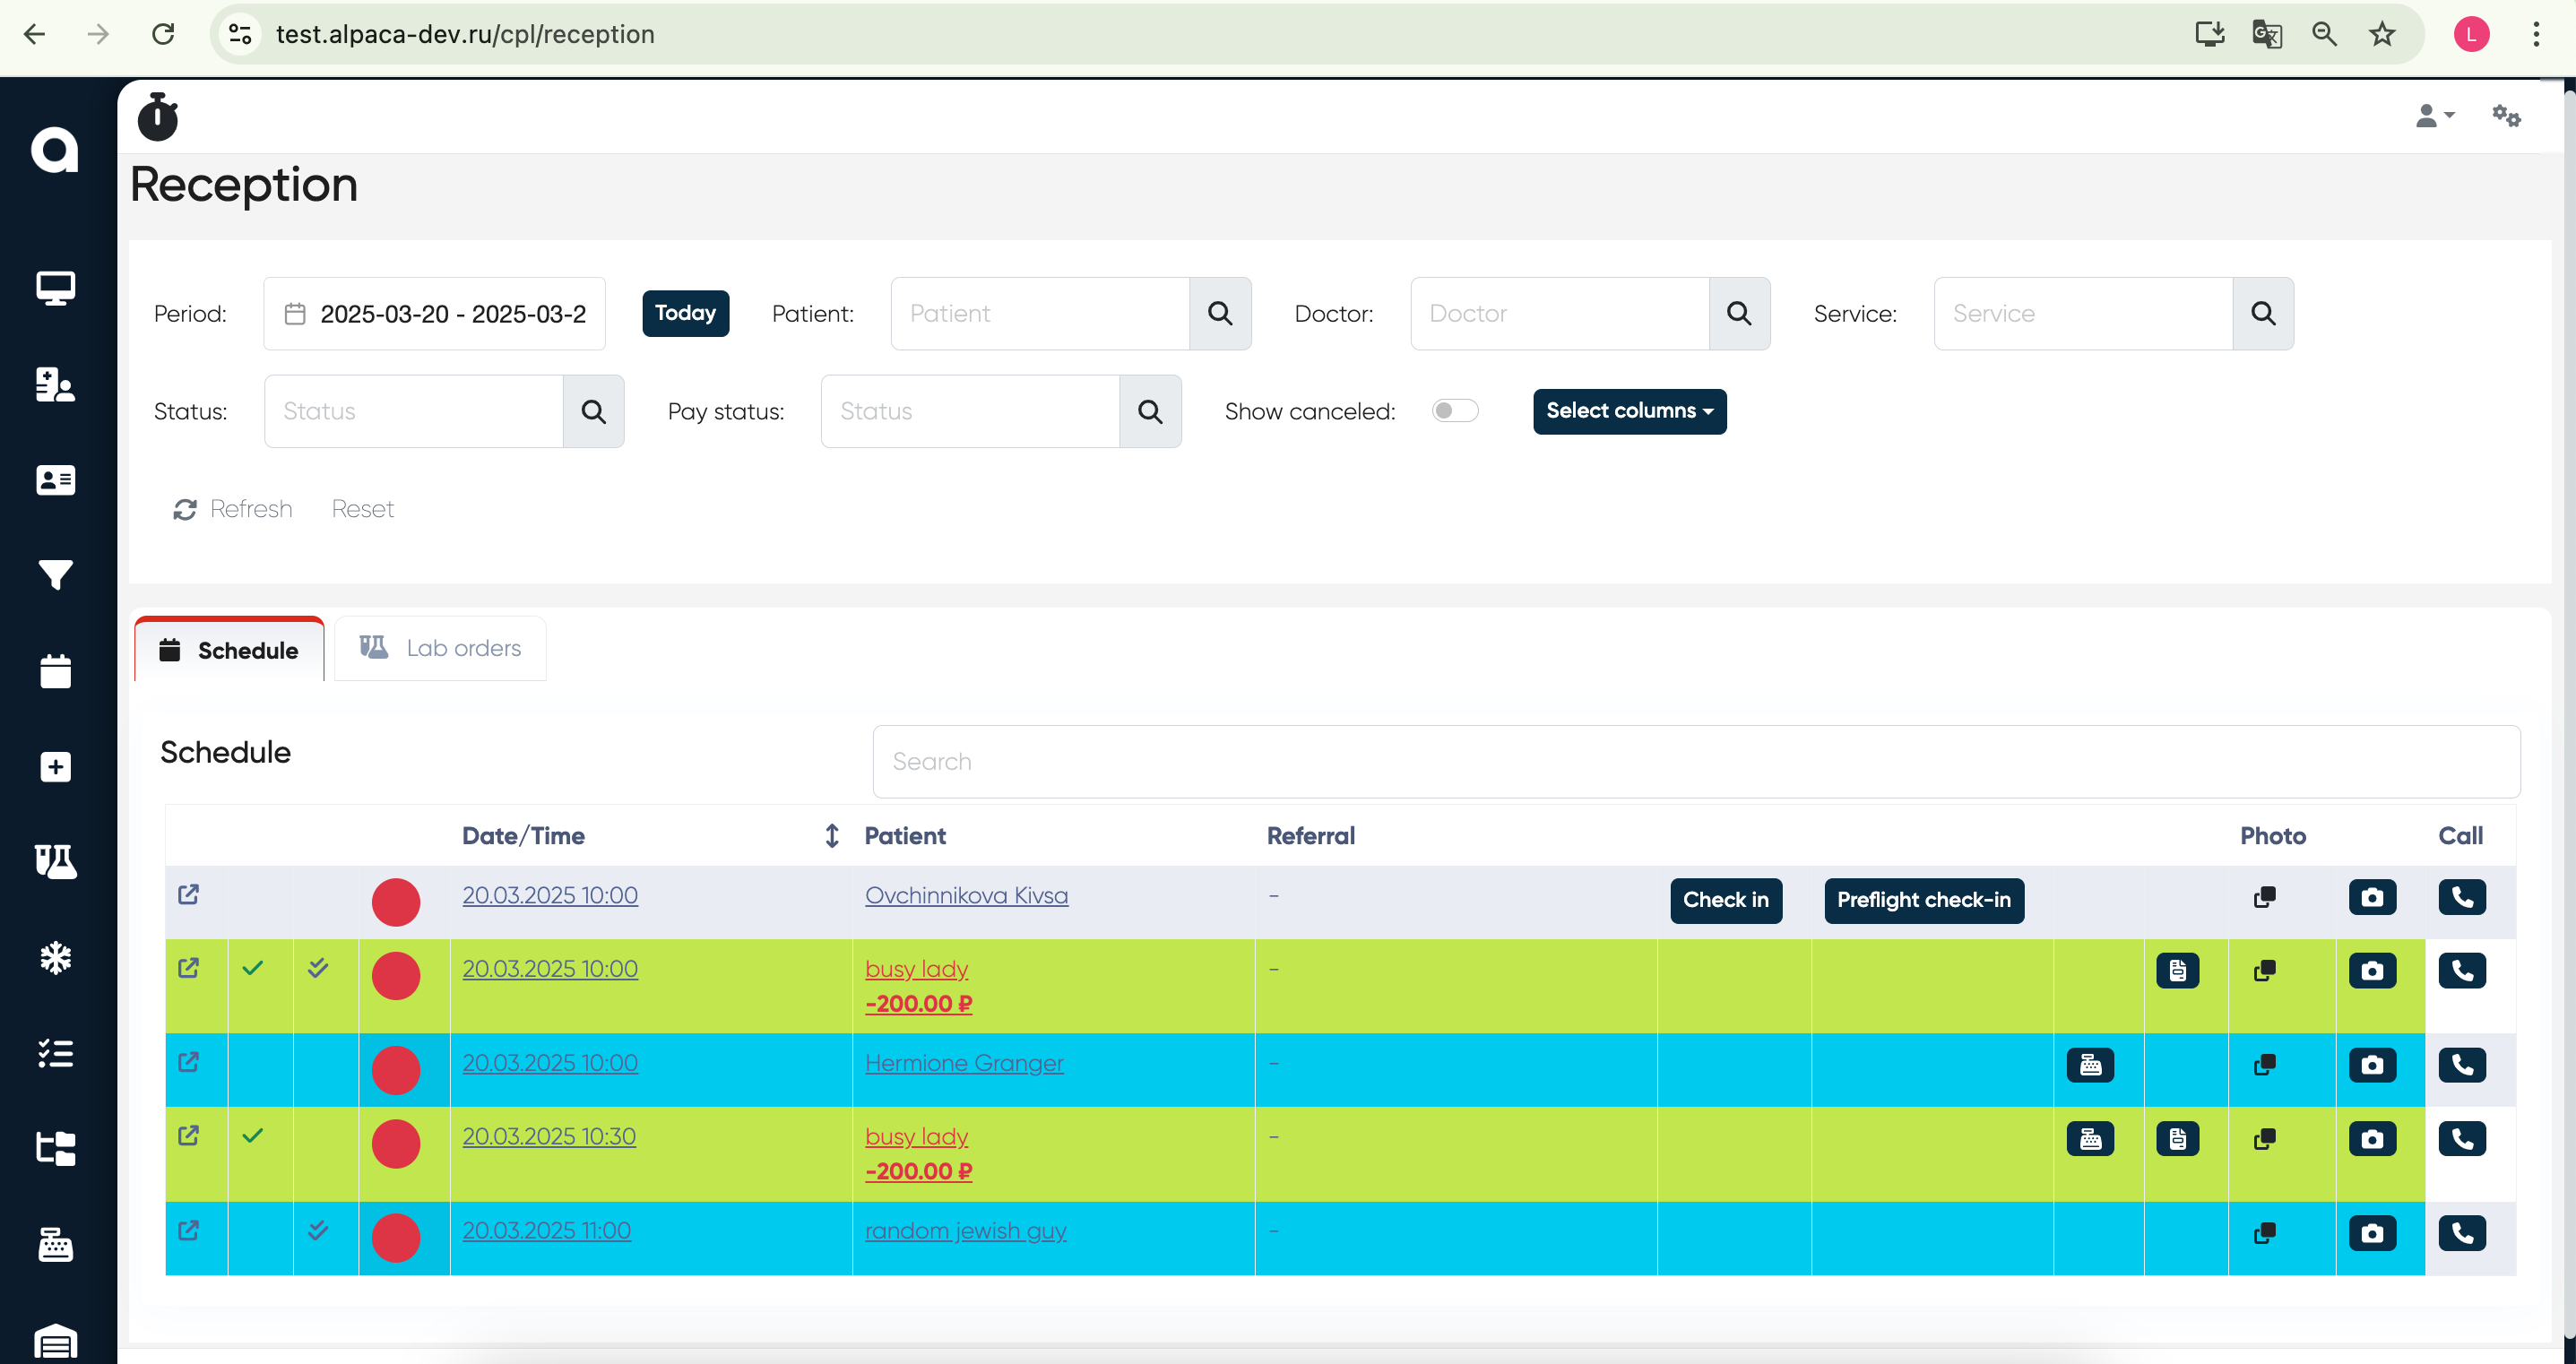
This is the Reception Module of Alpaca. It is designed for check-in management, patient scheduling, and payment tracking. The interface allows receptionists to view appointments, manage patient arrivals, update check-in status, and track payments.
Design
Functionality and elements
Schedule Tab
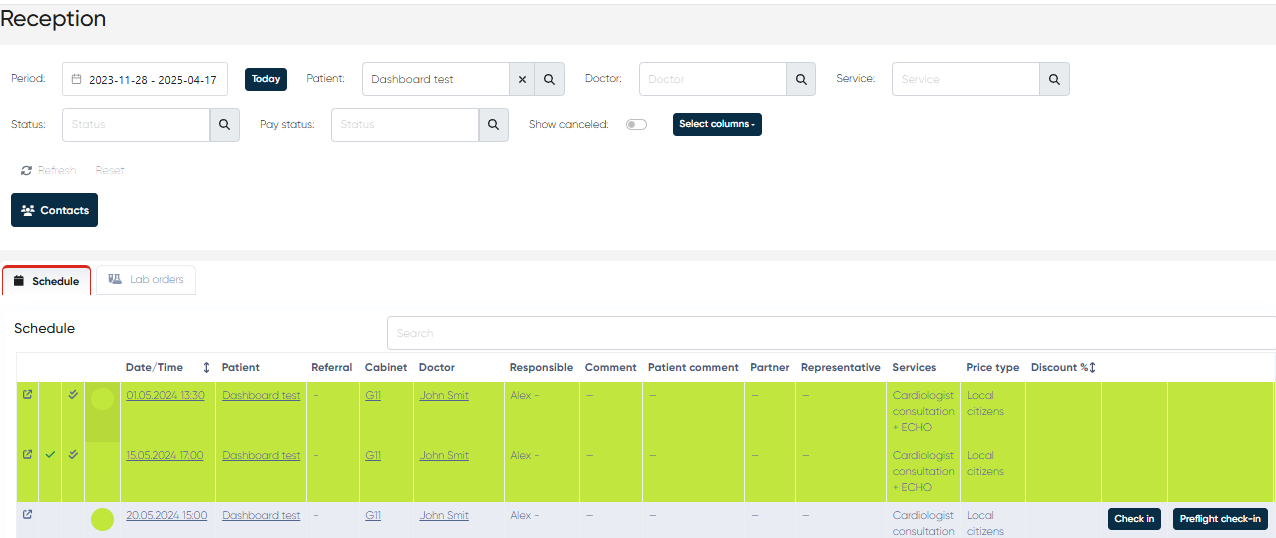
Displays upcoming patient appointments with the following columns:
Date/Time: appointment date & time.
Patient: name of the scheduled patient.
Referral: indicates if the patient was referred.
Check-in, Preflight Check-in buttons to initiate the corresponding processes.
After visit
 document generation button.
Open schedule
 button for viewing the responsible doctor’s schedule.
 Pay
 button for payment initiation with all possible payment methods (cash, credit card, check, web checkout with the possibility of generation of the link for online payment).
Lab orders tab
Display upcoming ordered laboratory tests for the patient with the possibility of Check-in and Preflight check-in.
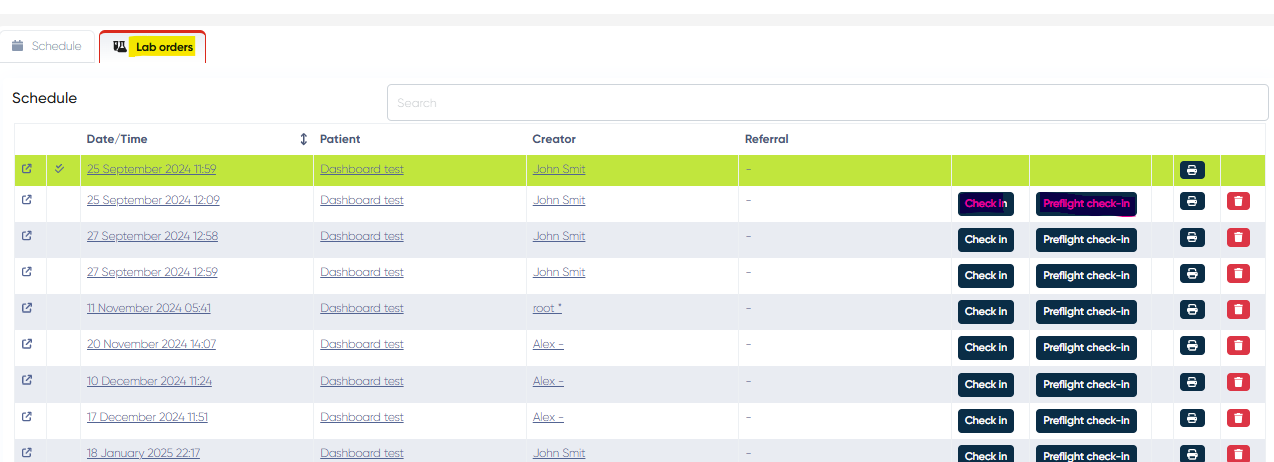
Check-in button

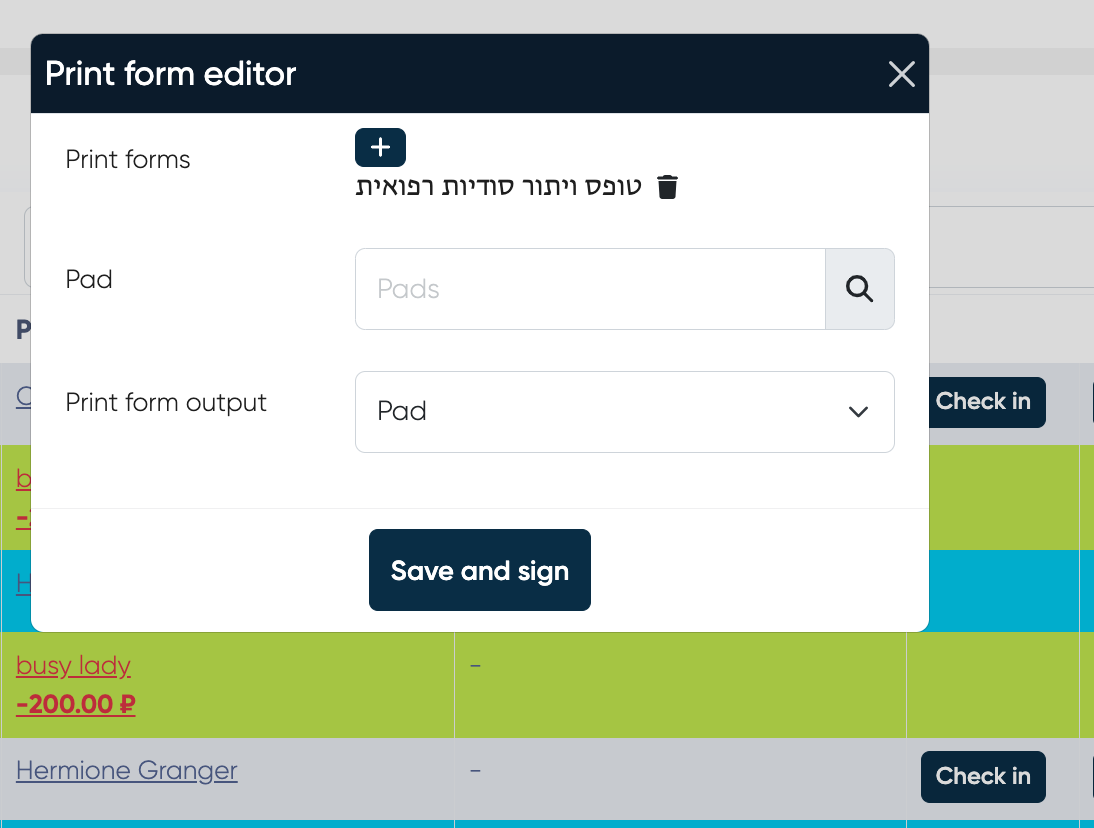
Check In Process
Choose patient
Click the “Check-In“ button
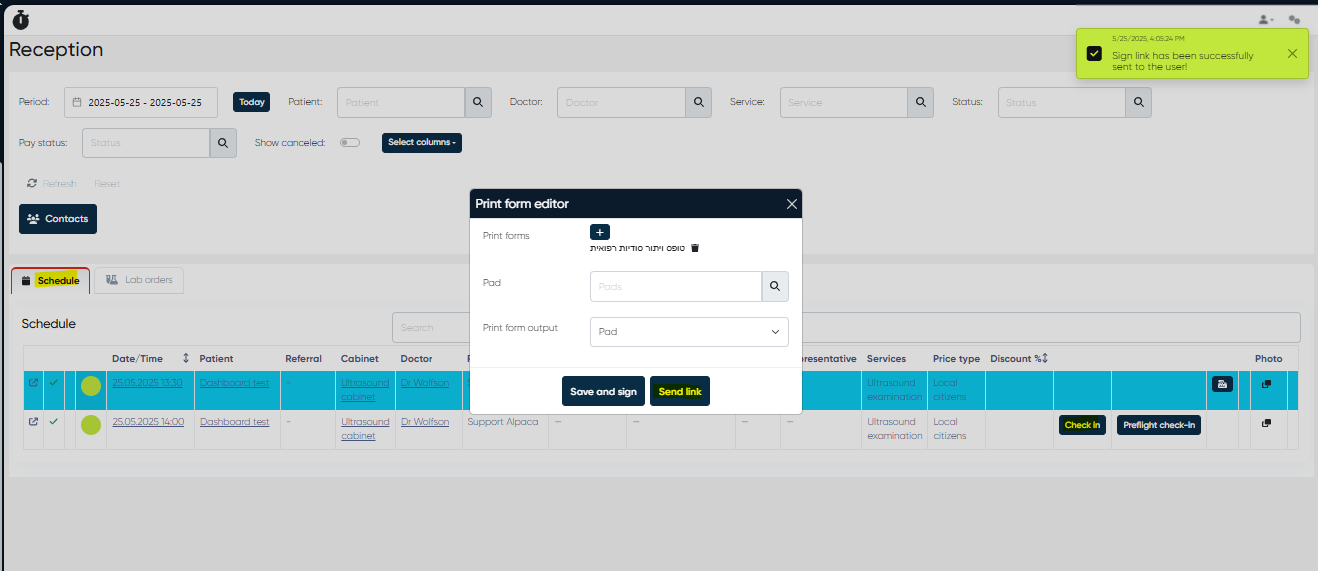
Choose print forms for check-in
Choose Pad Signature from the list
Save “Documents“
Send the link if needed
Save and sign button to end the check-in process
Sending Links to Patients for Remote Check-In Form Signing
Navigation:Reception → Schedule → Select Appointment → Check-In → Send Link
Overview
The Remote Check-In Form Signing feature allows reception staff to send secure, personalized links to patients so they can electronically sign check-in forms before arriving at the clinic.
This enhancement digitizes the pre-appointment workflow, reducing waiting times at the front desk and improving overall patient experience.
Functionality
When a patient has a scheduled appointment, staff can initiate the check-in process directly from the Schedule view.
By clicking Send Link, the system generates a unique, time-limited URL that the patient receives via SMS or email. The patient can open this link on any device to securely review and sign their assigned check-in forms.
The signed forms are automatically attached to the patient’s Medical Document and stored in their electronic record, ensuring compliance and easy retrieval.
How to Use
Navigate to Reception → Schedule.
Select the relevant appointment.
Click the Check-In button in the appointment menu.
Choose Send Link.
Confirm the patient’s contact channel (SMS or email).
Once sent, the patient receives a secure link to their check-in forms.
After the patient completes the signing, the system automatically updates their check-in status.
Notes
The link is secure and unique per patient and expires after a defined period (as configured by your system administrator).
Patients must complete all mandatory fields before submission.
The signed forms appear under the patient’s Documents tab and can be viewed by authorized staff.
This feature supports paperless operation and is ideal for telemedicine or high-volume clinics.
Preflight Check-In Process
This process is described in the “Preflight Check-In Process” section.