Preflight Check-In Process
Overview
The Preflight Check-In process prepares a patient for a scheduled appointment or procedure. This ensures a smooth patient experience and operational efficiency.
Workflow Summary
Check preconditions for Preflight Check-in
Initiate Preflight Check-In via SMS or E-mail
Update Patient Details
Additional Settings
1. Check preconditions for Preflight Check-in
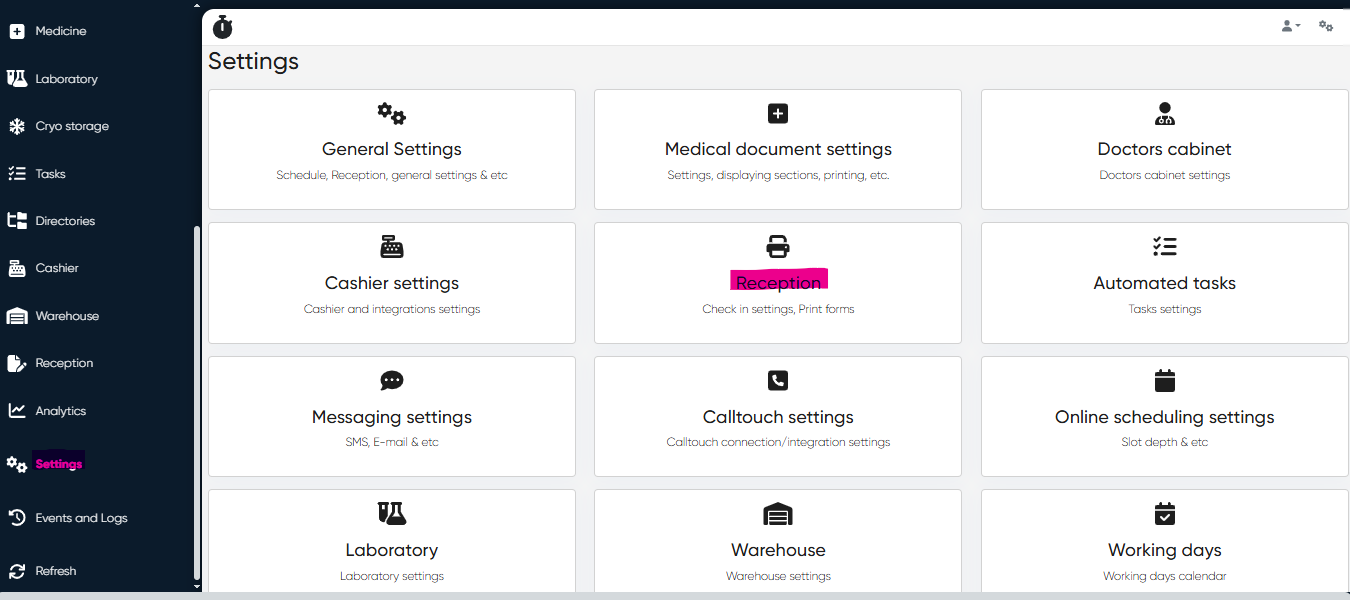
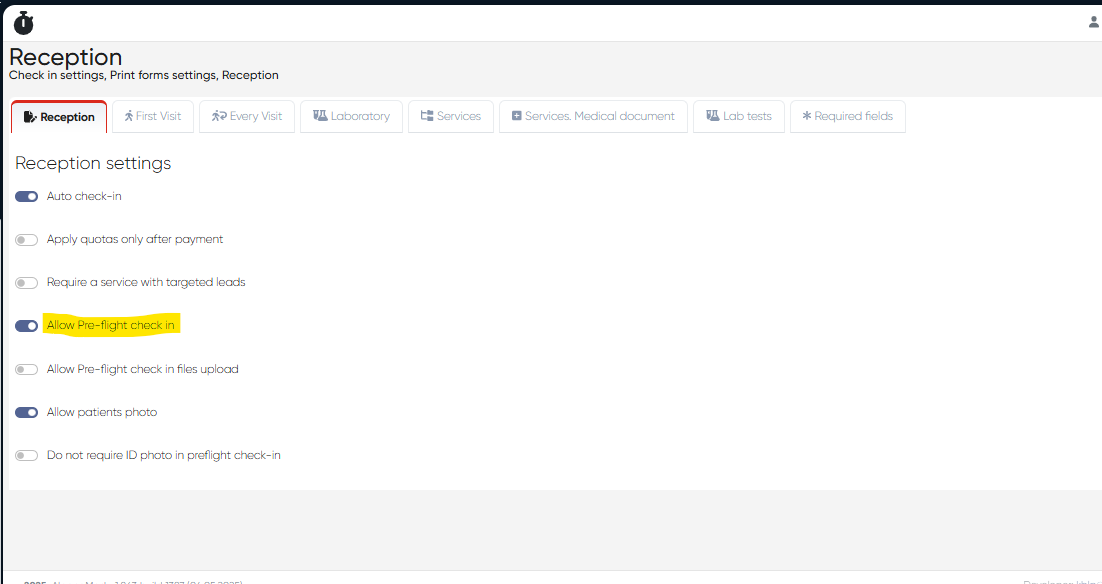
Navigation: Settings> Reception> Allow Pre-flight check in
From the Settings screen, select the Reception Settings and check if Allow Pre-flight Check-in switch is on.
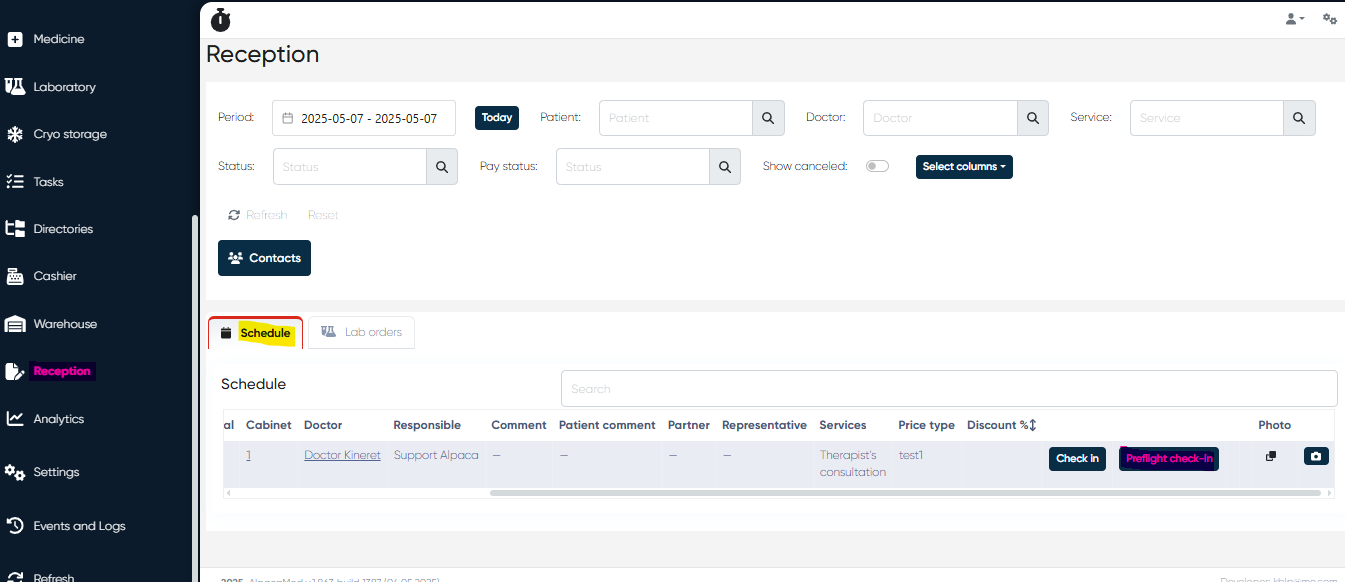
2. Initiate Preflight Check-In via SMS or E-mail
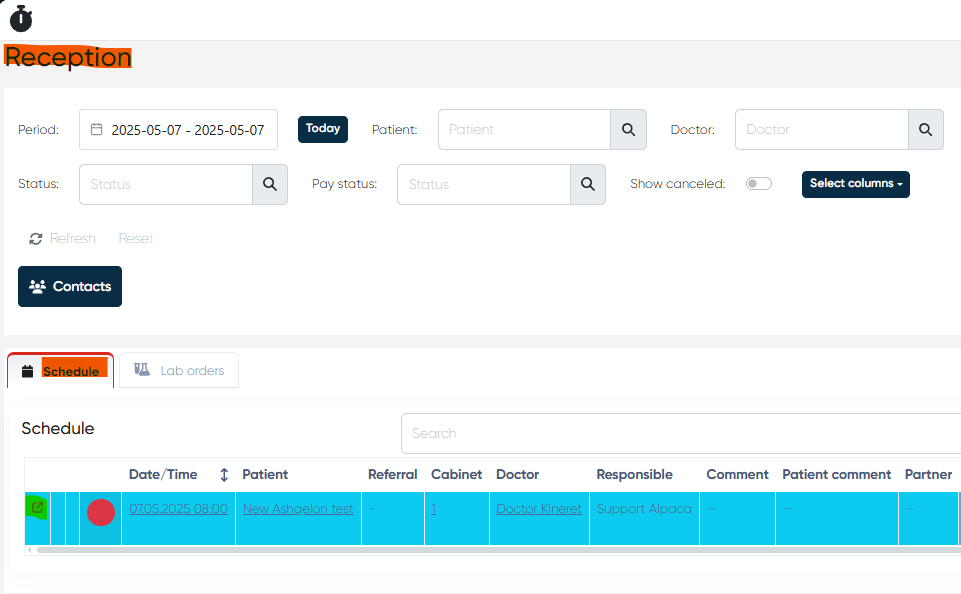
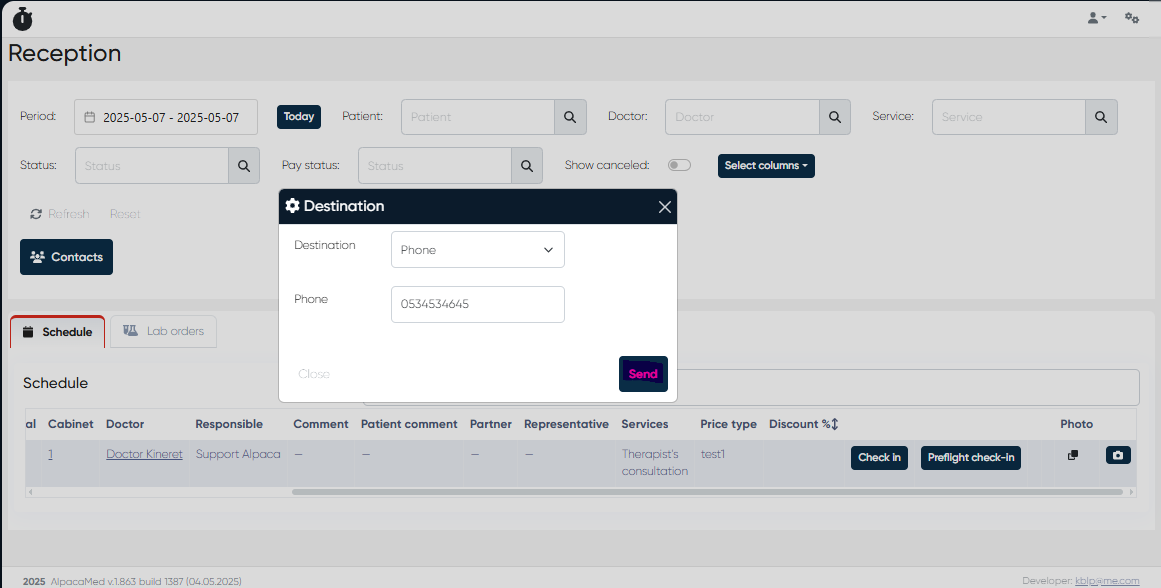
Navigation: Reception> Schedule> Preflight check-in>Select destination (E-mail/SMS)>Send
From the Reception screen select the Schedule tab and click to Preflight check-in button on the right. Then Destination window should be appear where you need to check client’s phone number/e-mail and if it’s correct click to the Send button. If for some reason Phone number/E-mail is incorrect it’s possible to enter the correct Phone/E-mail manually in the appropriate line.
3. Update Patient Details
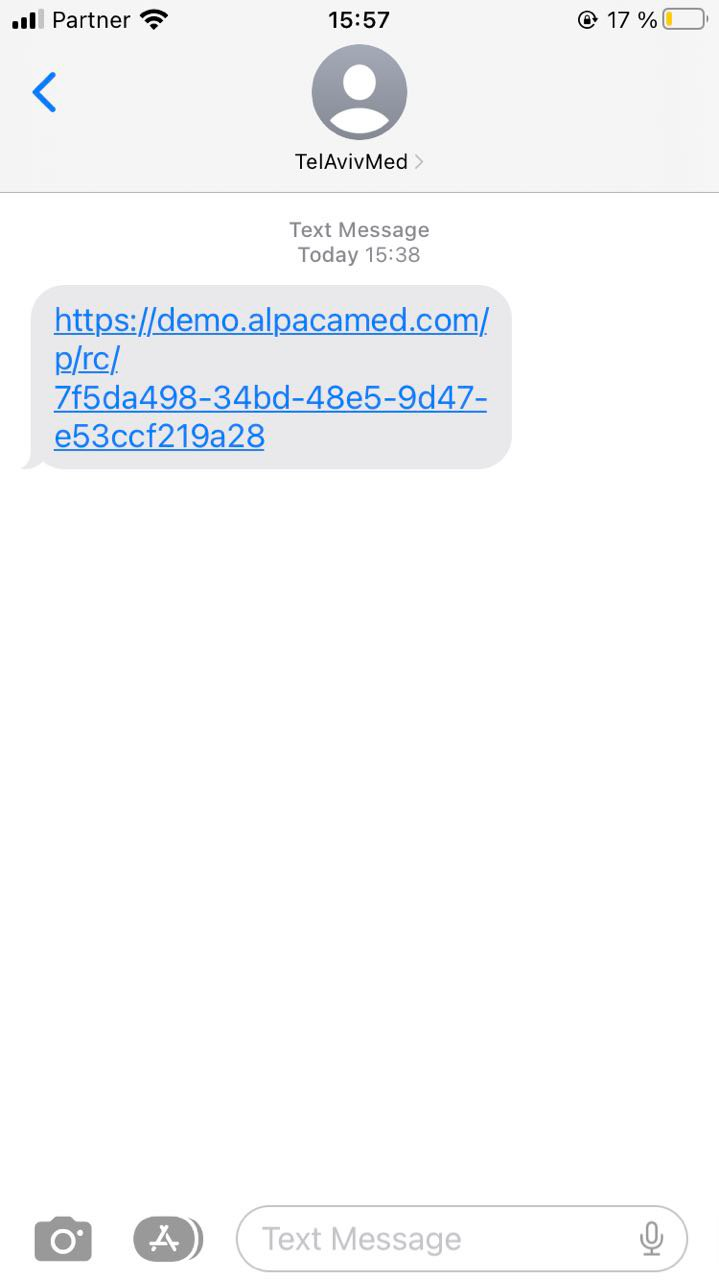
The client should receive the link via SMS or E-mail and update his personal data if needed.
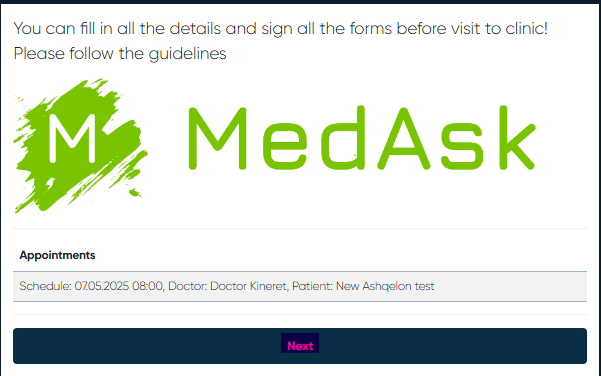
After following the link welcome window will be shown with the basic information about the appointment; the client should check and click the Next button.
On the next window client should enter his Name, check Phone number (if it’s incorrect, it’s possible to enter the correct one manually by clicking Other number button)and choose Gender and after that click Next button.
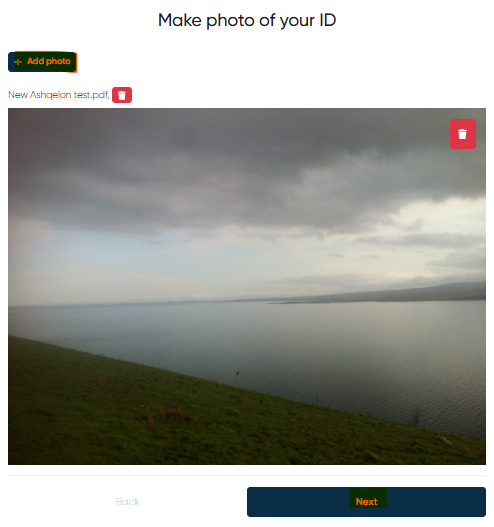
On the next window client should add his ID photo by clicking Add photo button and choosing the appropriate file from his device. When photo will be added client can see its preview inside the window. After that it’s needed to click Next button.
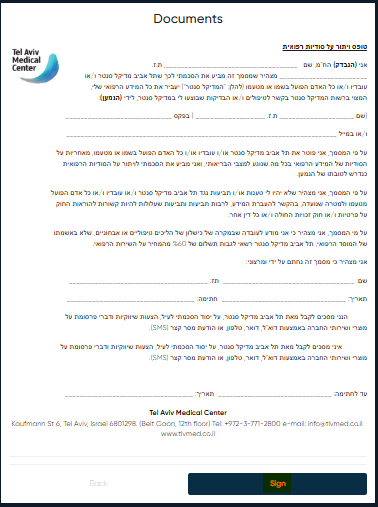
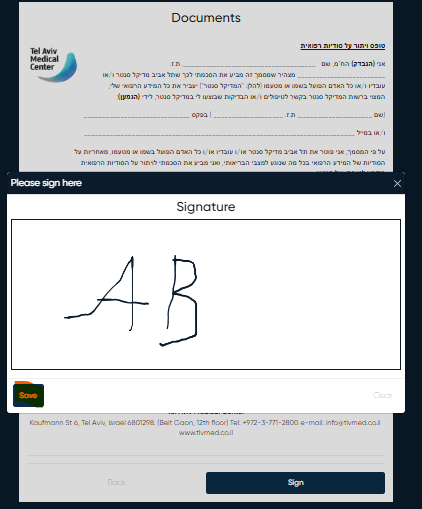
On the next window the Documents (for example Medical Confidentiality Waiver Form) will be shown to the client, he can check it, click Sign button, put his signature in appropriate window and click Save.
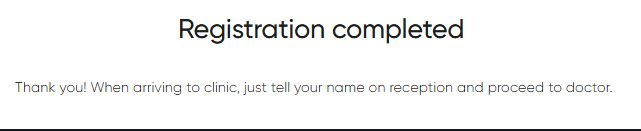
When all the process is finished client will see the message Registration completed.

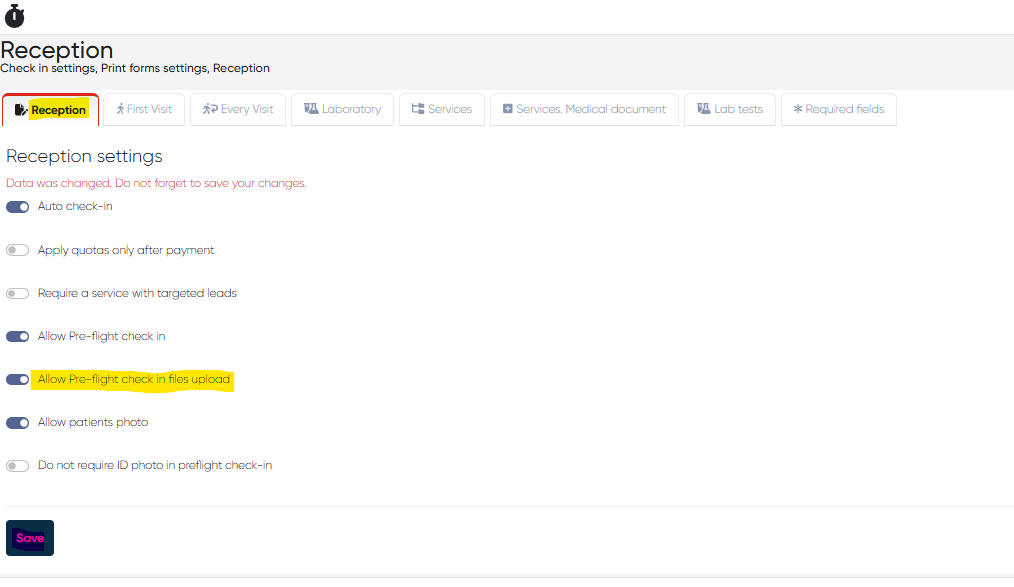
4. Additional settings
Allow/not allow Pre-flight Check-in files upload.
Navigation: Settings> Reception> Allow Pre-flight check in files upload
You can allow or not allow the client to upload files during the preflight check-in process. To change this option you need to go Settings screen, next to Reception settings and Reception tab in it and push the Allow Pre-flight check in files upload button and then click Save.
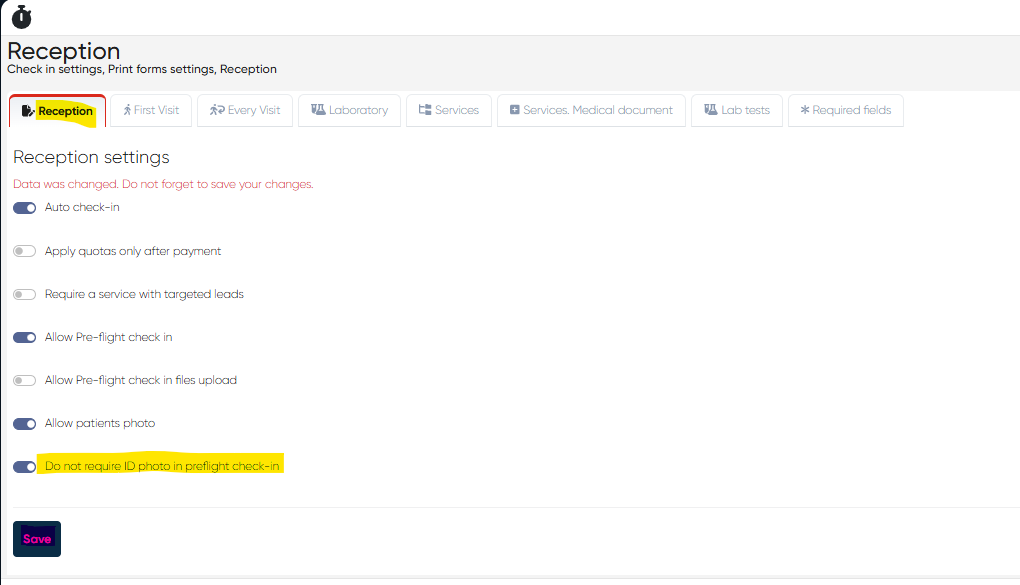
Do not require ID photo in pre-flight check-in
Navigation: Settings> Reception> Do not require ID photo in preflight check-in
You can turn on/off the requirement of client’s ID photo upload during the preflight check-in process. If ID photo is not required in preflight check-in, go to Settings screen, next to Reception settings and Reception tab in it and push the Do not require ID photo in pre-flight check-in button and then click Save.
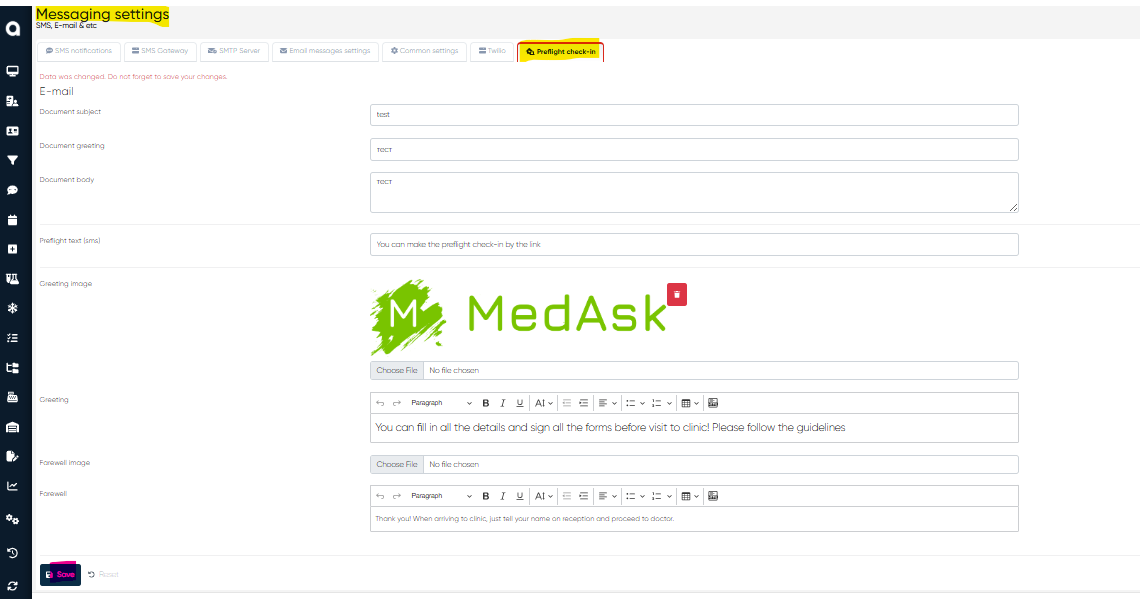
Pre-flight check-in E-mail/SMS template settings
Navigation: Settings> Messaging settings> Preflight check-in
You can change the template for pre-flight check-in E-mail/SMS as you want. To change the template, you need to go to Settings screen, Messaging settings, then to Pre-flight check-in tab. Here you can change the following components of the Pre-flight check-in process/ Pre-flight check-in E-mail/ SMS notification:
Document subject (for e-mail)
Document greeting (for e-mail)
Document body (for e-mail)
Pre-flight text (for SMS notification)
Greeting image (for the screen in the beginning of the Pre-flight check-in process)
Greeting (for the text on the screen in the beginning of the Pre-flight check-in process)
Farewell image (for the screen in the end of the Pre-flight check-in process)
Farewell (for the text on the screen at the end of the Pre-flight check-in process)
To apply all the changes, click Save button.
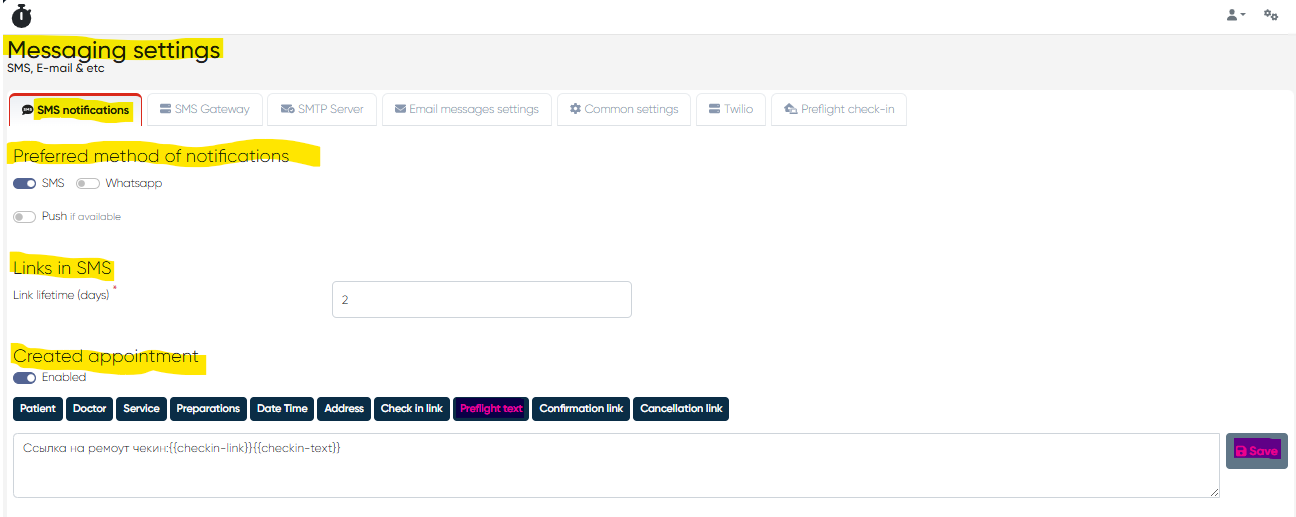
Pre-flight check-in notification settings
Navigation: Settings> Messaging settings> SMS notifications
You can change the settings of the pre-flight check-in notification as you wish. To change the settings, you need to go to Settings screen, then to Messaging settings and to SMS notifications tab in it.
Here you can change the following aspects of the Pre-flight check-in notification:
Preferred method of notification (SMS/Whatsapp/Push notification)
Link lifetime (days)
Pre-flight link and text format (to make changes, you need to click the Pre-flight text button below the Created appointment/Rescheduled appointment. To apply all the changes, do not forget to click Save on the right of the text bar).
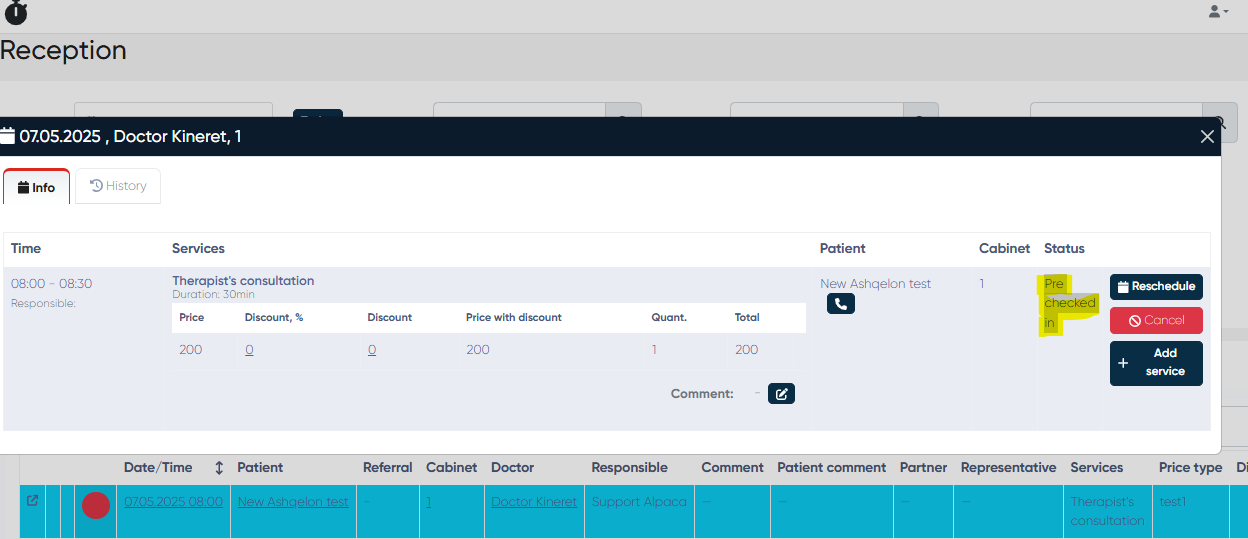
Final Status
After completion, the patient’s appointment status updates to “Pre-flight Checked-In”, and the status can be viewed on the Reception Screen as follows:
Reception> Schedule> Open Schedule button on the left of appointment string>Pre checked-in value should be visible in Status column