
PBX
PBX Section – CRM Module
The PBX (Private Branch Exchange) section in the CRM module allows your clinic to monitor and analyze all call-related activity, as well as link phone interactions with patient records through the internal Touch system. It includes configuration options, real-time call logs, and in-depth performance reports to help optimize communication workflows across the clinic.
1. Calltouch Settings
Navigation:Settings > Calltouch Settings
This configuration area is designed to enable Touch creation from incoming calls in the system. Despite the name, Calltouch here does not refer to an external call tracking platform, but rather a feature that connects incoming/outgoing calls with your CRM by generating "Touches" — system records of interactions that can be managed within the platform.

Settings Overview:
To activate the integration, toggle on Calltouch Service. Then fill in the following mandatory fields:
Call Data URL – The system’s internal endpoint for fetching call metadata.
Request Data URL – URL used by the system to request or exchange call data.
ID – Unique integration ID used to link the PBX data to system components.
Token – Authentication token used for secure data requests.
Time Lag – Time buffer (in minutes) to accommodate differences between the phone system and your clinic's server time.
Note: These settings are used for internal linkage and workflow automation, not external tracking services.
2. Callmarker Settings
Navigation:
Settings > Callmarker Settings
This configuration area is designed to enable Callmarker service integration. Unlike Calltouch, which focuses on linking calls to Touch records, Callmarker is used for classifying, tagging, and controlling the quality of calls within the clinic.
To activate the integration, toggle on Enable Callmarker Service.
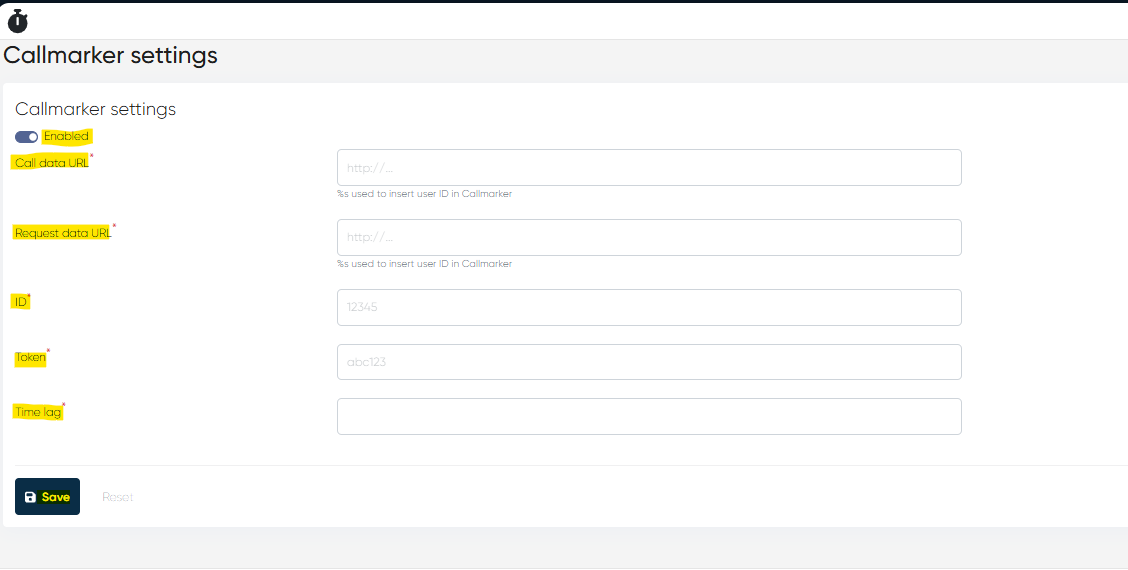
Settings Overview:
Call Data URL – URL endpoint where the system sends or fetches call metadata for analysis.
Found in your Callmarker account → Integration Settings > Call Data Endpoint.
Request Data URL – The request URL used by the CRM to push call-related data to Callmarker.
Found in your Callmarker account → API Settings > Request Endpoint.
ID – Unique integration ID assigned by Callmarker to your clinic’s account.
Found in your Callmarker account → Profile > Account Details > Integration ID.
Token – Secure authentication token that ensures safe communication between the CRM and Callmarker.
Found in your Callmarker account → Security Settings > API Token.
Time Lag – Buffer time (in minutes) to synchronize server call data timestamps with the CRM.
Set manually according to your clinic’s infrastructure and server timing differences.
Note: All fields are mandatory for correct data exchange. If not configured, call quality classification and tagging features will not be available.
3. Call Log
Navigation:Analytics > Call Log
The Call Log gives staff and admins a searchable table of all phone interactions recorded in the system. It's a key resource for reviewing call activity and listening to call recordings.
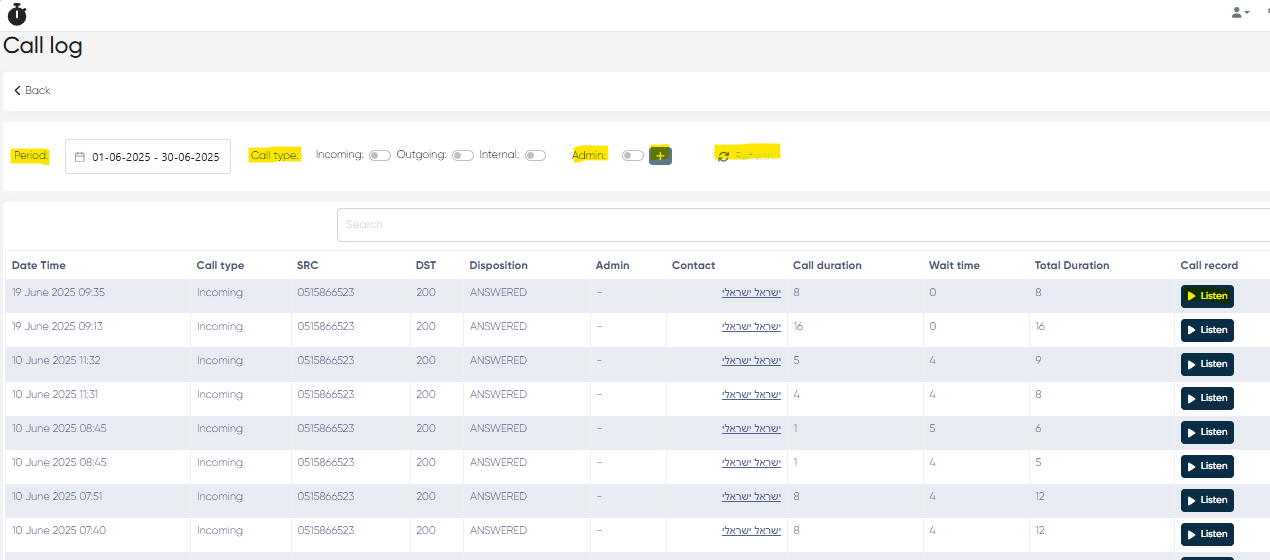
Table Columns:
Date Time – Timestamp of the call.
Call Type – One of: Incoming, Outgoing, or Internal.
SRC (Source) – Caller’s number.
DST (Destination) – Receiver’s number.
Disposition – Call status (e.g., Answered, Missed).
Admin – Staff member assigned to or who answered the call.
Contact – Patient or lead tied to the number.
Call Duration – Time spent speaking.
Wait Time – Time before the call was answered.
Total Duration – Sum of wait time and conversation.
Call Record – Listen button to play back the audio.
Filters and Controls:
Period – Date range filter via calendar.
Call Type Toggles – Filter by type of call.
Admin Filter – Toggle with + button to select specific staff members.
Search Bar – Quickly find data by keyword or number.
Refresh – Reload the table with updated call logs.
4. Calls Report
Navigation:Analytics > Calls Report
This area provides a summary and performance analysis of phone activity using tabular statistics and visualizations.
View Tabs:
Table – Shows metrics like call counts and durations.
Chart – Visual bar graphs of call volumes.
Dropdown Selector – Choose from:
By the Days
By the Hours
By the Employees and Days
By the Employees and Months
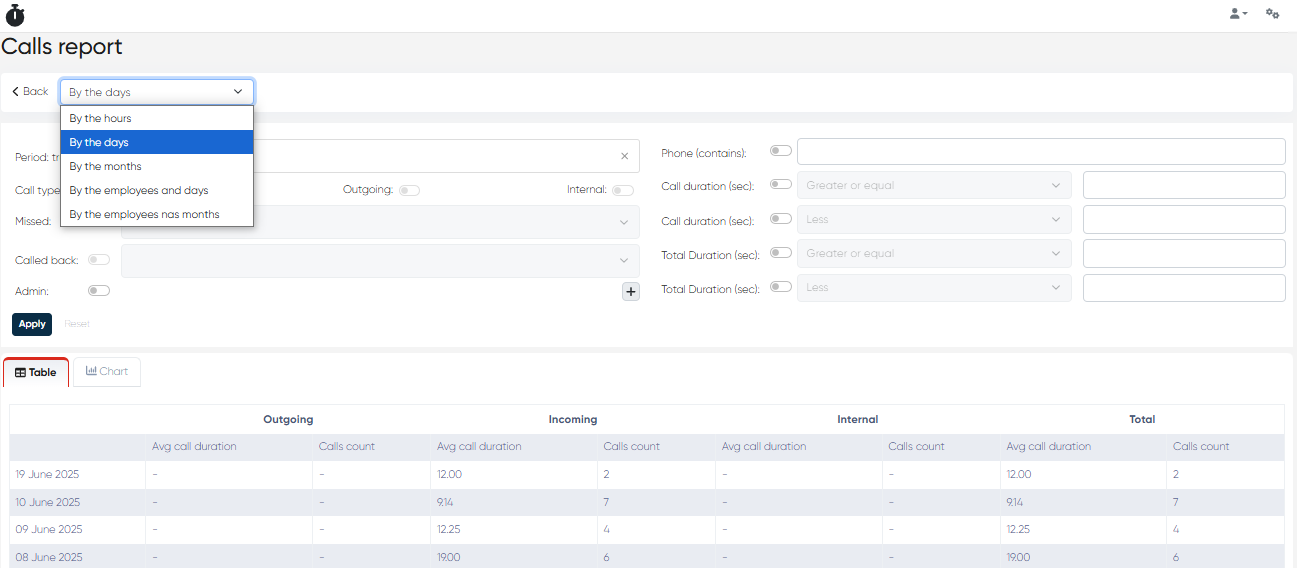
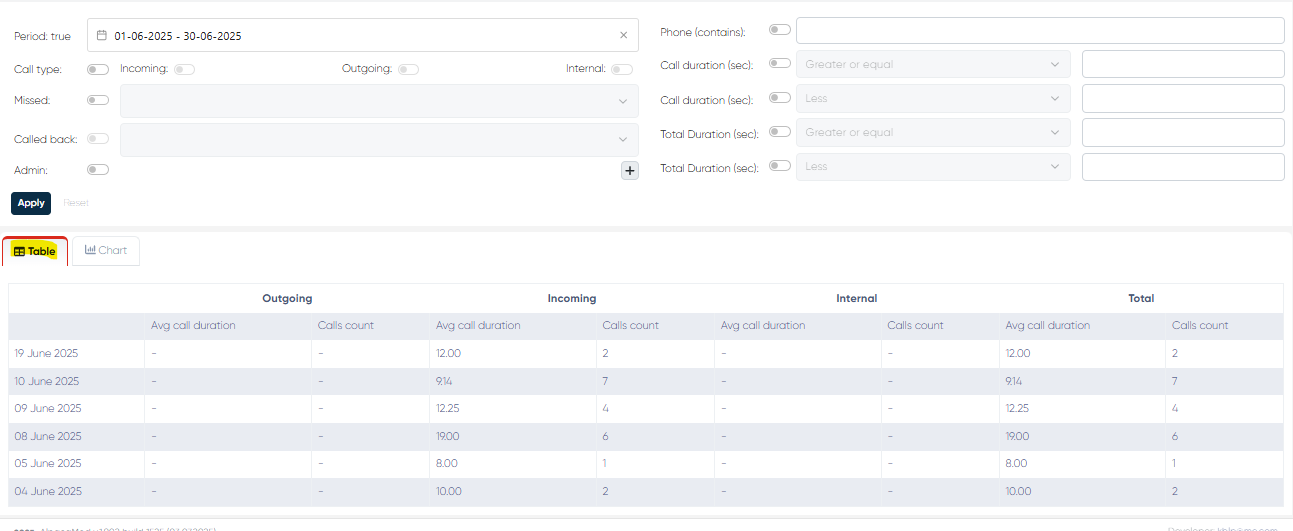
A) Table View (Default: By the Days)
Each row represents a specific day and aggregates data by call type.
Columns:
Outgoing – Avg Duration, Count
Incoming – Avg Duration, Count
Internal – Avg Duration, Count
Total – Overall averages and totals
This helps identify call traffic trends, response times, and staff engagement.
B) Chart View
A bar chart of calls per day based on selected filters helps visualize spikes and troughs in phone activity.
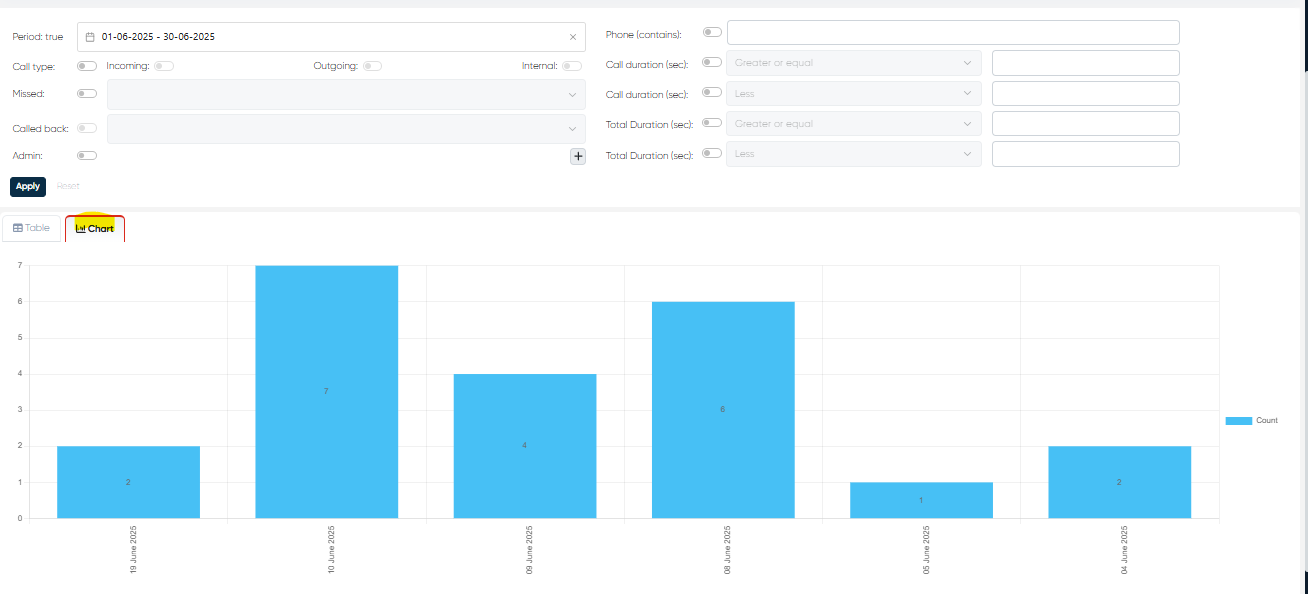
Shared Filters and Toggles (All Views):
Period – Define date range.
Call Type – Select type(s) of calls.
Missed – Filter missed calls only.
Called Back – Show only calls returned.
Admin – + to add specific staff to the filter.
Phone Contains – Search by partial number.
Call Duration (sec) – Set min/max ranges.
Total Duration (sec) – Set min/max ranges.
This module ensures comprehensive visibility and accountability for clinic calls, integrating them smoothly with patient management and CRM workflows. Let me know if you'd like this added to your manual or saved as part of your working document.
5. Shared Extensions and Call Notifications for Multiple Admins
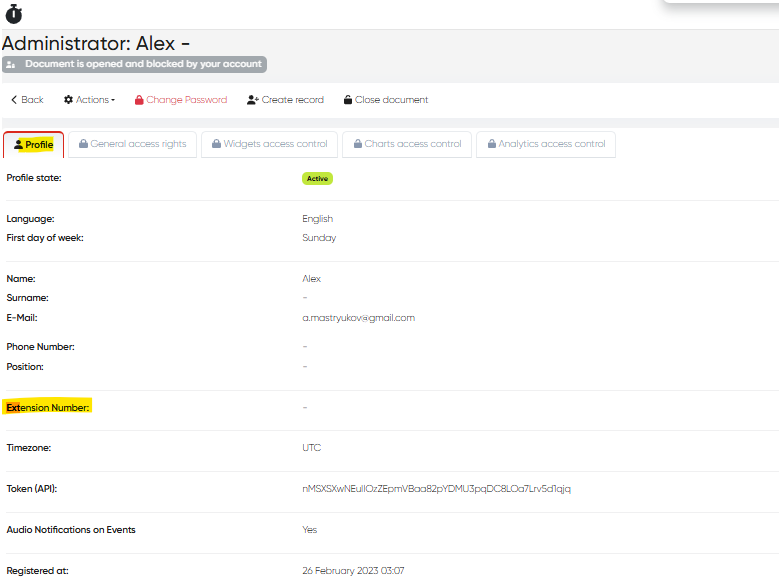
Navigation:Settings → Administrators → Select Admin → Profile → Extension Number
Overview
The Shared Extensions feature allows the same extension (local phone number) to be assigned to multiple administrators, enabling efficient team-based call handling in shared administrative or reception environments.
In addition, the system now provides real-time call pop-up notifications for all admins assigned to the same extension, ensuring that no incoming call goes unanswered and improving coordination among staff.
Functionality
Shared Extensions
Multiple admins can now share the same extension number in their profiles.
When an incoming call is directed to that extension, all assigned admins receive a touch-pop notification in real time.
This setup is ideal for shared reception desks, multi-operator support teams, or administrative groups handling high call volumes.
Call Notifications for Shared Extensions
When a call is received on a shared extension, a pop-up window appears across the system interface for all admins assigned to that extension.
If the caller’s number matches an existing patient record, the pop-up displays the patient’s name and key details, enabling immediate context for the responding admin.
If no match is found, the pop-up shows only the incoming phone number.
Any admin can answer, log, or manage the call, ensuring full coverage and fast response.
How to Configure Shared Extensions
Go to Settings → Administrators.
Select an existing admin from the list.
Open the Profile tab.
In the Extension Number field, enter the desired local number.
Assign the same extension to multiple admins as needed.
Save changes — all selected admins will now share this extension.
Benefits
Improved responsiveness — incoming calls are visible to all relevant admins.
Better team coordination — shared extension coverage across multiple users.
Reduced missed calls — every admin receives immediate pop-up notifications.
Enhanced patient experience — calls from known patients display their records automatically.
Notes
Pop-up notifications appear throughout the system, regardless of the active module.
Only one admin needs to answer a shared call; others’ notifications will automatically close once the call is handled.
Caller ID matching depends on the accuracy of patient phone numbers stored in the system.
To maintain privacy and performance, shared extensions should only be assigned within relevant administrative teams.