
Payments
The Payments section enables clinic staff to efficiently process and manage payments for patient appointments directly within the Reception module. It supports various payment types and configurable settings to fit your clinic’s financial workflow.
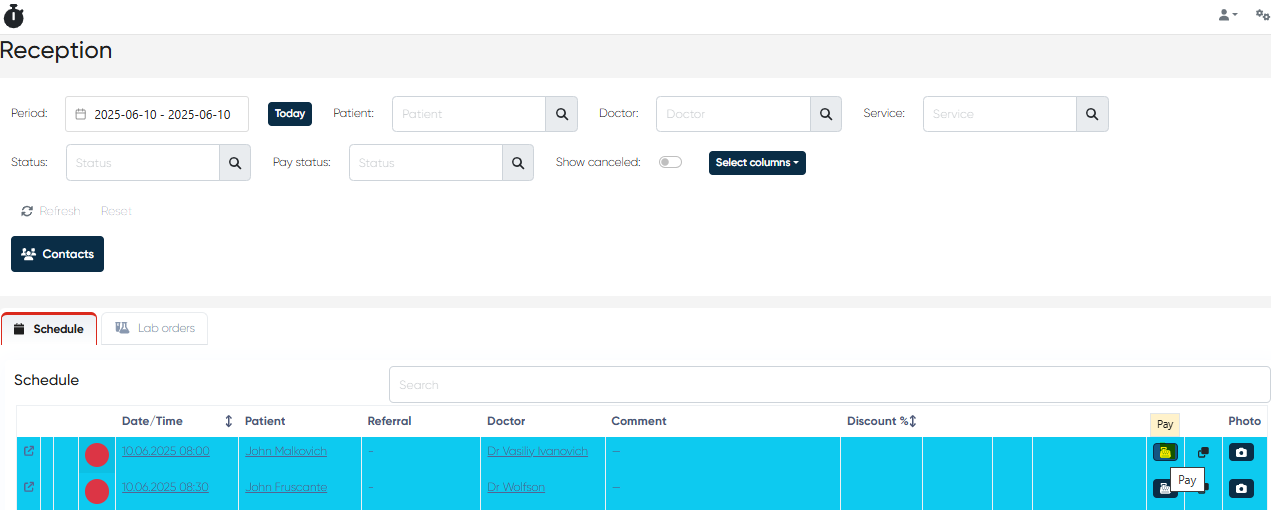
1. Accessing the Payment Window
Payments can only be processed for appointments where check-in has already been completed.
To initiate a payment, locate the desired appointment in the Schedule tab.
Click the Pay button adjacent to the appointment details.
This opens the Payment Window, where the payment process begins.
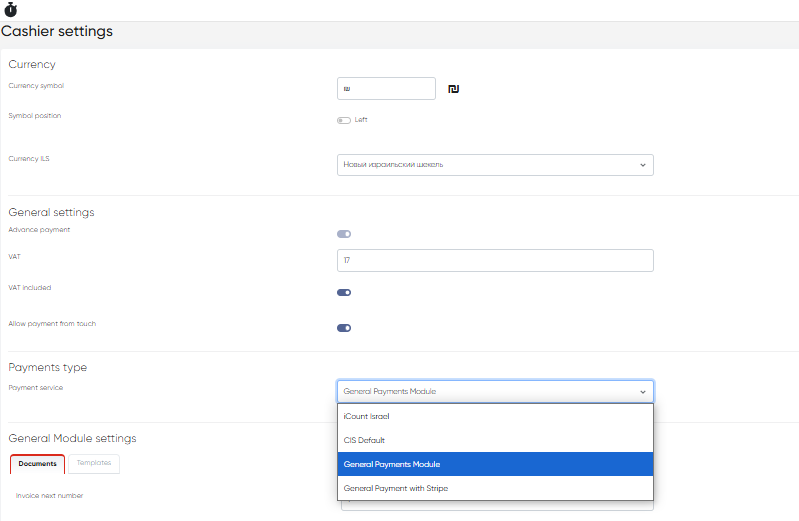
2. Payment Settings
Navigation: Settings>Cashier settings
The system offers configurable options to customize payment handling:
Currency Settings
Define the currency symbol (e.g., $, €, £).
Choose the symbol position (before or after the amount).
Set the currency name for display throughout the system.
General Payment Settings
VAT Percentage – Specify the VAT rate applicable to services.
Advance Payment – Enable or disable advance payment requirements.
VAT Included – Choose whether prices include VAT or exclude it.
Allow payment from touch – Allow or disallow direct payments from the Touch interface.
Payment Type Selection
Choose the default payment type from options such as:
iCount
General Payments Module
CIS Default
General Payments with Stripe Integration
Specific Settings for Payment Types
Configure individual parameters for each payment method, including transaction fees, API keys, and confirmation processes.
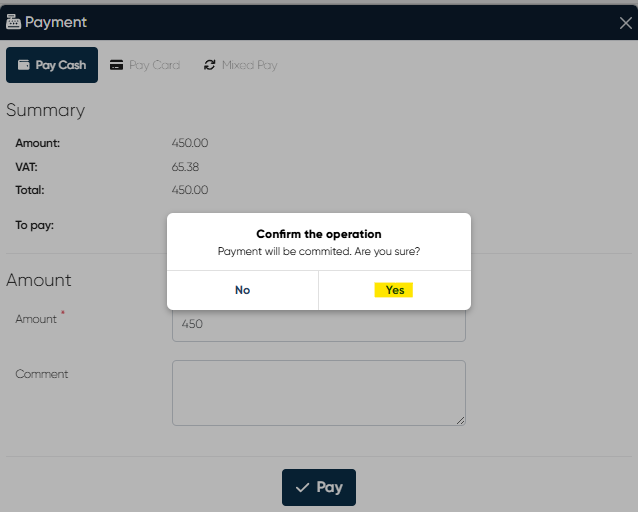
3. Making a Payment
After clicking Pay near the appointment, the Payment Window prompts you to select a payment method such as:
Cash
Credit Card
Deposit (prepaid patient funds)
Mixed Pay (combining multiple payment methods)
Others, as configured in your system
Enter the payment amount (if partial payment is allowed).
Click the Pay button to proceed.
Confirm the payment in the pop-up dialog to finalize the transaction.
Upon successful payment, the system will update the appointment status and mark it accordingly (e.g., payment confirmed).

Summary
The Payments section in the Reception module streamlines the financial process by offering flexible payment options and comprehensive settings. It ensures accurate payment recording, supports multiple payment types, and integrates VAT and other fiscal requirements to fit your clinic’s needs.