
Manual templates
Manual Templates – LIS Module
The Manual Templates section allows you to customize the appearance and structure of laboratory documents, such as lab orders and test results, as well as manage barcode settings and integrations with external laboratory systems. These templates define the standard print layout for all laboratory documentation generated by the system.
Navigation
Settings > Laboratory Settings
Inside the Laboratory Settings, you will find five tabs to manage templates and related configurations:
1. Order Tab – Lab Orders Template
This tab allows you to configure the template used for printing or generating laboratory orders.
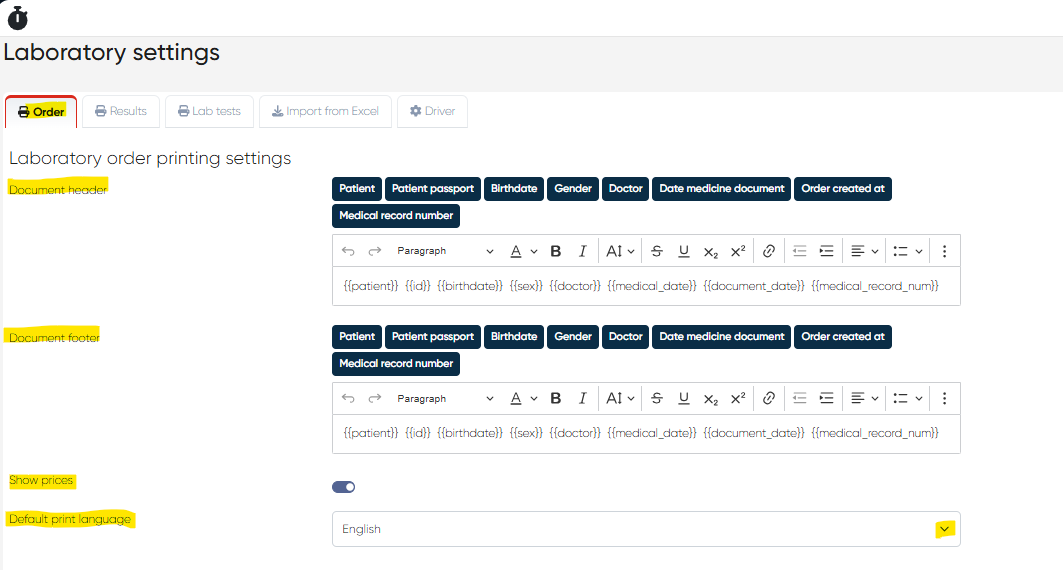
Elements Available:
Document Header:
A rich-text formatting panel for entering static text or clinic branding.
Use configurable fields (placeholders) to dynamically insert patient and order details:
{{patient}}– Patient’s full name{{id}}– Patient’s ID number{{birthdate}}– Date of birth{{sex}}– Gender{{doctor}}– Referring or attending doctor{{medical_date}}– Appointment or test date{{document_date}}– Document creation date{{medical_record_num}}– Patient’s medical record number
Document Footer:
Same formatting panel and configurable fields as the header.
Use for clinic contact info, disclaimers, or additional notes.
Show Prices Toggle:
Enable this to display prices for lab tests in the order printout.
Disable to generate a non-pricing version.
Default Print Language Dropdown:
Choose the default language for generated order documents (e.g., English, Hebrew).
2. Results Tab – Lab Test Results Template
This tab configures the template for printing lab test results.
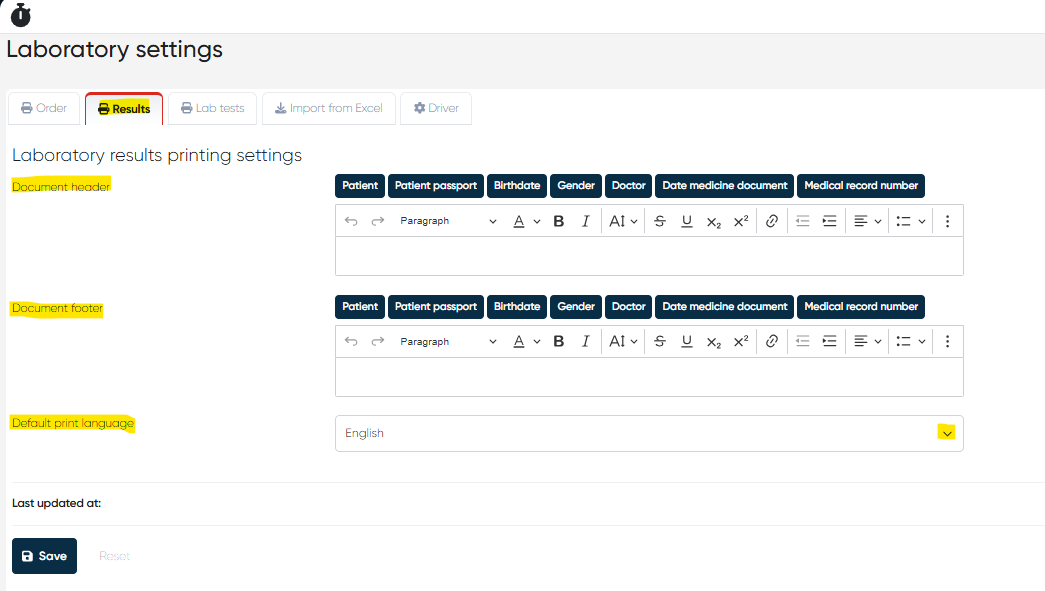
Elements Available:
Document Header:
Rich-text formatting panel with placeholders:
{{patient}},{{id}},{{birthdate}},{{sex}},{{doctor}},{{medical_date}},{{medical_record_num}}
Document Footer:
Same formatting panel and placeholders as the header.
Default Print Language Dropdown:
Sets the default output language for results documents.
3. Lab Tests Tab – Barcode Settings
This tab defines the barcode parameters printed on lab test labels.
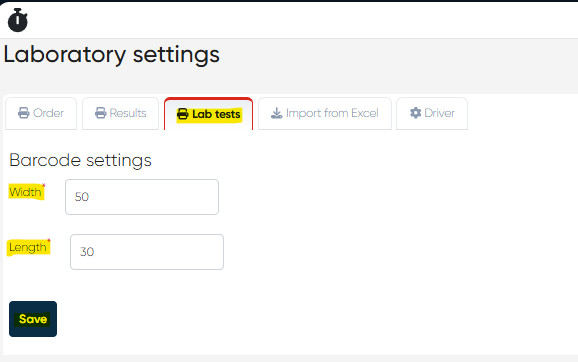
Width: Set the barcode width (in millimeters).
Length: Set the barcode length for proper label alignment.
(Used for physical labeling of samples in your laboratory workflow.)
4. Import from Excel Tab – Bulk Upload of Dictionaries
This section allows you to import multiple LIS dictionaries via an Excel file to speed up setup or bulk updates.
Supported dictionaries:
Equipment
Containers
Drivers
Lab test groups
Lab Tests
Tests (physical)
Units
Biomaterials
Norms
Steps:
Prepare the file using the required format (download template available).
Click Upload File.
The system processes the data and updates or adds entries to your LIS dictionaries.
5. Driver Tab – External Laboratory Manager Connection
This tab is used to connect your LIS to an external Laboratory Manager system.

Driver GUID:
Enter the unique Driver GUID provided by your external lab system vendor.
This enables data exchange and automatic synchronization between the systems.
Summary Table
Tab | Purpose |
|---|---|
Order | Configure lab order print template (header, footer, prices) |
Results | Configure lab results template (header, footer, language) |
Lab Tests | Define barcode size for test labels |
Import from Excel | Bulk import LIS dictionaries |
Driver | Connect to the external Laboratory Manager via GUID |