
Cashier management
Cashier Management – Administration
1) Cashier Management
Navigation: Main menu > Cashier
This section contains two main tabs for financial operations:
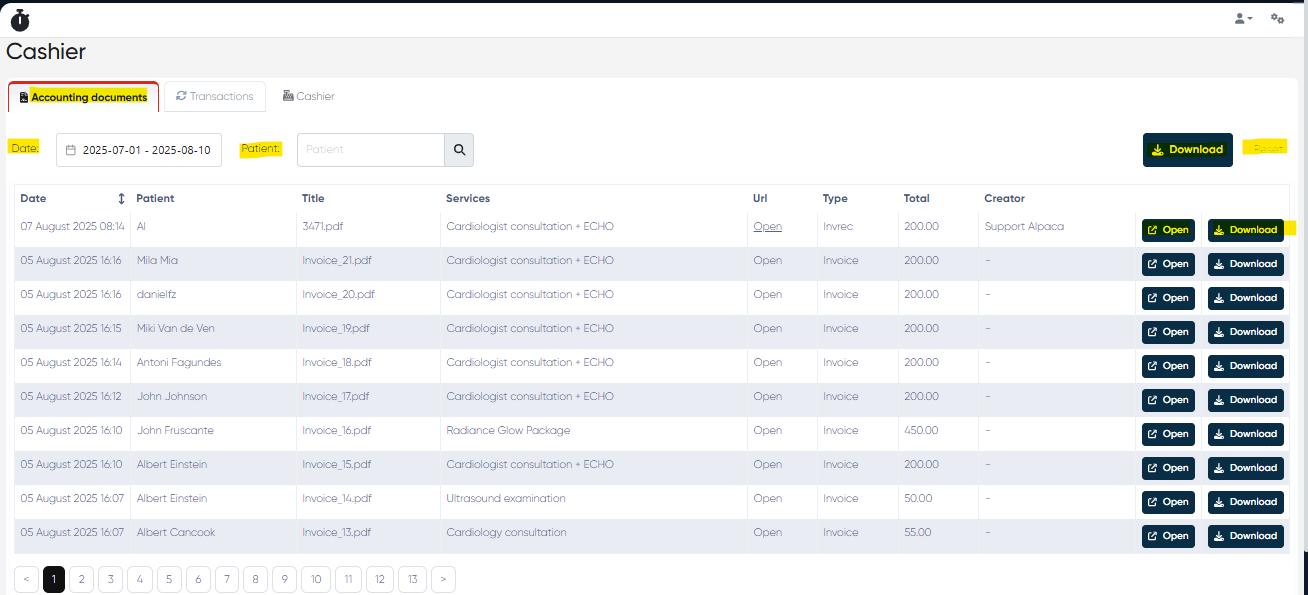
a) Accounting Documents
Displays a list of all accounting documents in the system.
Table Columns:
Date – date the document was issued.
Patient – name of the patient the document belongs to.
Title – document title.
Services – list of services covered by the document.
URL – link to the document.
Type – type of accounting document (invoice, receipt, etc.).
Total – total document amount.
Creator – admin who created the document.
Open – button to view the document in the system.
Download – button to download the document file.
Filters & Actions:
Date selector – filter documents by date range.
Patient – filter by patient name.
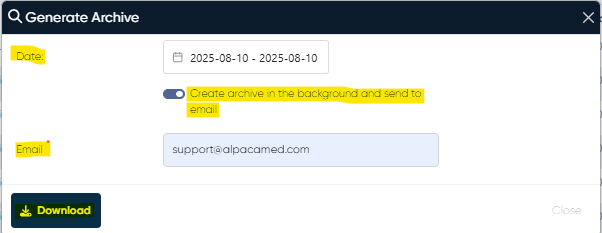
Download – download the full archive of accounting documents for the selected period.
Opens a dialogue window where you can:
Download immediately.
Create the archive in the background and send it to your email.
Reset – clear all filters.
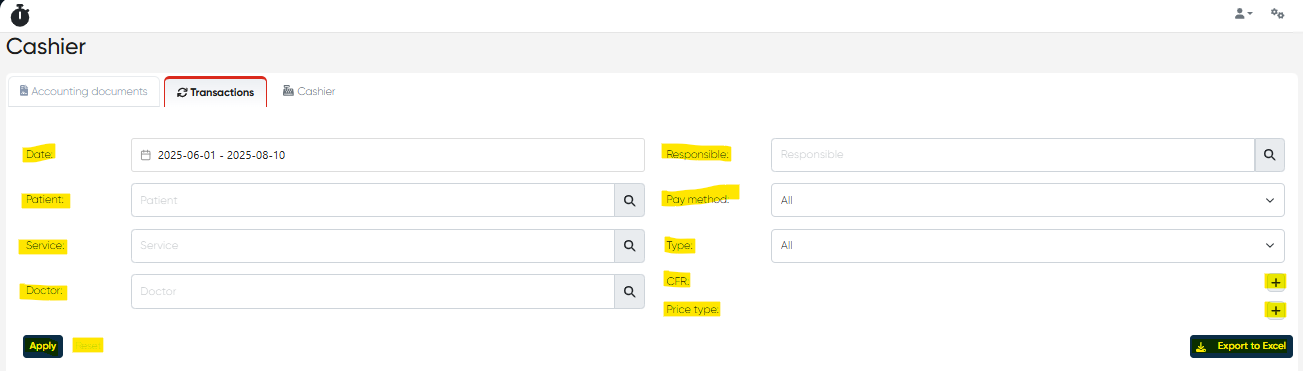
b) Transactions Tab
Provides a summary and detailed list of financial transactions.
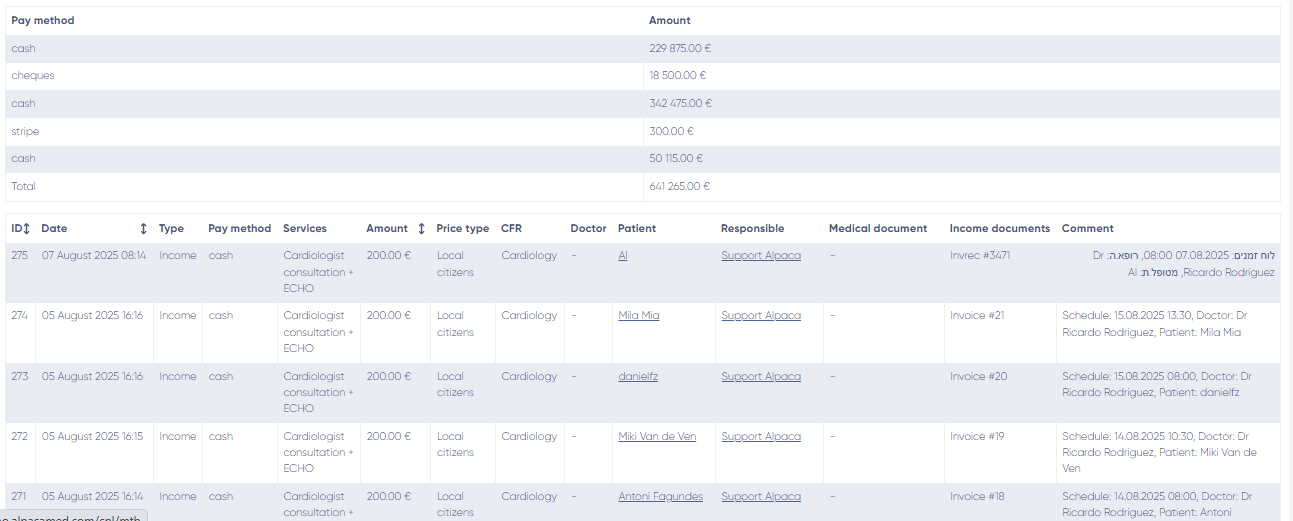
Summary Table:
Pay Method – e.g., cash, cheque, Stripe, card, insurance, partner, web-checkout, deposit funds, etc.
Amount – total per each payment method.
Total – grand total across all payment methods.
Detailed Transaction List Columns:
ID – transaction ID.
Date – date of the transaction.
Type – income or expense.
Pay Method – the payment method used.
Services – services covered.
Amount – payment amount.
Price Type – price category used.
CFR – unique financial reference code.
Doctor – attending doctor.
Patient – patient name.
Responsible – staff responsible for the transaction.
Medical Document – link to related medical document.
Income Document – link to related income document.
Comment – any additional notes.
Filters & Actions:
Date, Patient, Service, Doctor, Responsible, Pay Method, Type, CFR (multi-select), Price Type (multi-select).
Apply – apply selected filters.
Reset – clear filters.
Export to Excel – export filtered results.
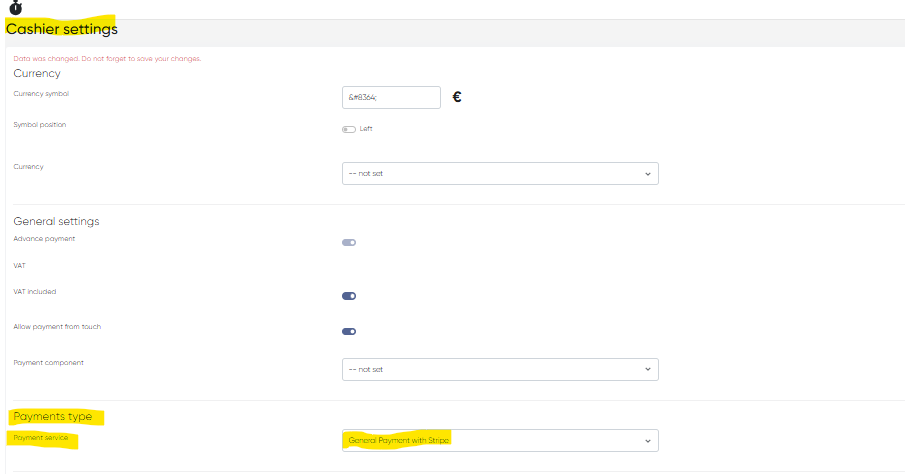
2) Cashier Settings
Navigation: Settings > Cashier settings
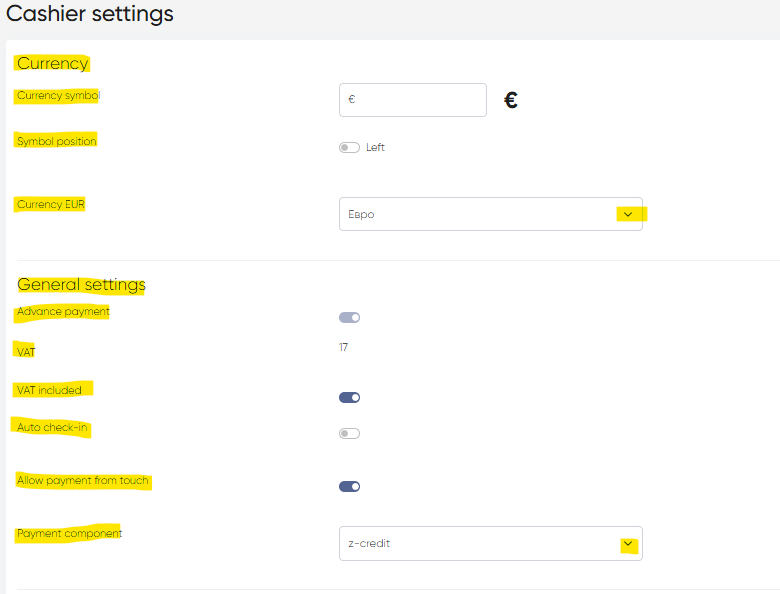
a) Currency Settings
Currency Symbol – enter the symbol (e.g., $, €, ₪).
Symbol Position – choose left or right of the amount.
Currency Dropdown – select the system currency.
b) General Settings
Advance Payment – toggle on/off.
VAT (%) – set VAT rate.
VAT Included – toggle whether VAT is included in prices.
Auto Check-in – toggle automatic patient check-in after payment.
Allow Payment from Touch – toggle allowing payments directly from a patient touch record.
Payment Component Dropdown – select payment provider: Z-Credit, Not Set, etc.
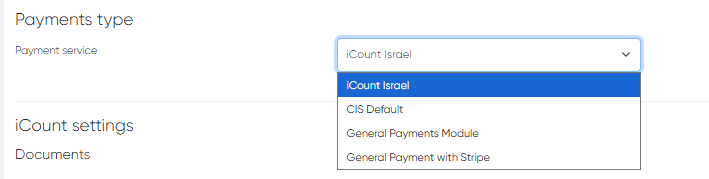
c) Payment Type
Dropdown to select the payment provider:
iCount
CIS Default
General Payment Module
General Payment with Stripe
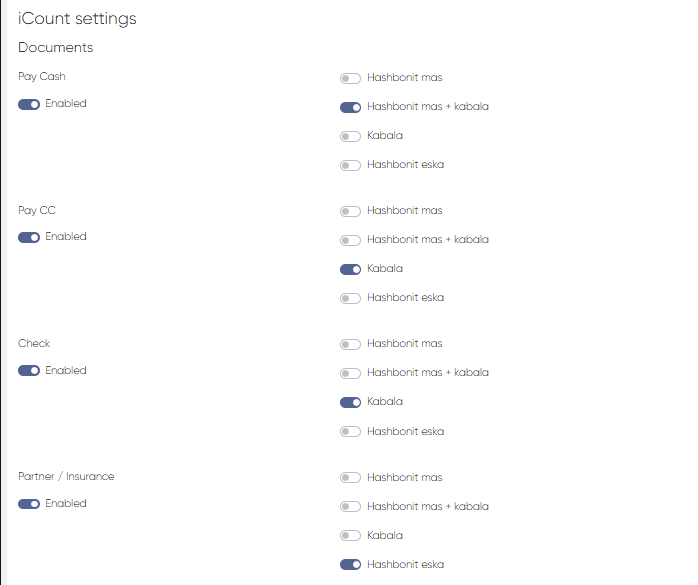
d) Payment Type–Based Settings
iCount Integration
Document Toggles – enable/disable each payment method:
Pay Cash
Pay Credit Card (CC)
Cheque
Partner/Insurance
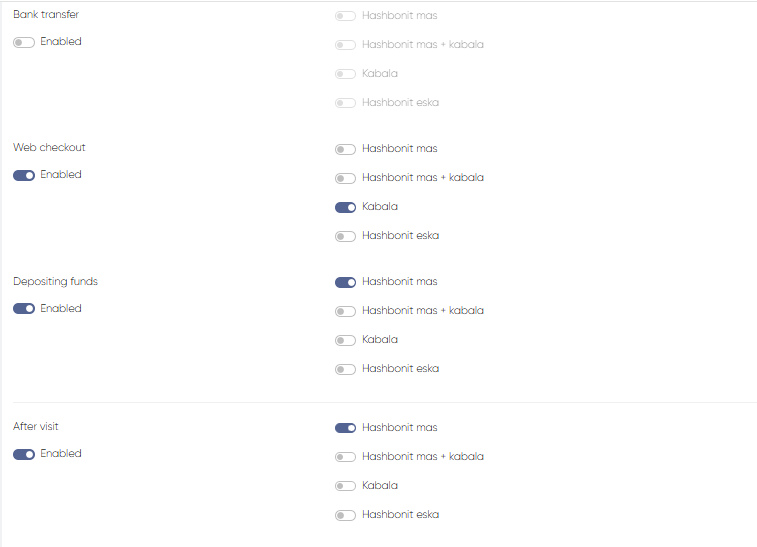
Bank Transfer
Web Checkout
Depositing Funds
After Visit
Accounting Documents – enable/disable per payment method:
Hashbonit Mas (Invoice)
Hashbonit Mas + Kabala (Invoice + Receipt)
Kabala (Receipt)
Hashbonit Eska (Proforma Invoice)
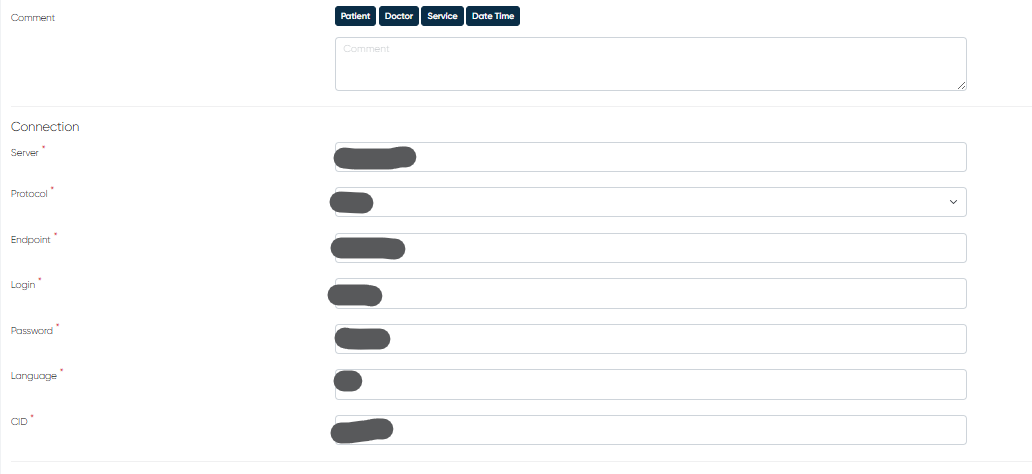
Comment Field – supports custom placeholders:
{{patient}} {{doctor}} {{service}} {{date-time}}
Connection Settings (found in your iCount dashboard under “Account Settings > API”):
Server – API server URL provided by iCount.
Endpoint – API endpoint for your account.
Login – iCount account username.
Password – iCount account password.
Language – language for generated documents.
CID – your company’s unique ID in iCount.
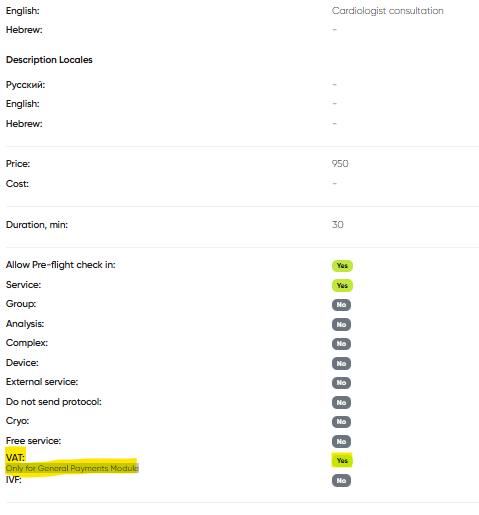
VAT Enable/Disable Option in Service Settings (for GPM)
Navigation: Directories → Services → Actions → Edit → Service Settings
Overview
The VAT Enable/Disable option allows administrators to define whether Value-Added Tax (VAT) is applied to individual services within the General Payments module.
This feature provides flexibility for clinics that operate under different tax regulations or handle mixed-tax services (e.g., medical vs. non-medical).
Functionality
By default, VAT is enabled for all services in the system, meaning that standard VAT rates are included automatically when calculating totals in the General Payments module.
When the option is disabled, the system assigns 0% VAT for the selected service during payment processing.
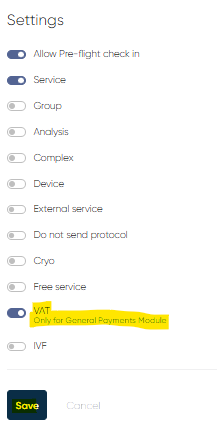
How to Configure
Navigate to Directories → Services.
Find the service you want to modify and click Actions → Edit.
In the Service Settings section, locate the VAT (General Payments) option.
Toggle the option off to disable VAT for this service.
Click Save to apply changes.
Example Use Cases
Clinics offering tax-exempt procedures (e.g., certain medical services).
International operations where VAT laws differ per branch or country.
Services that are internally charged or non-billable.
Notes
This setting affects only the General Payments module; VAT handling in Billing or Finance modules may be configured separately.
Changes take effect immediately for all new payments created after saving the modification.
To maintain consistent accounting, it’s recommended that only system administrators or finance managers adjust VAT settings.
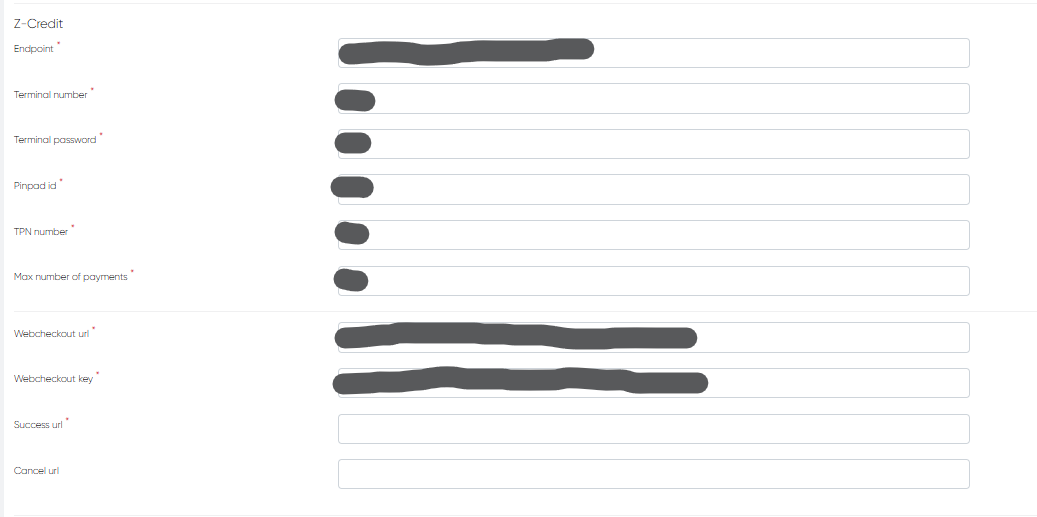
Z-Credit Integration
(Settings are available inside your Z-Credit account, under “API & Integration Settings”)
Endpoint – provided by Z-Credit.
Terminal Number – assigned by Z-Credit.
Terminal Password – password for your terminal.
Pinpad ID – if applicable for your device.
TPN Number – transaction processing number.
Max Number of Payments – set installment limits.
Web Checkout URL – link to Z-Credit’s payment form.
Web Checkout Key – authentication key.
Success URL – redirect page after successful payment.
Cancel URL – redirect page if the payment is cancelled.
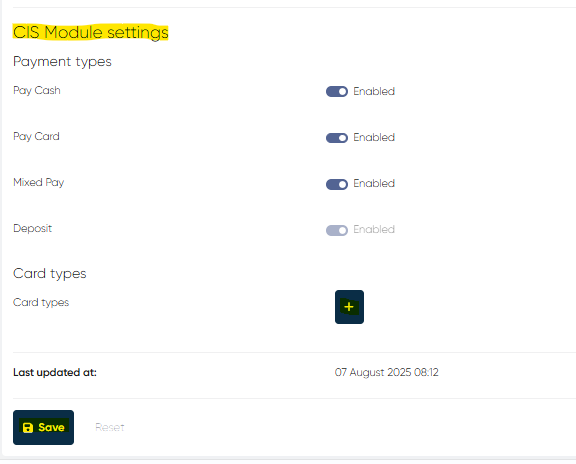
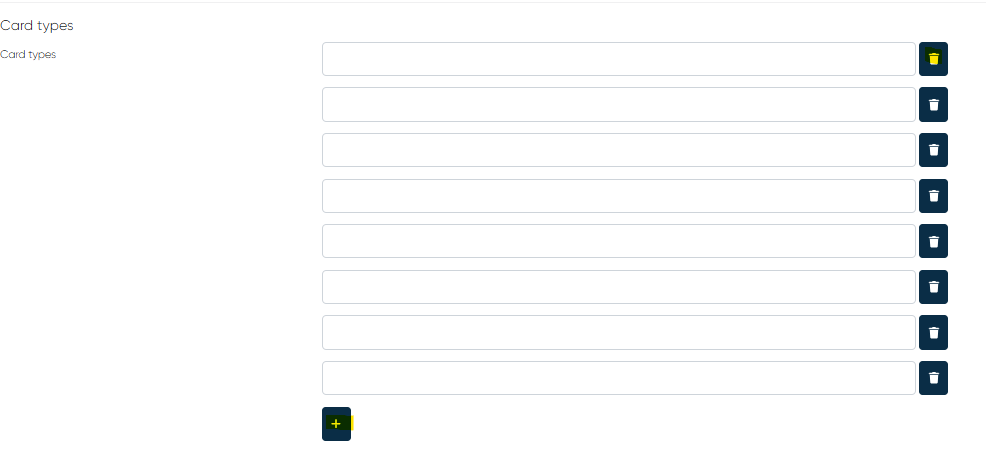
CIS Default
Payment Types Toggles – Pay Cash, Pay Card, Mixed Pay, Deposit.
Card Types Selector – create and name card types as needed.
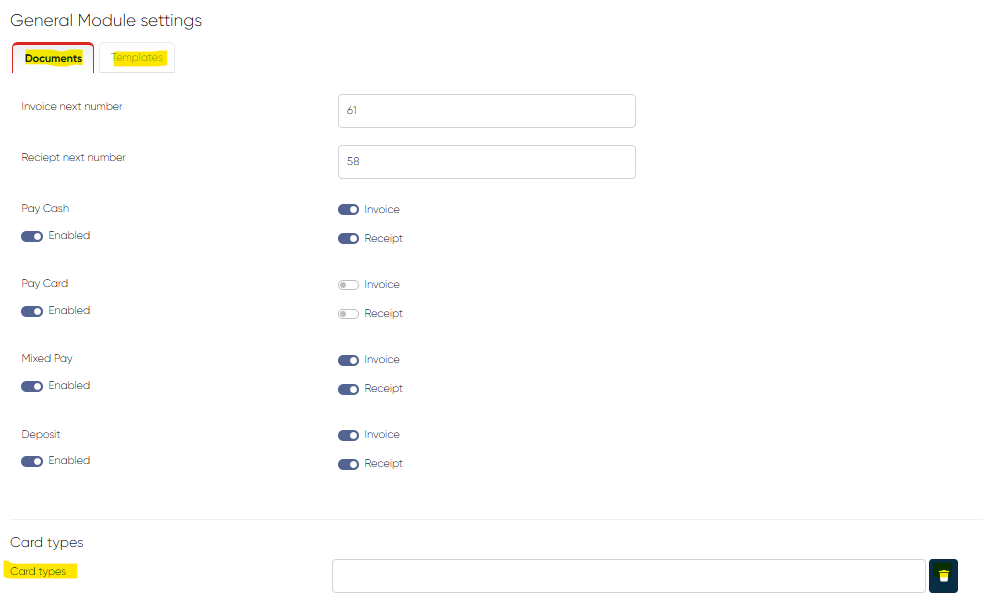
General Payment Module
Documents Tab
Receipt Next Number – next available receipt number.
Invoice Next Number – next available invoice number.
Payment Method Toggles – Pay Cash, Pay Card, Mixed Pay, Deposit.
Invoice/Receipt Toggles – enable per method.
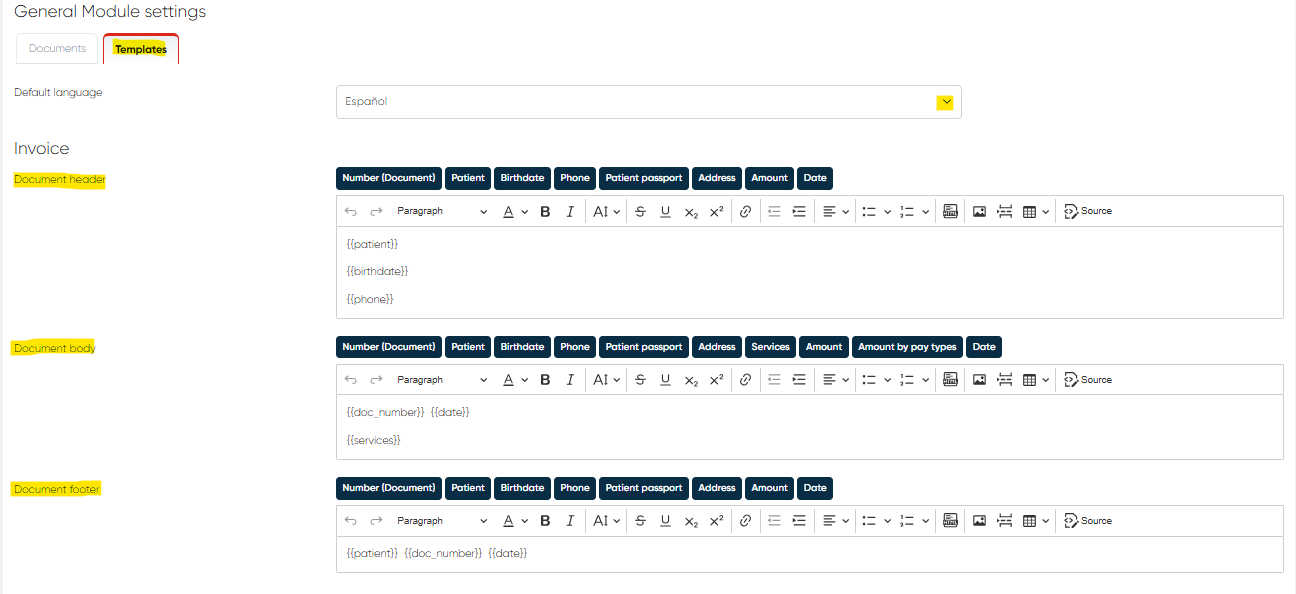
Templates Tab – Standard formatting panels with customizable fields:
Invoice:
Header, Body, Footer – can include placeholders such as
{{doc_number}},{{patient}},{{services}},{{amount}},{{date}}, etc.
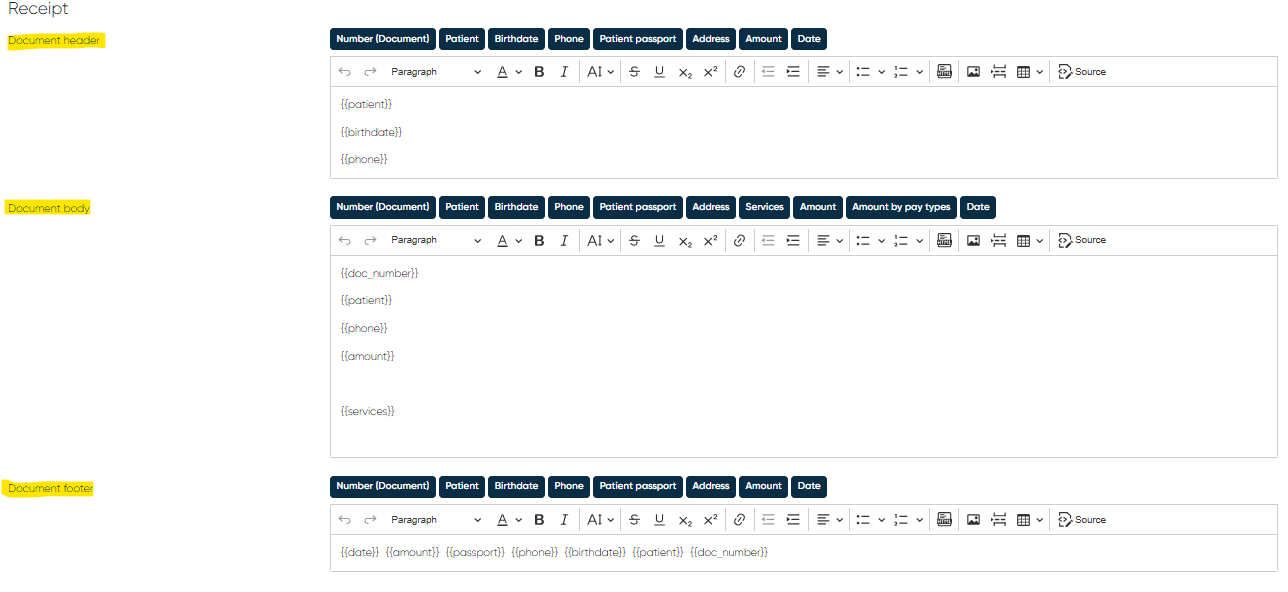
Receipt:
Header, Body, Footer – same placeholder structure as Invoice.
Card Types Selector – create/delete card types.
VAT Enable/Disable Option in Service Settings
Module: General Payments → Service Configuration
Navigation: Directories → Services → Actions → Edit → Service Settings
Overview
The VAT Enable/Disable option allows administrators to define whether Value-Added Tax (VAT) is applied to individual services within the General Payments module.
This feature provides flexibility for clinics that operate under different tax regulations or handle mixed-tax services (e.g., medical vs. non-medical).
Functionality
By default, VAT is enabled for all services in the system, meaning that standard VAT rates are included automatically when calculating totals in the General Payments module.
When the option is disabled, the system assigns 0% VAT for the selected service during payment processing.
How to Configure
Navigate to Directories → Services.
Find the service you want to modify and click Actions → Edit.
In the Service Settings section, locate the VAT (General Payments) option.
Toggle the option off to disable VAT for this service.
Click Save to apply changes.
Example Use Cases
Clinics offering tax-exempt procedures (e.g., certain medical services).
International operations where VAT laws differ per branch or country.
Services that are internally charged or non-billable.
Notes
This setting affects only the General Payments module; VAT handling in Billing or Finance modules may be configured separately.
Changes take effect immediately for all new payments created after saving the modification.
To maintain consistent accounting, it’s recommended that only system administrators or finance managers adjust VAT settings.
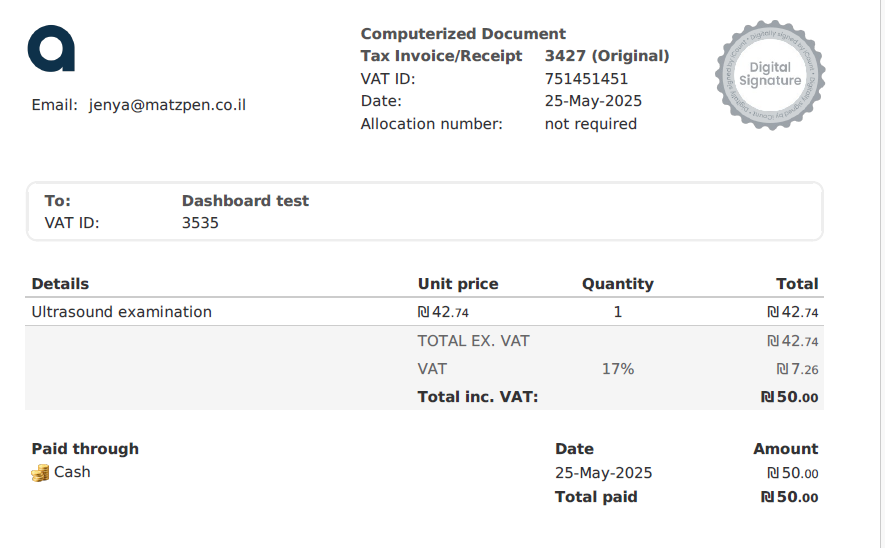
Reworked Printing of Documents (Invoice / Receipt)
Navigation:Main Menu → Finance → General Payments
Overview
The document printing functionality in the General Payments module has been reworked to improve the accuracy, clarity, and completeness of printed financial documents, including invoices and receipts.
These enhancements ensure that every printed document reflects up-to-date payment information and complies with internal accounting and audit standards.
Key Improvements
a. Accurate VAT Calculation
Printed invoices and receipts now apply VAT values based on each service’s VAT Enable/Disable status in the Service Settings.
VAT is displayed with correct percentage and calculated total.
Zero-VAT services are clearly indicated, ensuring tax compliance across varying service types.
b. Discount Information
Discounts applied to payments are now transparently reflected in printed documents.
Each discount amount and percentage is displayed.
The final payable total after discounts is shown clearly at the bottom of the document.
c. Payment Type Breakdown
Each printed invoice or receipt now includes a detailed breakdown of payment types used in the transaction (e.g., cash, card, bank transfer).
Each payment method lists its corresponding amount.
Ensures clarity when patients use multiple payment methods.
Benefits
Improved financial transparency for patients and accounting teams.
Compliance-ready printouts that meet clinic and audit requirements.
Streamlined reconciliation for finance and administration staff.
Notes
The improvements apply automatically to all invoices and receipts printed after the update.
Custom print templates may need minor layout adjustments to fully align with the new output format.
VAT values are derived directly from each service’s configuration in Directories → Services.
General Payment with Stripe
Navigation:Main Menu → Settings → Cashier Settings → Payments Type → Payment Service → General Payment with Stripe
Overview
The Stripe Payments Integration enables secure online payments directly through the clinic management system.
This feature enhances both client experience and financial operations by allowing clinics to process payments digitally, issue invoices and receipts automatically, and support a variety of payment workflows — from full cash equivalents to mixed payments.
Stripe integration ensures accurate financial documentation, supports compliance, and simplifies reconciliation between online and in-clinic transactions.
Key Capabilities
Secure online payment processing via Stripe.
Automatic invoice and receipt generation after successful transactions.
Support for multiple payment modes, each fully configurable:
Pay Cash
Stripe
Mixed Pay
Granular enable/disable controls for each payment type.
Automated synchronization with cashier and finance reports.
Enabling Stripe Payments
Navigate to Main Menu → Settings → Cashier Settings → Payments Type → Payment Service.
Select General Payment with Stripe.
Toggle Enable to activate Stripe integration for your clinic.
Configure your preferred payment modes (see below).
Save the settings.
Stripe Payment Modes
Each clinic can choose one or more payment modes depending on internal policy and workflow needs.
a. Pay Cash (incl. Invoice, Receipt)
Stripe transactions are recorded as cash-equivalent payments.
When enabled:
An Invoice is created for the full service amount.
A Receipt is generated immediately after successful payment.
Use case: full-sum, single-method payments made instantly online.
b. Stripe (incl. Invoice, Receipt)
Stripe appears as a dedicated payment method in the General Payments module.
When enabled:
Stripe is shown as a standalone payment option during checkout.
An Invoice and Receipt are automatically issued.
Use case: standard online card payments through Stripe.
c. Mixed Pay (incl. Invoice, Receipt)
Supports split payments, allowing Stripe to be combined with other methods (e.g., deposit, cash, or bank transfer).
When enabled:
An Invoice is created for the full amount.
Separate Receipts are issued for each payment source.
Payment breakdown is fully logged.
Use case: flexible billing scenarios with multiple payment contributors.
All three modes can be enabled or disabled independently, offering precise control over how Stripe transactions are processed and recorded.
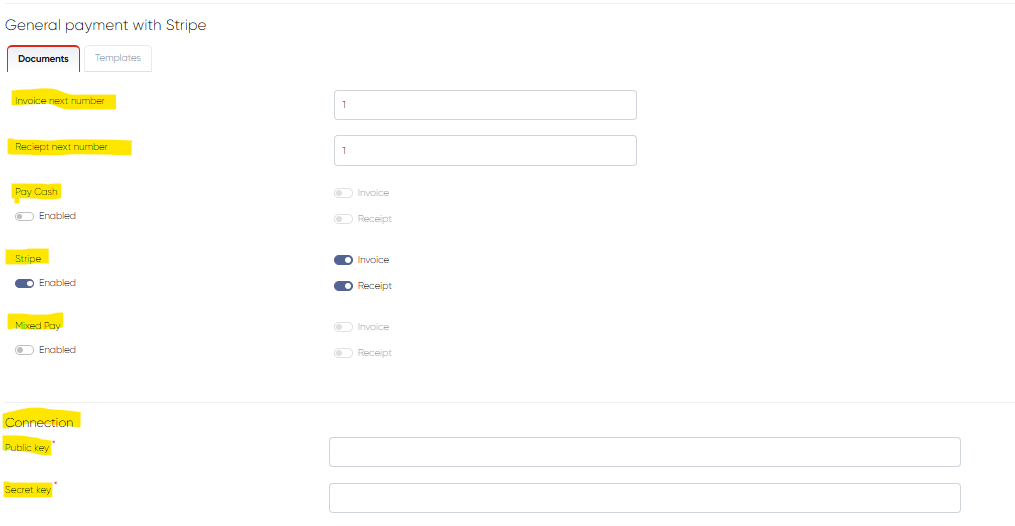
Stripe API Key Configuration
To connect your Stripe account to the system:
Log in to your Stripe Dashboard.
Go to Developers → API Keys.
Copy your:
Public Key (
pk_live_...)Secret Key (
sk_live_...)
In the clinic management system, navigate to:
Settings → Integrations → StripeEnter the credentials into the fields:
Stripe Public Key
Stripe Secret Key
Click Save.
Important: Incorrect or inactive keys will block payment processing. Keep these keys confidential and verify access before enabling payments.
Invoice & Receipt Numbering Settings
To maintain proper financial continuity and comply with accounting standards:
Location:Main Menu → Settings → Cashier Settings → Payments Type → Payment Service → General Payment with Stripe
You can configure:
Invoice Next Number – defines the next invoice number sequence.
Receipt Next Number – defines the next receipt number sequence.
This ensures document numbering aligns with your internal accounting system or local regulations.
Benefits
End-to-end online payment workflow within the system.
No third-party redirects — fully integrated checkout.
Improved patient experience through convenient and secure payment options.
Automated documentation with accurate, audit-ready invoices and receipts.
Flexible configuration supporting mixed payment methods and multi-branch environments.
Notes
Stripe supports all major credit and debit cards.
Refunds, chargebacks, and transaction reports can be viewed directly from your Stripe Dashboard.
Multi-currency support depends on your Stripe account configuration.
Only authorized finance or administrator roles can modify payment settings.
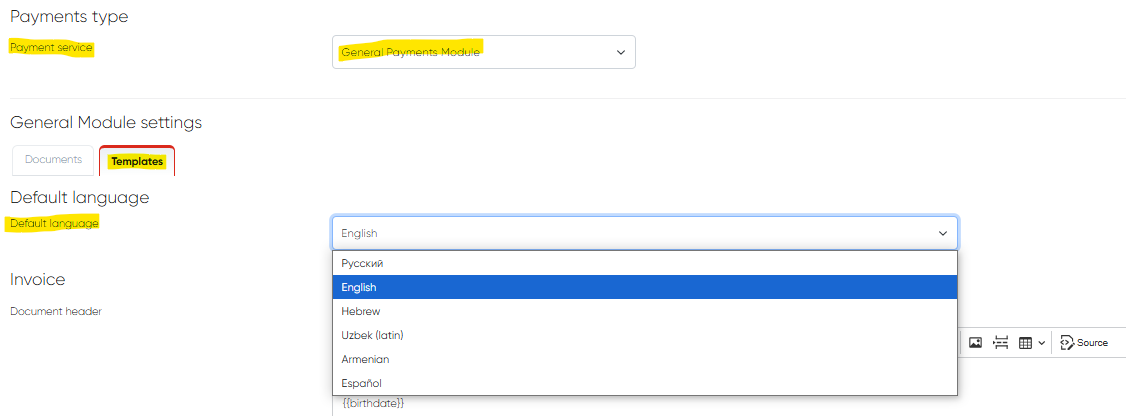
Default Language Setting for Receipts and Invoices (Cashier)
Navigation:Settings → Cashier Settings → General Module Settings / General Payment with Stripe → Templates Tab → Default Language
Overview
The Default Language setting defines which language is used by default when generating or printing receipts and invoices in the Cashier module.
This option ensures that financial documents are automatically produced in the correct language based on your clinic’s operational region, preferred client communication language, or compliance requirements.
This setting applies to both:
General Payment Module
General Payment with Stripe
Functionality
Administrators can now pre-select a default print language for all invoice and receipt templates.
Once configured, every newly generated document automatically uses the specified language, eliminating the need for manual language selection each time a document is printed.
If multilingual templates are configured, users can still manually change the document language at the time of printing — but the system will always start from the default defined here.
How to Configure
Navigate to Settings → Cashier Settings.
Open either:
General Module Settings, or
General Payment with Stripe, depending on which payment workflow you are configuring.
Go to the Templates Tab.
Locate the Default Language field.
Select the desired language from the dropdown list.
Click Save to apply your changes.
All future receipts and invoices will now be generated using the selected default language.
Benefits
Ensures consistency in printed financial documents.
Reduces manual setup for multilingual environments.
Improves client experience with correctly localized receipts and invoices.
Supports international clinics operating across multiple language regions.
Notes
The available languages depend on the templates installed in the system.
Manual language override remains possible at print time.
Changing the default language does not affect existing historical invoices — only newly generated ones.
Applies equally to both offline (Cashier) and online (Stripe) payment workflows.