
Branch Management
Branch Management – Administration Module
The Branch Management section allows you to configure and maintain a multi-branch clinic structure within the system. It enables administrators to create branch records, assign branch access for staff, link cabinets and schedules to specific branches, and filter operational data by branch throughout the system.
1. Branch Creation
Navigation:Directories > Branches > +Create record
Here you can create a new branch for your clinic.
To create a branch, fill in the following details:
Title: Name of the branch (e.g., “Downtown Clinic”, “North Branch”)
Company: Select the main clinic company from the list
Once the branch is created, it will appear in the Directories > Branches list.

Branch List Overview:
Displays all existing branches
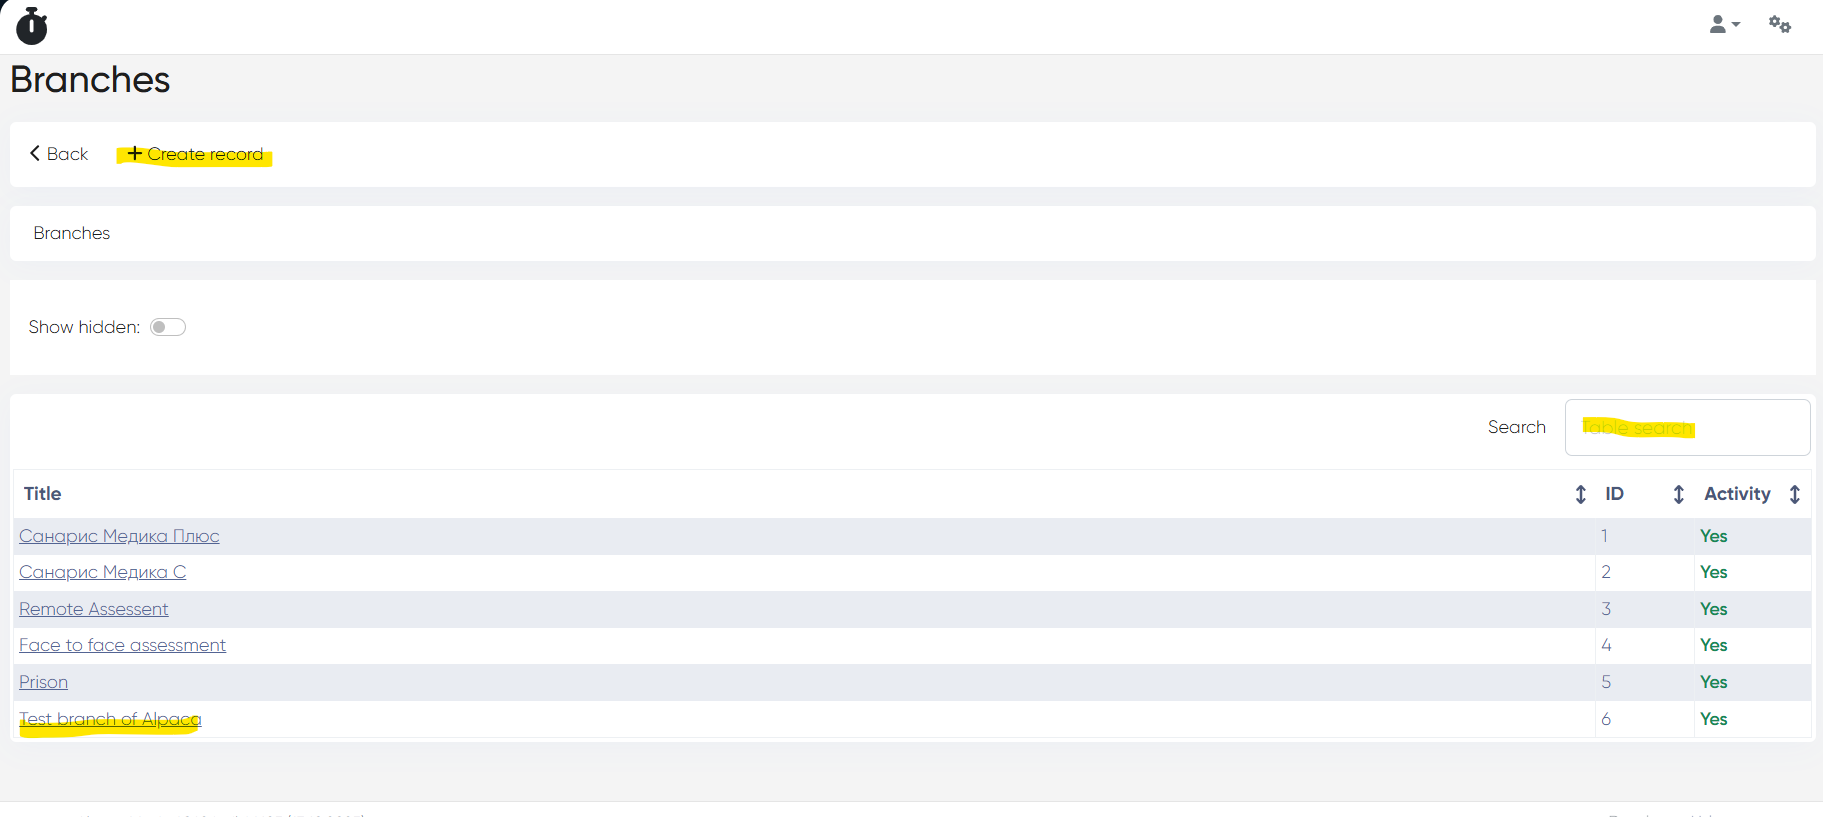
Each branch name is clickable and opens the Branch Card.
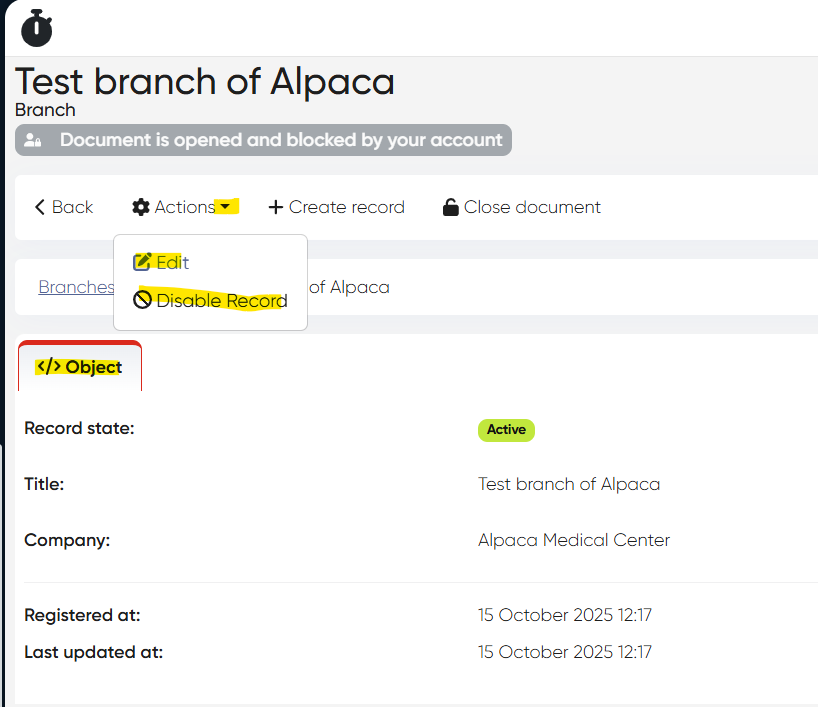
The Branch Card contains all the details entered during branch creation.
Use the Actions button to Edit or Disable the branch record when needed
2. Admin Access Management for Branches
Navigation:Settings > Administrators
The system supports granular access control for administrators across different branches.
You can apply a Branch Filter to view only administrators who have access to a specific branch.
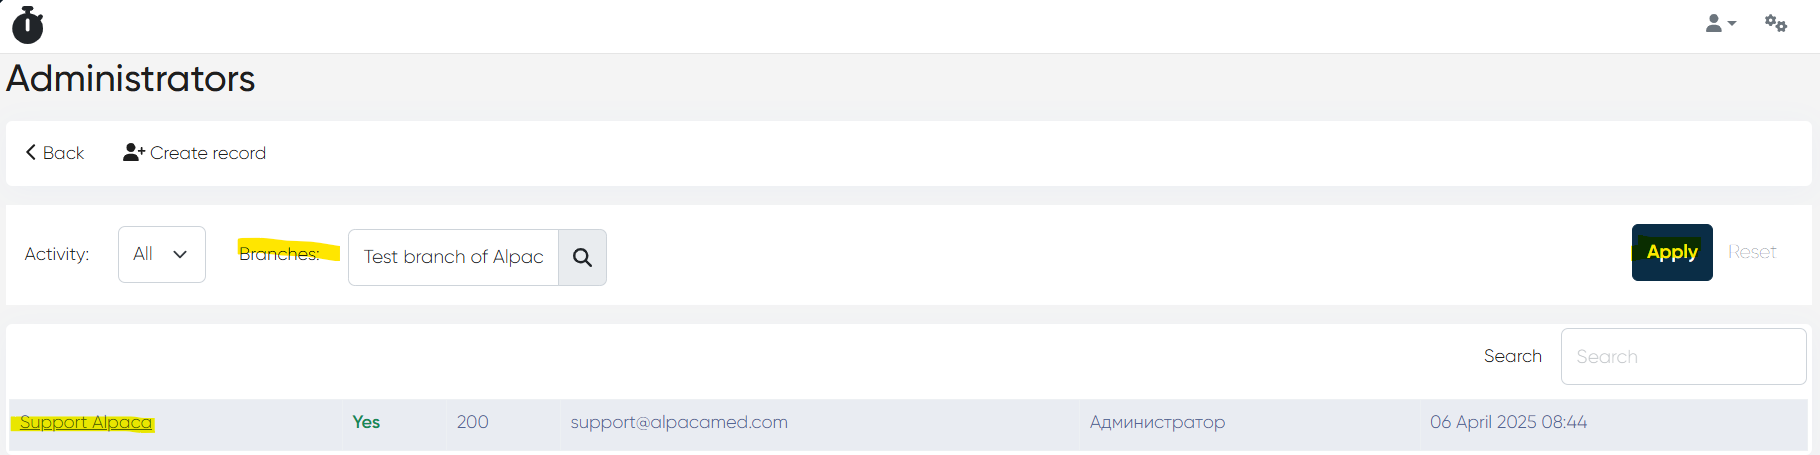
To grant or modify access for a particular administrator, click on the admin’s name in the list (searchable via the Search bar).
Inside the Branch Access tab, you can:
Select a Default Branch for the administrator.
Grant access to multiple branches by selecting them from the list
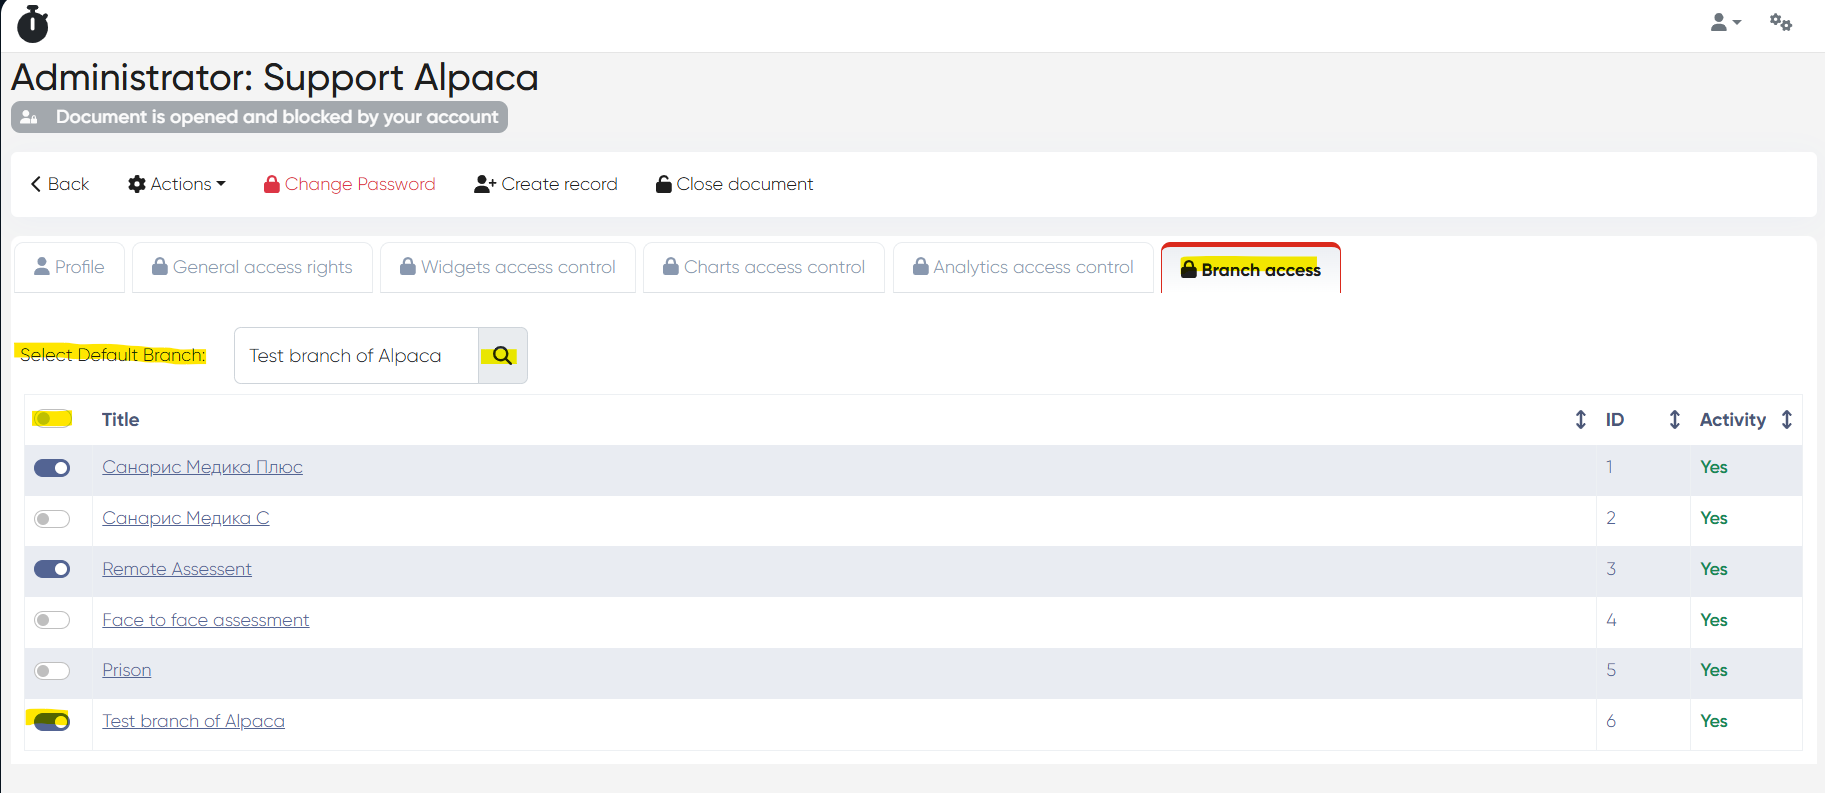
This setup ensures that each admin can access only the relevant branches in their operational scope.
3. Branch Settings for Cabinets
Cabinets can be linked to specific branches, allowing you to organize clinical spaces according to your branch structure.
You can assign a cabinet to a branch in two ways:
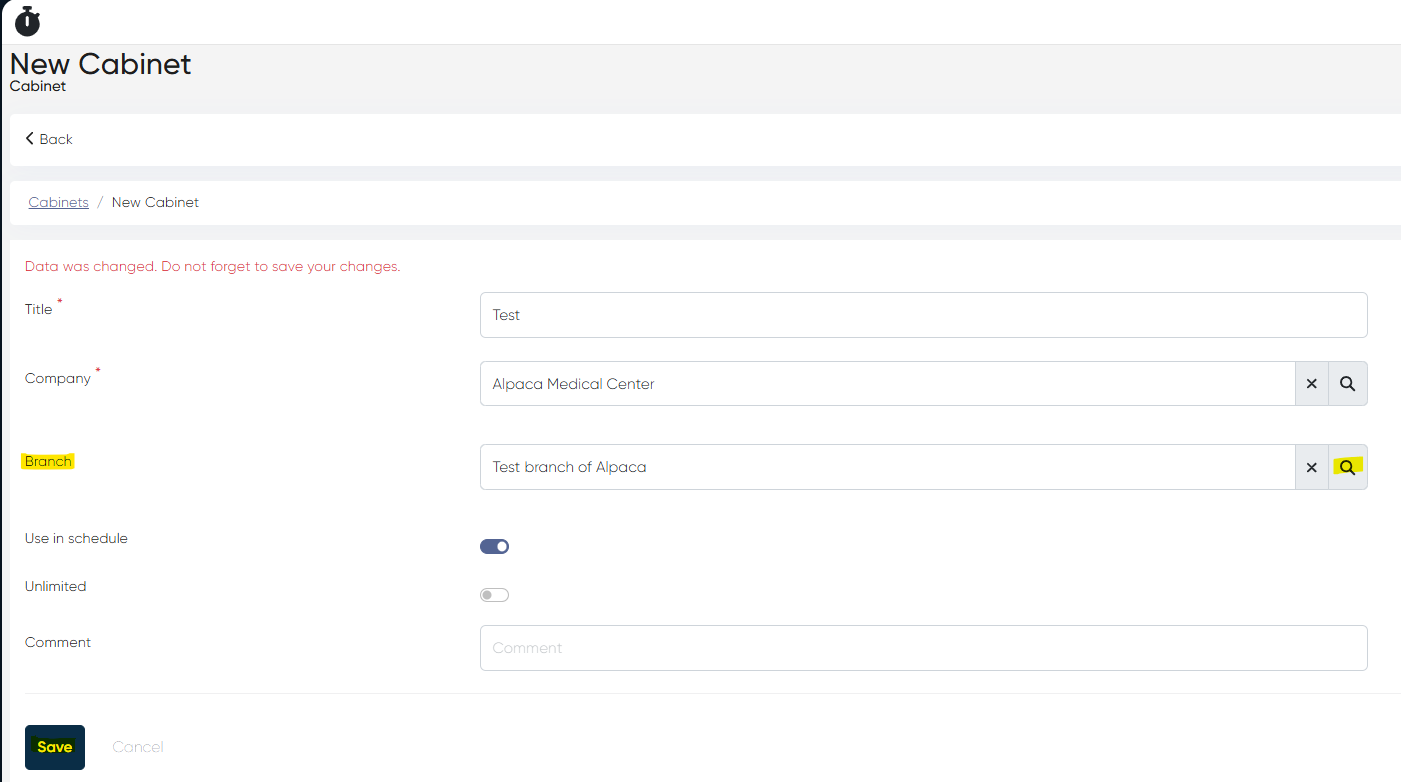
a) During Cabinet Creation
Navigation:Directories > Cabinets > +Create record
When creating a new cabinet, select the Branch from the dropdown list along with other cabinet parameters.
b) Editing Existing Cabinets
Navigation:Directories > Cabinets > Select cabinet > Actions > Edit
For existing cabinets, open the Cabinet Card and choose the required branch from the list in the Branch field.
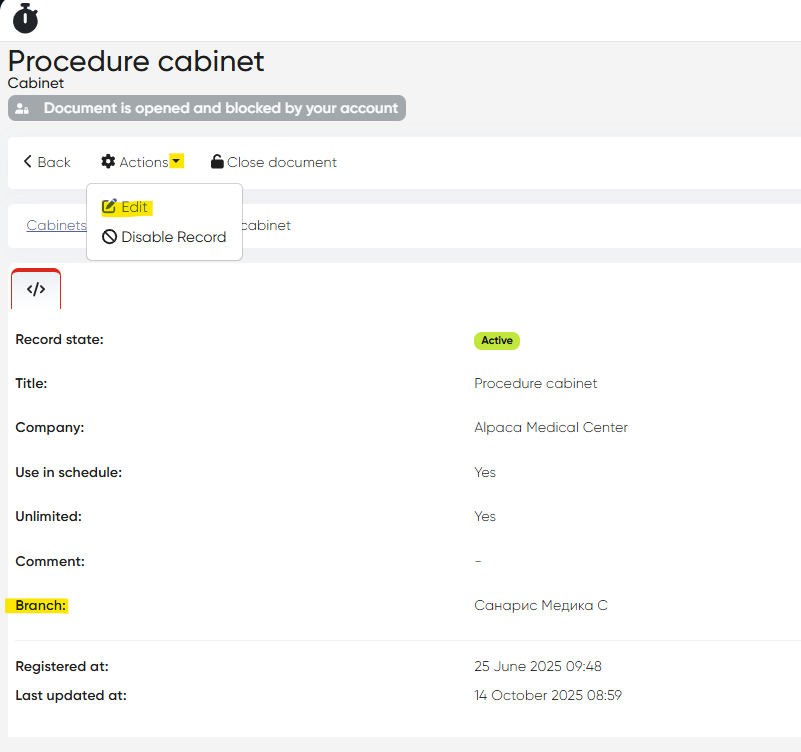
This ensures each cabinet is properly associated with the correct branch.
4. Filters by Branch in System Sections
Once the branch structure is active, the system allows you to filter data and operations by branch across multiple sections.
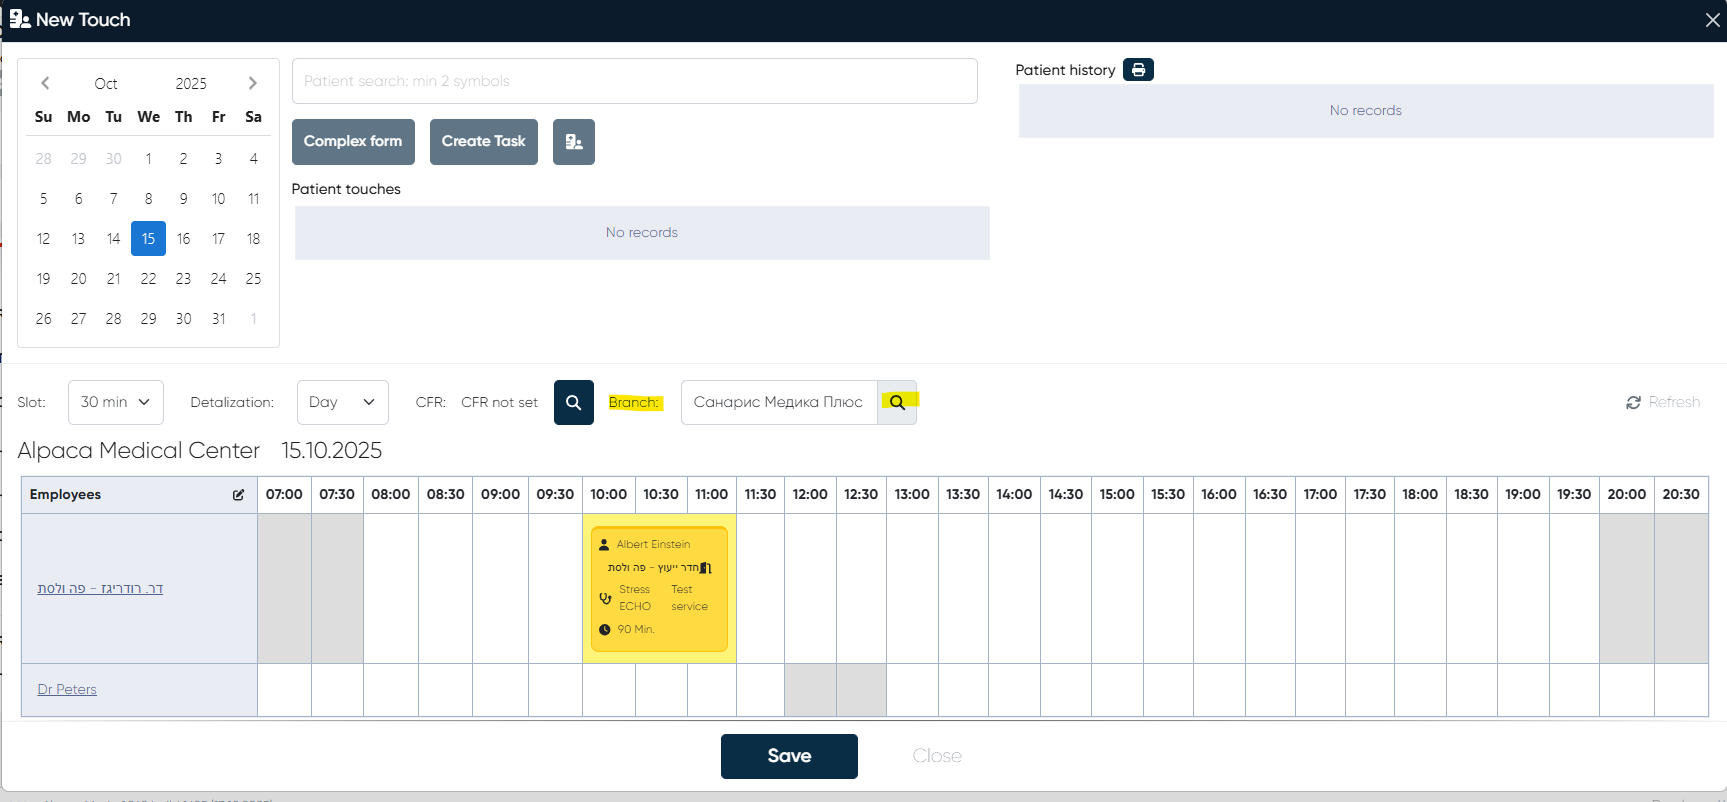
a) New Touch
Use the branch selector to view only the schedule and available slots for the selected branch when creating a new appointment.
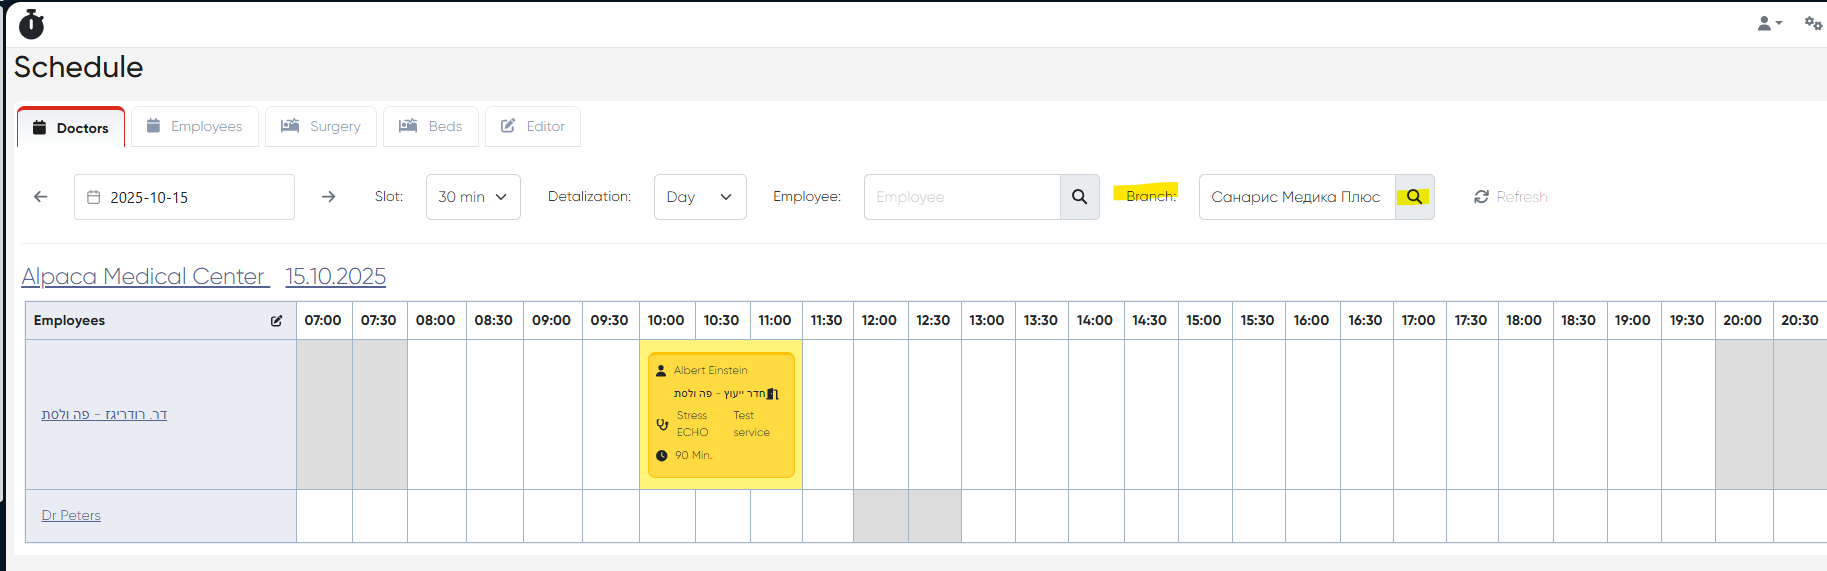
b) Schedule
Apply the branch filter to display only the schedule related to the chosen branch.
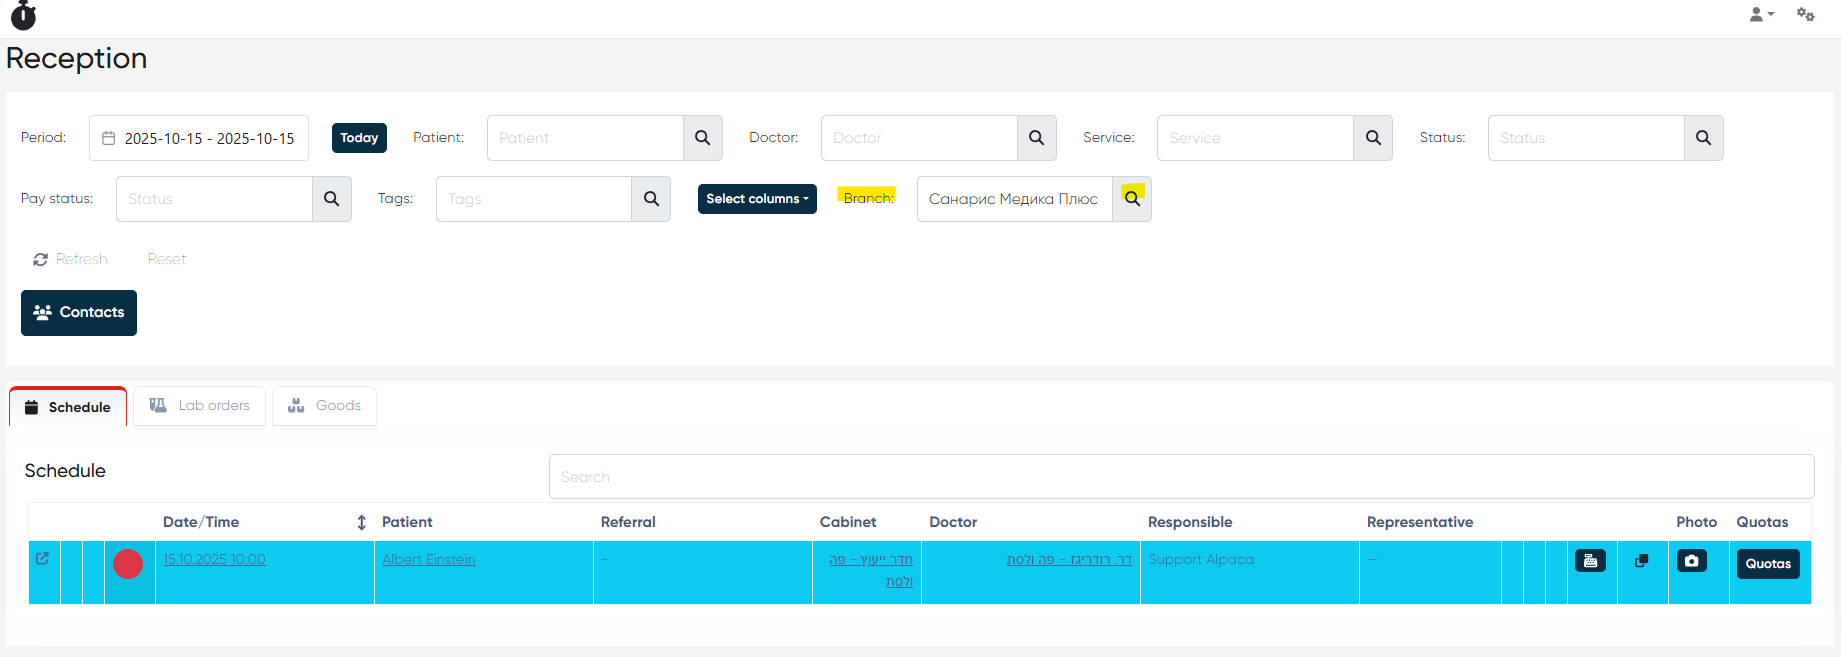
c) Reception
In the Reception module, you can filter appointments by branch to view only those belonging to the selected location.
This filtering functionality ensures streamlined management for clinics with multiple locations, minimizing scheduling errors and improving visibility.
5. Enabling or Disabling the Branch Structure
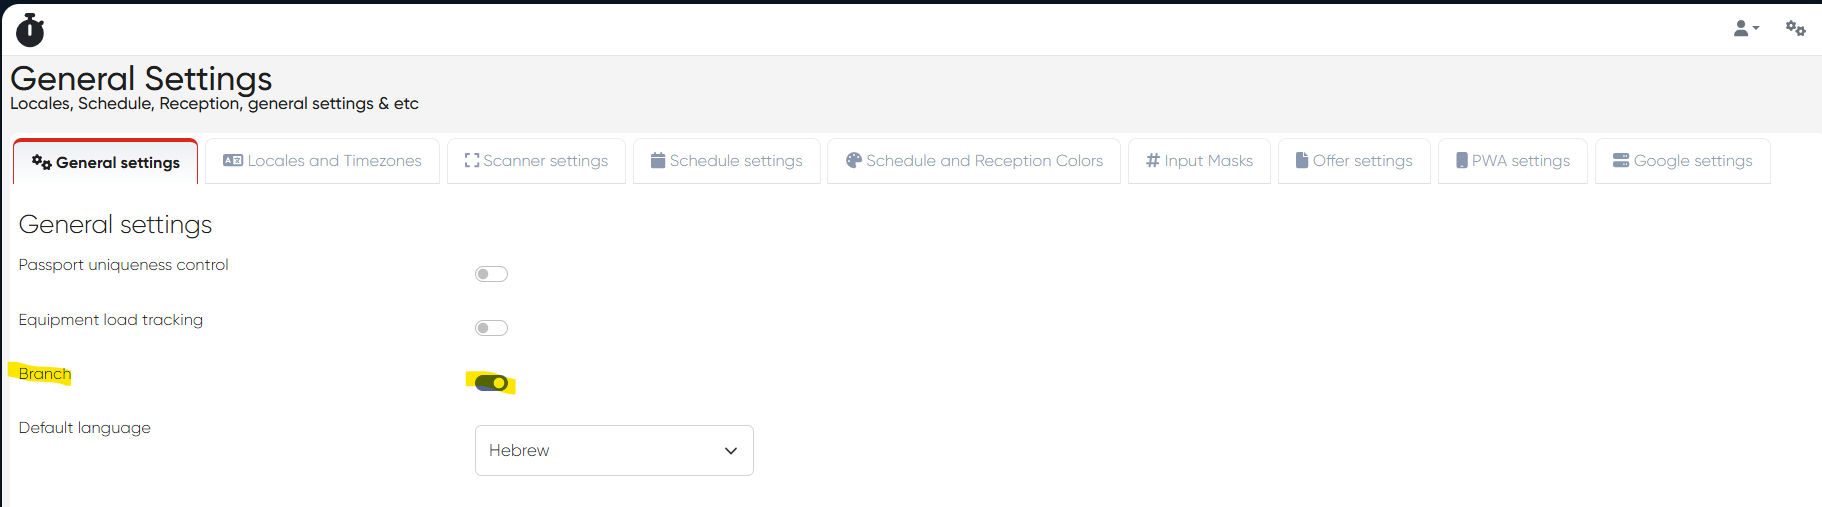
Navigation:Settings > General settings > Branch
Here you can toggle the Branch Structure of the system:
If enabled (ON):
The system operates in multi-branch mode, displaying branch filters, branch-specific cabinets, and branch-based segmentation throughout the modules.If disabled (OFF):
The system operates in single-branch mode, hiding branch-specific filters and showing a unified management view without branch segmentation.
Summary
The Branch Management functionality provides a flexible and scalable way to manage multi-location clinic operations. By structuring branches, assigning access, and linking cabinets and schedules, clinics can maintain organized workflows, improve data accuracy, and ensure clear separation between departments and physical locations.