Automated tasks
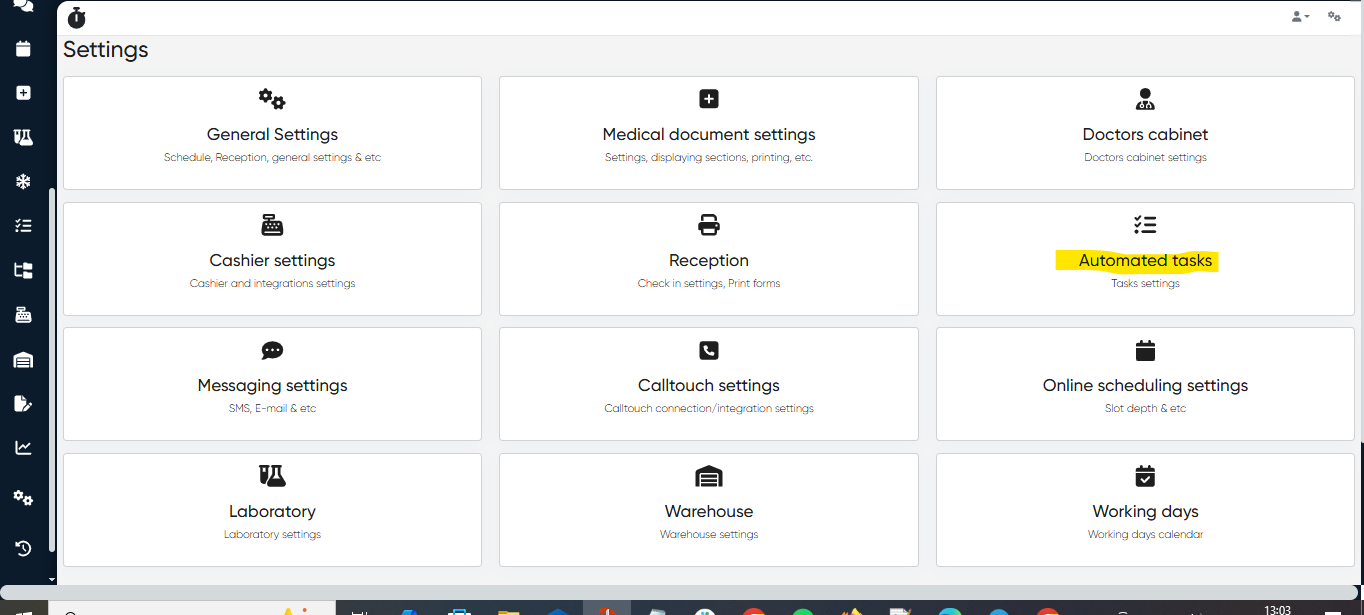
Navigation: Main menu> Settings> Automated tasks
Description
The Automated Tasks section in the CRM module enables the clinic management system to generate and manage predefined tasks based on specific triggers or events in the patient journey. These tasks help ensure consistent communication, timely follow-up, and proper document handling without relying on manual tracking.
Automated tasks are categorized into three main types: Touch, Appointment, and Medical Document.
Touch Tasks
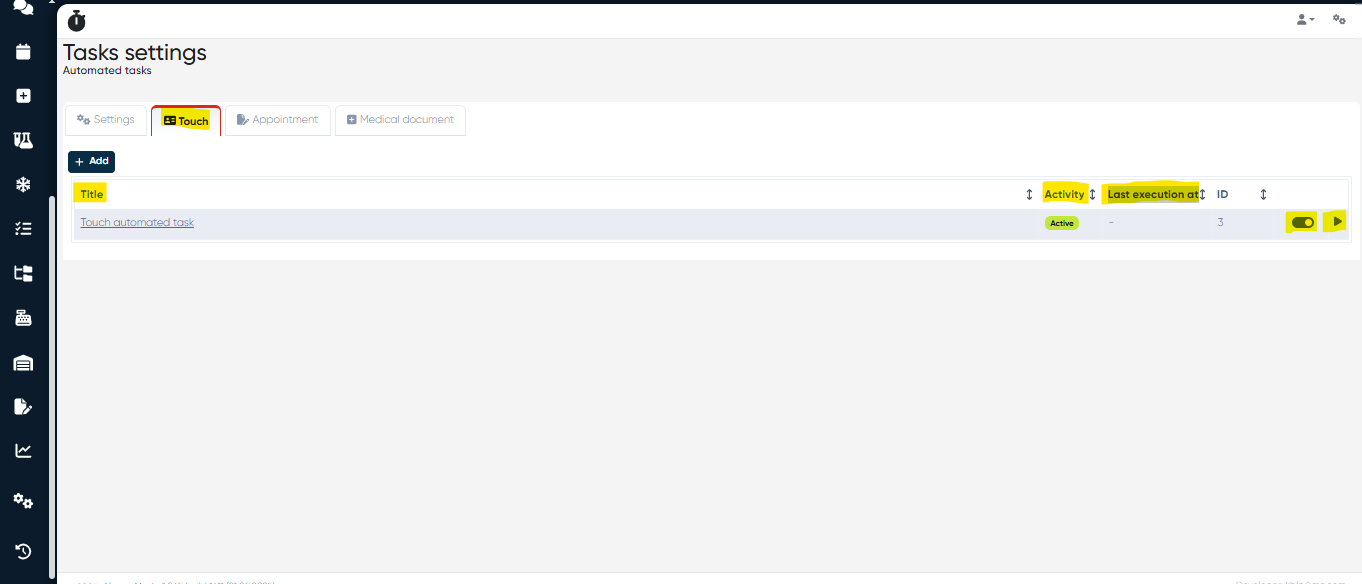
Navigation: Main menu> Settings> Automated tasks>Touch
Purpose:
Maintain ongoing engagement and communication with patients and partners.
Description:
In this section, you can view and run already created automated touch tasks or add a new one by clicking the +Add button.
You can view the task title for already created automated touch tasks, check if they’re now Active or Inactive via the Activity column, and see when they were executed last time (Last execution at column). Also, you can make it Active/Inactive by clicking ![]() , and immediately run it by clicking
, and immediately run it by clicking ![]() .
.
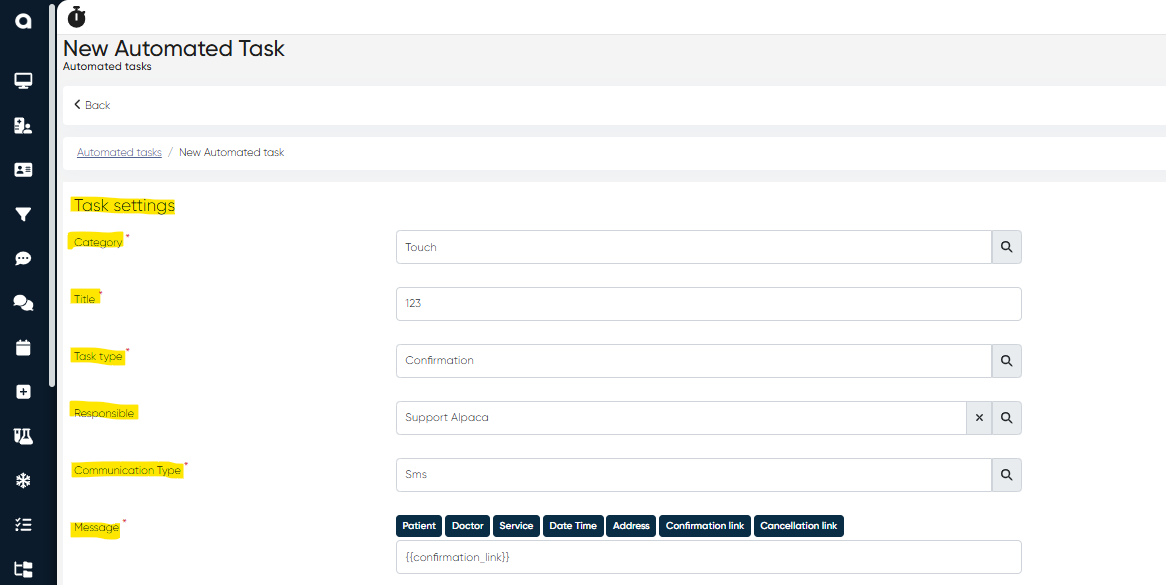
If you want to create a new automated touch task after clicking +Add button you need to set task parameters such as:
Category (Touch should be selected here)
Title
Task type (e.g., confirmation with client, follow-up about rescheduling or cancellation)
Responsible (select the responsible person from your employee list)
Communication type (e.g., SMS, WhatsApp, etc.)
Message (here you can set the standard message for the task and attach all necessary links if needed)
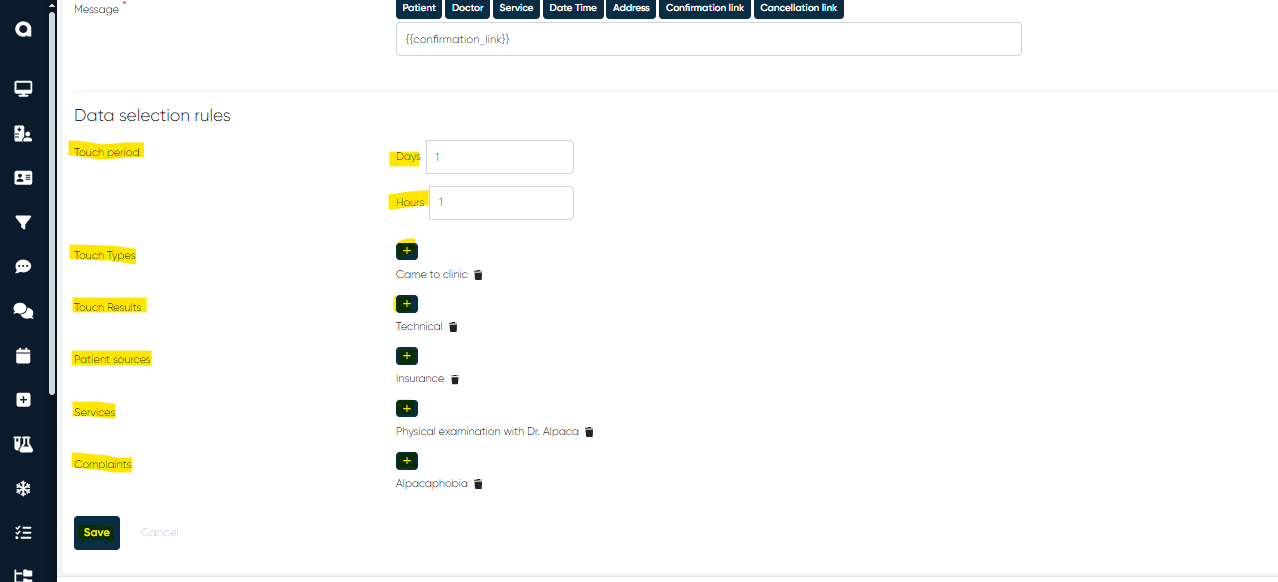
Touch period in days/hours
Touch types (can be multiple and selected from the list by clicking + button; it can be Came to clinic, outgoing call, etc.)
Patient sources (can be multiple and selected from the list by clicking + button; it can be, for example, the list of patients from the insurance company)
Services (can be multiple and selected from the list by clicking + button; it can be, for example, all needed examinations, procedures, lab tests)
Complaints (can be multiple and selected from the list by clicking + button)
After adding all the necessary information for the new automated task, click the Save button to create the task.
Appointment Tasks
Purpose:
Ensure all appointment steps are followed through before and after scheduled visits.
Navigation: Main menu> Settings> Automated tasks>Appointment
Description:
In this section, you can view and run already created automated touch tasks or add a new one by clicking the +Add button.
You can view the task title for already created automated appointment tasks, check if they’re now Active or Inactive via the Activity column, and see when they were executed last time (Last execution at column). Also, you can make it Active/Inactive by clicking ![]() , and immediately run it by clicking
, and immediately run it by clicking ![]() .
.
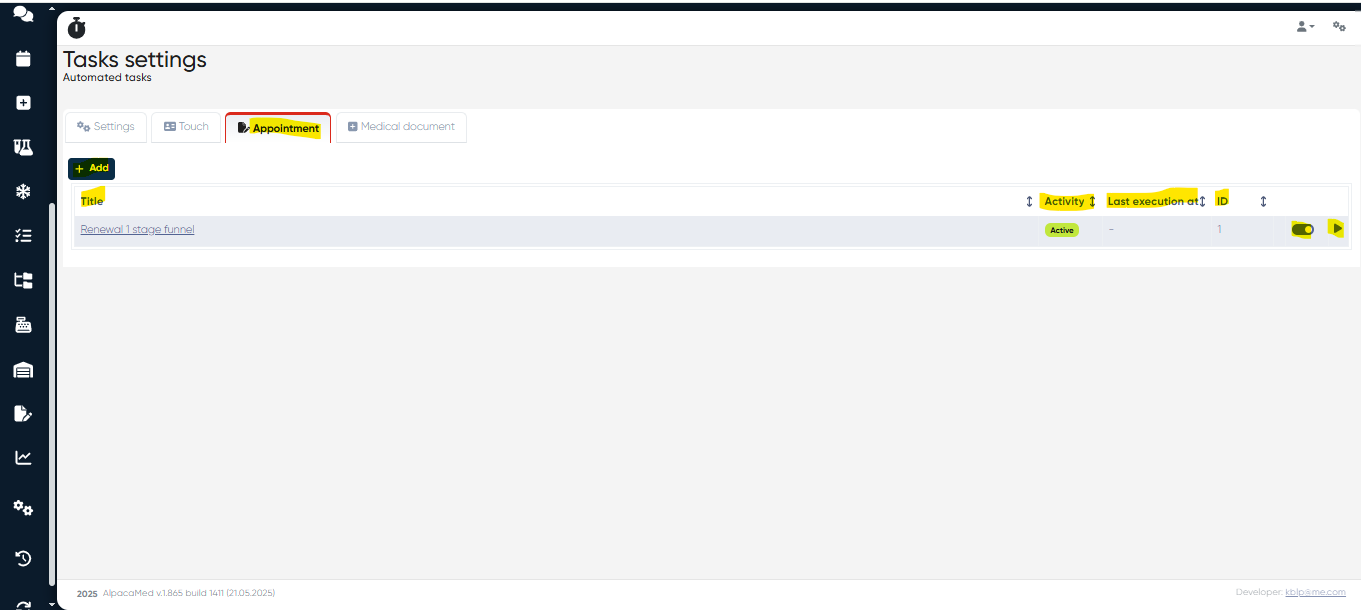
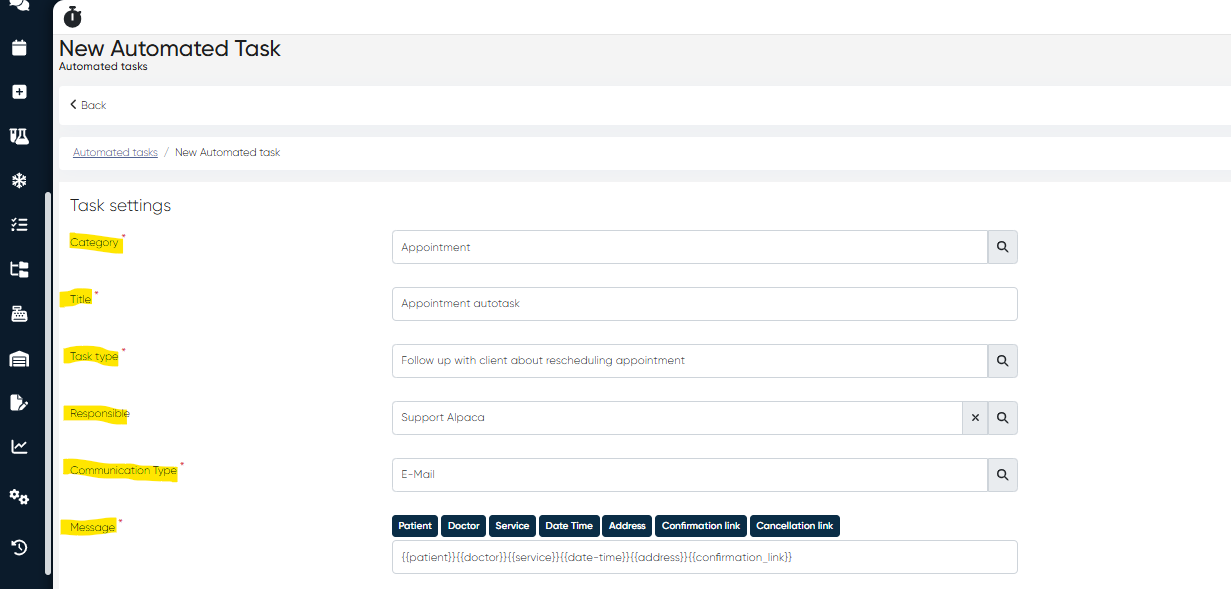
If you want to create a new automated appointment task after clicking +Add button, you need to set task parameters such as:
Category (Appointment should be selected here)
Title
Task type (e.g., confirmation with client, follow-up about rescheduling or cancellation)
Responsible (select the responsible person from your employee list)
Communication type (e.g., SMS, WhatsApp, etc.)
Message (here you can set the standard message for the task and attach all necessary links if needed, date and time of appointment, etc.)
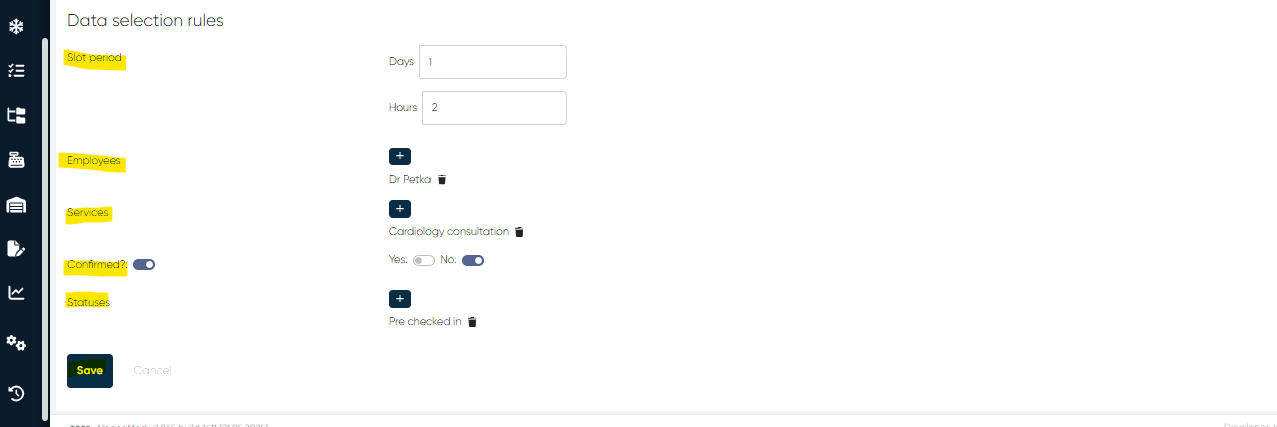
Slot period in days/hours
Employees (can be multiple and selected from the list by clicking + button; it can be, for example, the list of doctors from your Medical Center)
Confirmed? (Here you can select if the appointment is confirmed or not)
Statuses (can be multiple and selected from the list by clicking + button; here you can, for example, mark if the preflight check-in was done)
After adding all the necessary information for the new automated task, click the Save button to create the task.
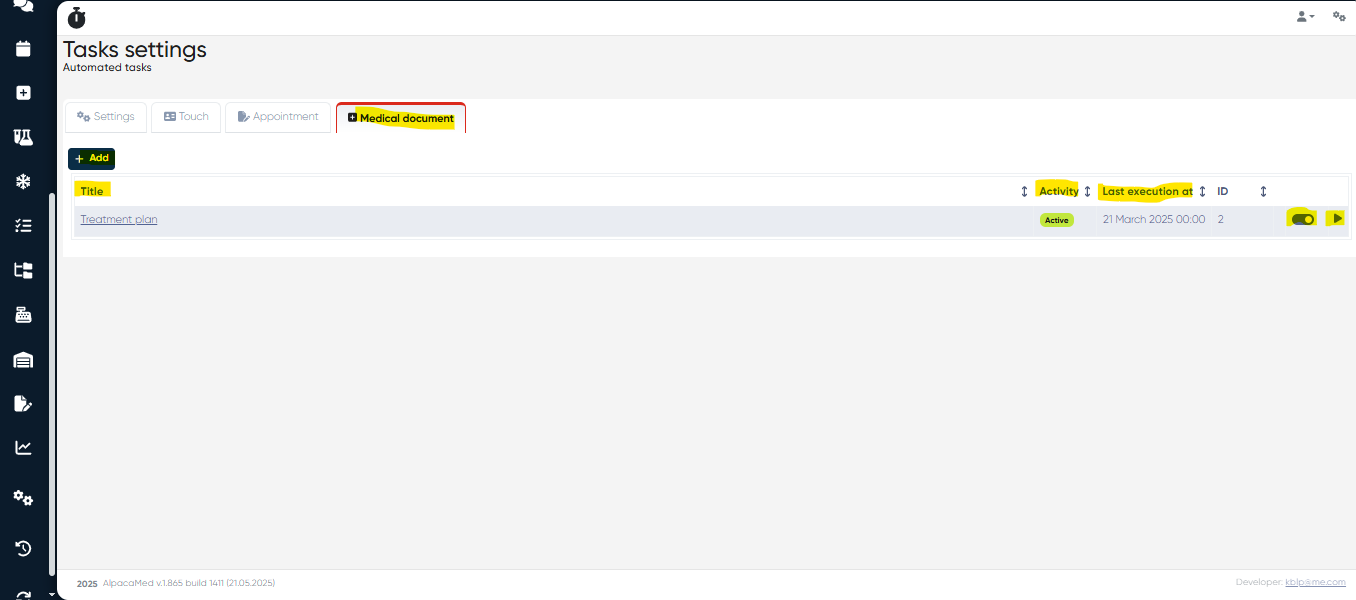
Medical Document Tasks
Purpose:
Track and manage the flow of critical medical documents and ensure proper documentation is obtained and processed.
Navigation: Main menu> Settings> Automated tasks>Medical document
Description:
In this section, you can view and run already created automated medical document tasks or add a new one by clicking the +Add button.
You can view the task title for already created automated medical document tasks, check if they’re now Active or Inactive via the Activity column, and see when they were executed last time (Last execution at column). Also, you can make it Active/Inactive by clicking ![]() , and immediately run it by clicking
, and immediately run it by clicking ![]() .
.
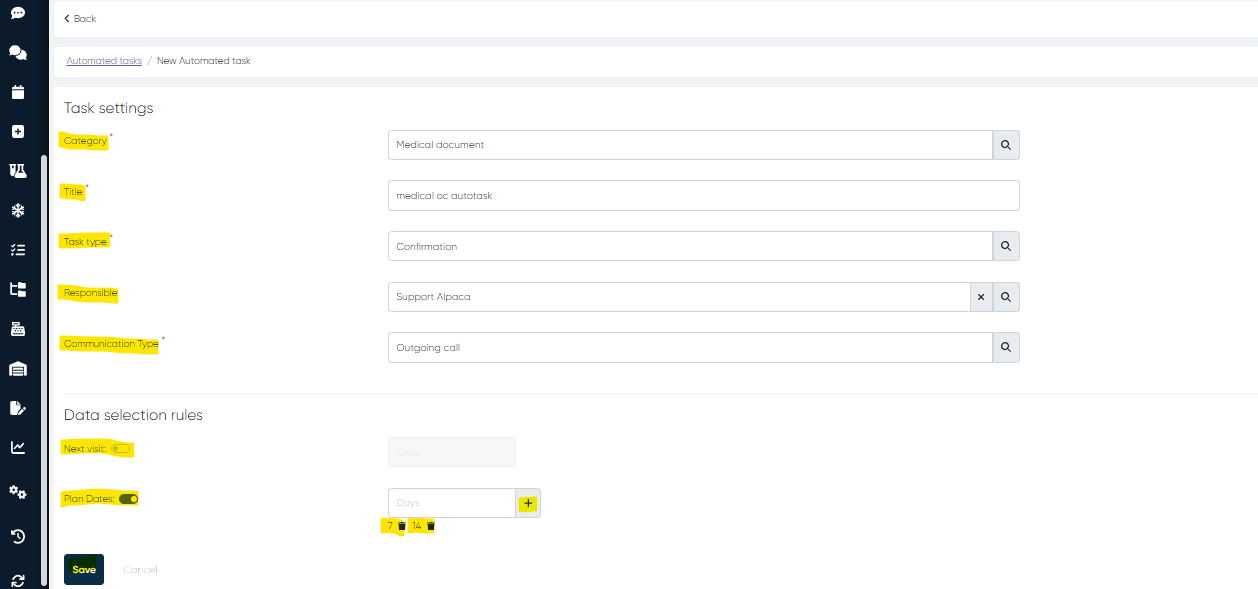
If you want to create a new automated medical document task after clicking +Add button, you need to set task parameters such as:
Category (Appointment should be selected here)
Title
Task type (e.g., confirmation with client, follow-up about rescheduling or cancellation)
Responsible (select the responsible person from your employee list)
Communication type (e.g., SMS, WhatsApp, Outgoing call, etc.)
Next visit time in days or multiple Plan dates
After adding all the necessary information for the new automated task, click the Save button to create the task.
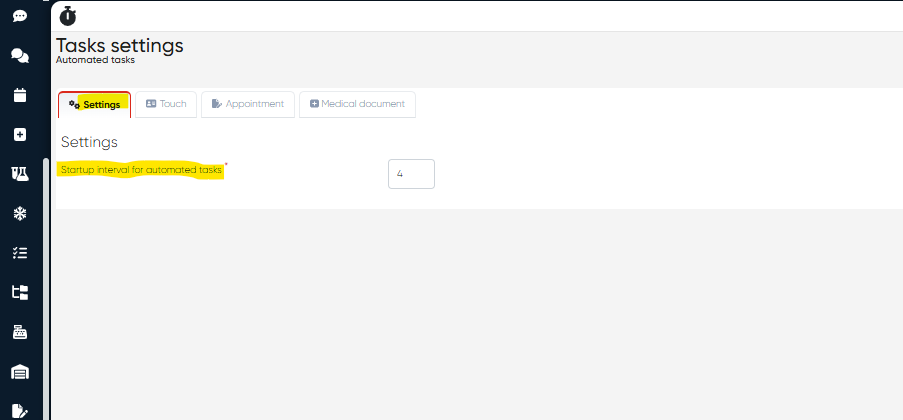
Additional automated tasks settings
Startup interval for automated tasks:
You can set the startup interval for all your automated tasks in days. You can do it via the Settings section of Automated tasks settings.